When it comes to ways to reduce energy consumption there are many changes that you can make to your own home that have additional benefits for you. Note that reducing electricity consumption is just one of the ways for fighting climate change. Now a days light bulbs with various types of sensors can provide energy savings, for example, a motion sensing light bulb can protect against absentmindedness, in terms of switching lights off in low-traffic rooms and/or outdoor areas. The obvious advantage of a motion sensor light bulb with an integrated a photo sensor (light sensor) is that it will turn on when someone or something is nearby but only at night, or when there is insufficient natural light.
PIR Motion Detector LED Light Bulb
Passive Infrared (PIR) motion sensor based LED light bulbs hardly need an introduction as you find such gizmos everywhere.
Technically, a PIR motion sensing LED light bulb comprises a PIR motion sensor, an LED plate, and a power supply. Below you can see the key parts of a Chinese AC230V PIR motion sensing LED light bulb.
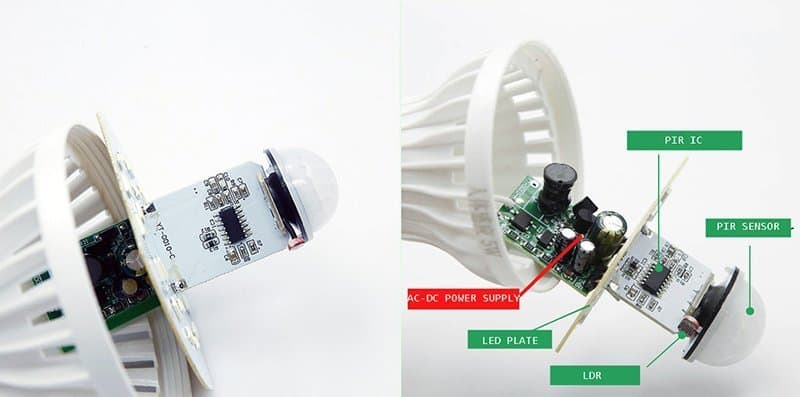
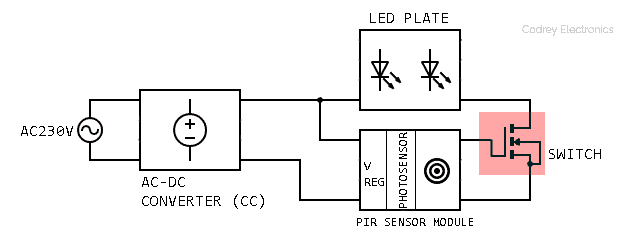
The key to getting more about the inside electronics is to refer the following basic block diagram of the PIR motion-activated LED light bulb (as a reference). It’s simple, straight forward, and self-explanatory!
Motion-activated light bulbs are becoming more commonplace, not only in homes but in other similar places. As mentioned before, motion-sensing technology reduces electricity consumption by eliminating the possibility that the light bulbs will accidentally be left on. Besides, motion-sensing technology is vastly improved, meaning that there is less of a chance the light bulbs will malfunction and reduce the benefit of using them.
The Radar LED Light Bulb
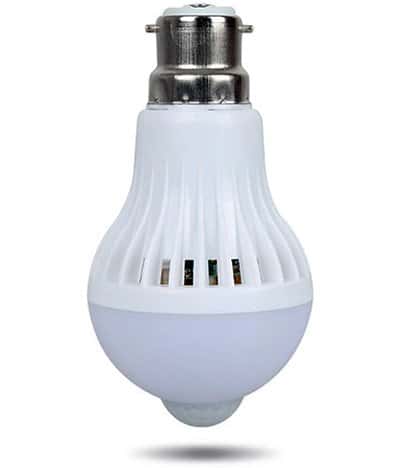
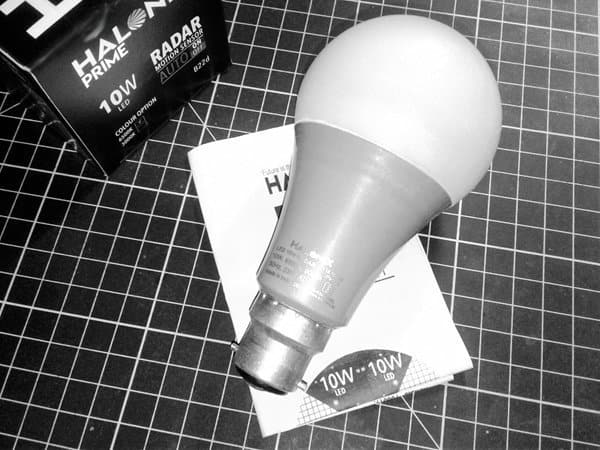
Anyway, more recent trend is towards “Radar” LED light bulbs! The radar LED light bulb is nothing but an AC230V LED light bulb which claims to employ radar to detect motion. What is interesting about this LED bulb is that it does indeed seem to detect motion but there’s no extruded sensors – simply looks like an ordinary LED bulb. This is the photograph of a “Made For India” 10W Radar LED Bulb I bought from Amazon. The brand name is Halonix!
At first, note that I am not affiliated with Amazon or the companies/sellers making/selling these LED bulbs. Okay, here is what you should know about the radar magic trick in general.
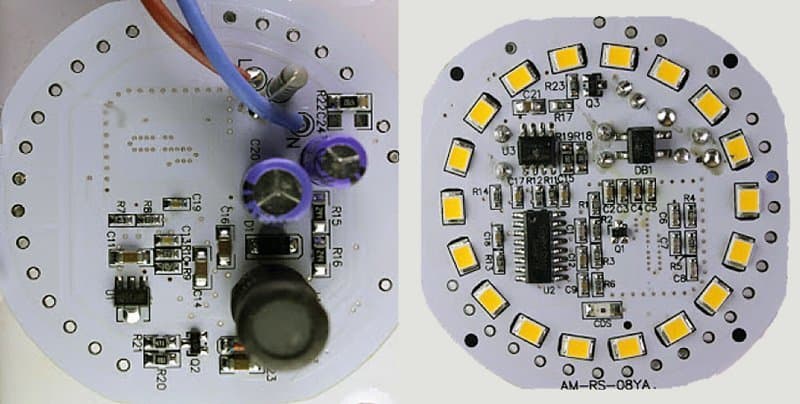
Basically, structure of the radar bulb is very similar to the passive infrared sensor bulb except that a tricky ‘Doppler Radar’ microwave motion sensor module is being used in the radar bulb for motion/occupancy detection. Below you can see the key parts of a typical radar LED light bulb – another wondrous example of Chinese electronics!
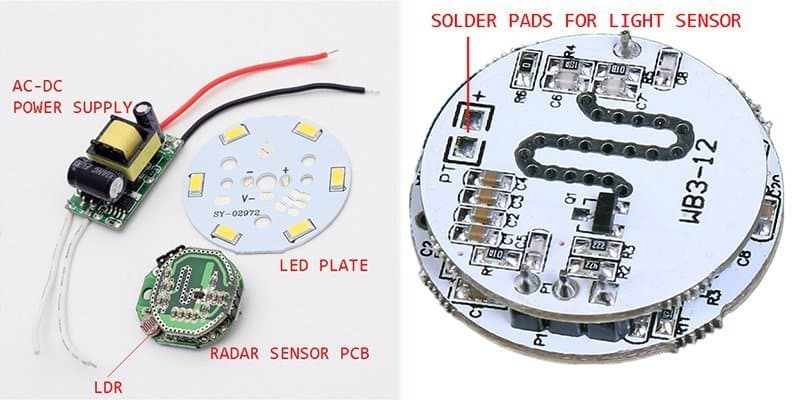
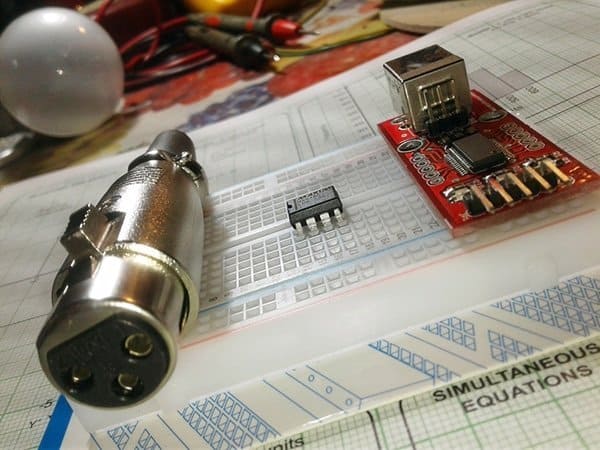
In some models, the radar sensor is a separate PCB mounted at the top of the main PCB which’s often referred as the LED plate. Ofcourse, there’re single PCB versions as well, and you can find a photograph below (thanks to my usb microscope). What’s curious is that the radar circuitry seems so simple, but there’s certainly a magic-level masterminding on the go here!
Oh, wait – want to get an overview of it all in a quick note? Ask no more, here ya go – the brief sidebar!
So then…what about the radar electronics? Well, this is a good time to discuss something just about the Doppler Radar microwave motion sensor modules. You may find some little projects on Doppler Radar microwave motion sensor modules elsewhere in this website, so make sure you check it out at first.
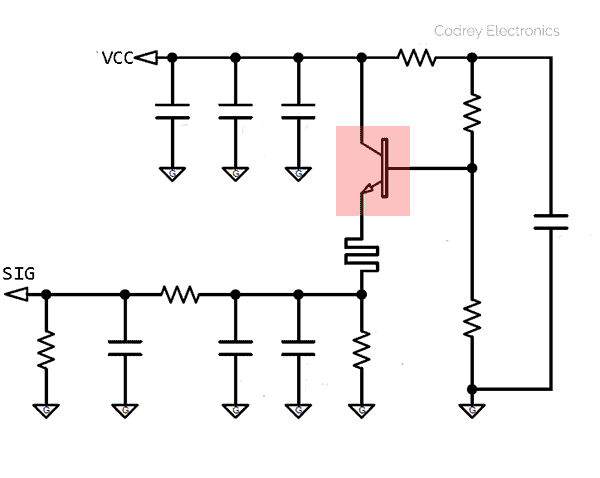
In principle, there’re two crucial parts to this radar circuitry – a transistor-based microwave frequency transmitter/receiver/mixer (operating in GHz scale), and an IC – based low frequency signal handler. At the core of the RF part is a high-frequency NPN transistor perhaps wired in Colpitts oscillator configuration. The vital function of a Doppler radar is to be able to mix the reflected signal with the transmitted signal to get in at a frequency which is the difference between the transmitted and reflected signal. In this circuitry it seems that the aforesaid RF transistor cleverly assumes the function of the mixer, too. Thereafter, the low Doppler frequency difference is extracted by an RC filter, the signal is then processed by the controller IC, and finally delivered a logic-level on/off signal (this really needs to be verified furthermore).
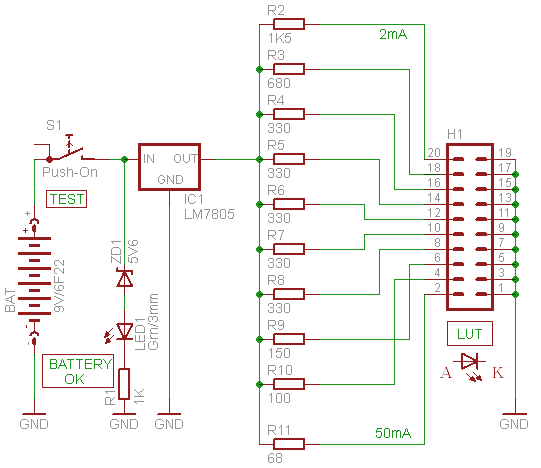
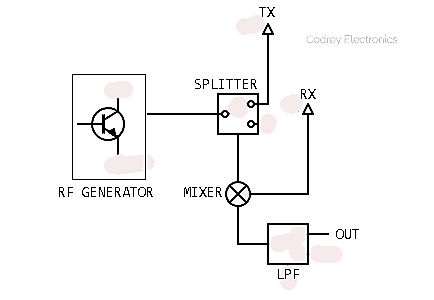
When it comes to the very basis of a radar, a radio-frequency (RF) signal is generated first, and then multiplied by the reflected signal. The resultant cos(x-y) is really a low-frequency signal which determines the speed of the target. See the typical radar block diagram.
At this point, you’re basically done in terms of basic theory. So let me share a bit more about the radar bulb I got from Amazon. This is the partial inside view of my radar bulb (the power supply circuitry is mounted underneath – a common practice).
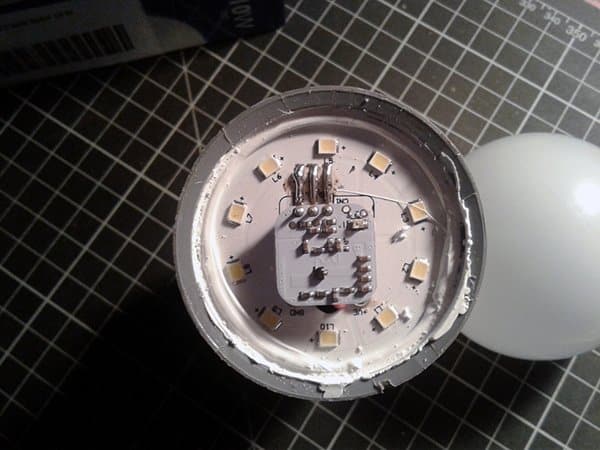
Over again, this radar bulb has three parts viz. the AC/DC constant current power supply, the white LED plate, and the radar sensor module.
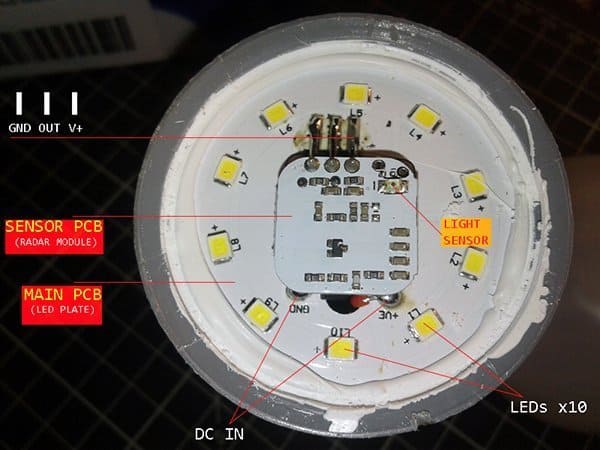
I don’t want to make an attempt on a serious teardown right away, however, it’s observed by me that the DC input (DC IN) to the LED plate (coming from the ac/dc power supply unit) is around 113VDC in standby state, which falls to just about 88VDC in active state. The V+ pin of the radar module gets about 12VDC (actually 12.9V) supply while its output pin delivers 5V (actually 4.8V) in active state. This logic-level output is used to switch on the LEDs incase of a valid motion detection. Further, we can see a light sensor (photo transistor) soldered directly on the radar sensor module.
Usually, in almost all Chinese Doppler Radar sensor modules, if look attentively, we can see the key inductor and capacitor components formed by PCB traces, where the inductor is normally on the top layer and capacitor(s) are on the bottom layer of the PCB.

Unfortunately I can’t find any trusty information on this particular Chinese design, but the great description of how the microwave part of this clever design thought works is in patent (https://patents.google.com/patent/EP3091605A1/en).
As mentioned earlier the radar bulb I have was supplied by Amazon. Yes, it’s a radar LED bulb. But no, it’s not the one really made in India. The funny thing I noticed is the description “Made for India”. The Indian maker took the blame for it – it’s a mere assembly of just a couple of cheap pre-wired electronics bricks shipped from China. Anyway, people actually like it and find a value in it. Also it worked well in my lab, and on the radar bulb itself, the LEDs will stay solid lit up to 50-60 seconds after a motion detection if the ambient light level is less than 50lux. According to the maker, the detection range is 15 feet at 3600 angle. I’ll have to take their word for that, but some real-world tests certainly indicates it can very easily ‘see’ a few more feet.
Obviously, people will have different needs for automatic lights and the lumens associated with them. But for most users out there, this will probably fit the bill quite well – and at a cost not terribly much higher than you’d spend for other luxury gizmos. Said differently, the radar bulb might be more of an inconvenience than a money saver – especially in bathrooms where it might not detect that someone is still there and turn out unexpectedly.
Do It Yourself
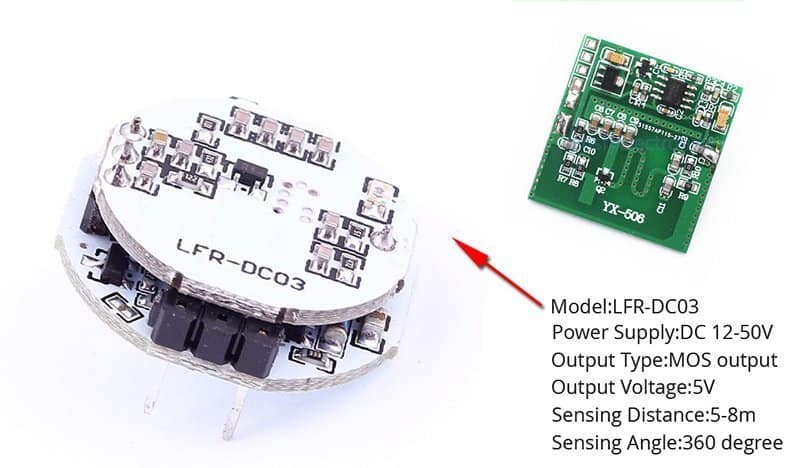
If you would like to make your own radar bulbs, now you can work on it quickly and easily. Simply go into any Chinese online electronics store and grab Doppler Radar LED Light Bulb kits for cheap. The most popular Doppler radar module (tailored for LED bulbs) so far is the LFR-DC03 (https://www.aliexpress.com/item/32735352367.html). According to seller’s note, this one is a 24GHz Radar Sensor. Another one is the YX-506 module.
Sometimes taking the time to read a review/teardown article provides you with many more ideas and directions you can go with things. Thanks for reading! And as always, feel free to post comments or questions in the comments section below, I’ll be happy to try and answer them as quickly as possible.