The Chirping Cricket presented here creates electronic cricket chirping sounds that can be used for recreational purposes or to simulate warm summer nights.
It is actually a continuation of a previously published similar do-it-yourself fun project Tiny Chirp, but quite different in some respects.
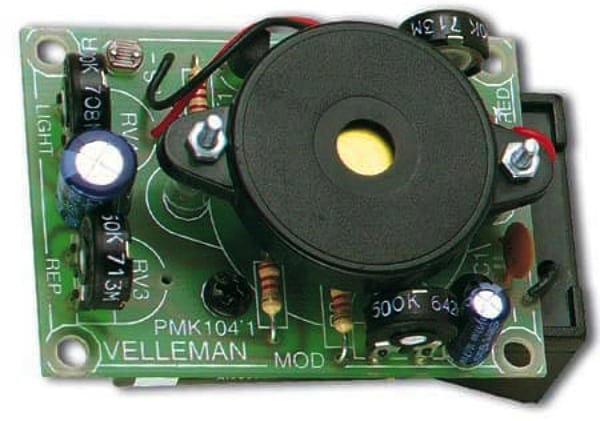
You can still buy relatively cheap CKD (complete knock-down) and/or SKD (semi-knock-down) electronics hobby kits to make similar gizmos (see a prewired electronic chirping cricket kit below) but what is the real fun in that? So, let us try over again to build our own electronic chirping cricket with a few parts lying around…
Building an electronic chirping cricket circuit using discrete analog electronics components is really fun, but can be overwhelming for many STEM kids. Hence, an Arduino microcontroller is the choice here as it offers greater ease and at the same time opens doors for further extensions in the future.
That being said, the current project is centered around an Arduino Nano microcontroller, but it will happily work with an Arduino Uno (or a compatible microcontroller) as well.
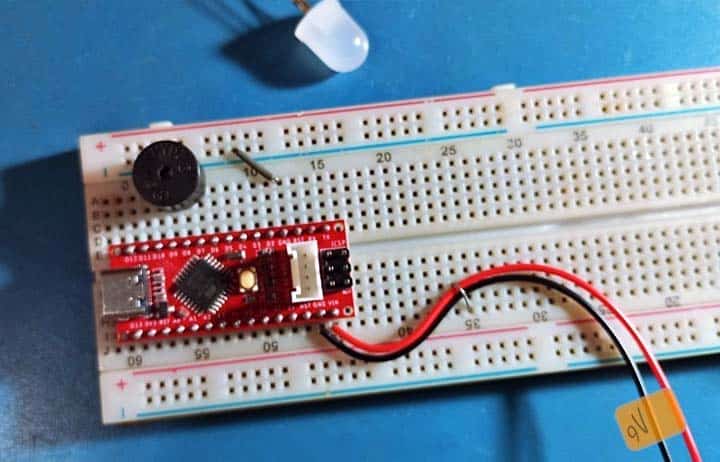
So, here is the Arduino Nano hardware setup diagram:
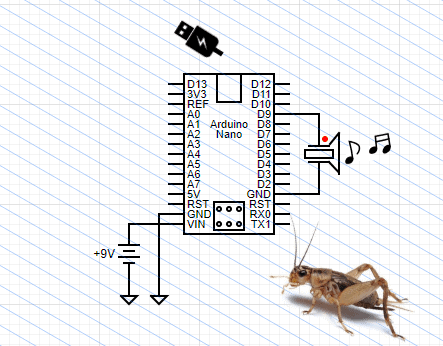
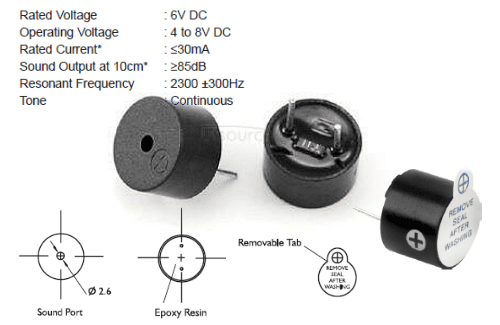
As can be seen in the schematic, the only additional component needed to complete the build is a 5VDC Active Buzzer (see below). Like almost all Arduino Nano/Uno projects, this setup can be powered by a 6F22 9V battery or a standard 5V USB power supply.
Now copy-paste the minimal (adapted) code provided below and upload it to test it out.
int sounder = 9; //Active Buzzer Pin D9
int chirpTone = 5; //See Note 1
int chirpDelay = 20; //See Note 2
void setup() {
pinMode(sounder, OUTPUT);
}
void loop() { //See Note 3
chrip(5);
delay(300);
}
void chrip(int chirps) {
for(int i = 0; i < chirps; i++) {
tone(sounder, chirpTone * 1000, 30);
delay(chirpDelay);
tone(sounder, chirpTone * 10000, 10);
delay(chirpDelay);
}
}
Note 1: At the moment, the chirp tone is set to 5 but you can play around with different numbers by increasing or decreasing it to find out which one is most favorable for your ears.
Note 2: Take a look at the chirp delay value which handles the me interval in between each chirp. So, playing around with this value gives entirely different outcomes – just lower it to 10 or raise it to 30 and listen to the new chirpiness.
As an aside, crickets are mainly nocturnal leaping insects known for their loud, coherent, chirping song of males trying to attract females. The male makes chirping noises by rubbing the forewings together.
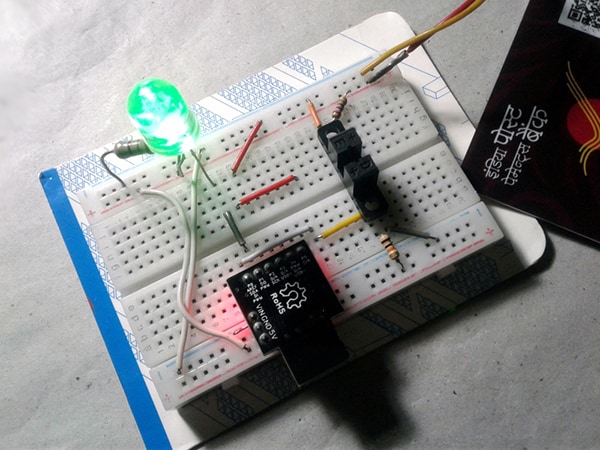
Note 3: Like in a lot of STEM projects we have covered, you can modify both the hardware and software of this demo project to bring colors to your very own electronic chirping cricket. To give you an idea, a photo sensors could be added to automatically wakeup the chirps when darkness falls. Adding a couple of small lamps for visual effects would be another great thing to try.
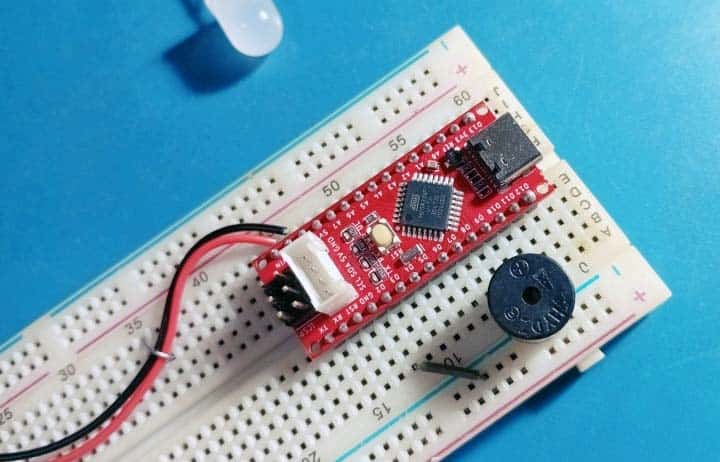
Below is my quick test setup made on a breadboard with Seeeduino Nano (at least it works as a proof of concept).
So now you have a compact electronic circuit that simulates the sound of a cricket. And you know, it can be built with a simple electronic scheme consisting of only an everyday microcontroller board and an active buzzer. What is more, there is ample room for further mods.
Have fun, that is what it is all about!