The Household 9V Battery Tester presented here is not very accurate and is probably better as an estimating tool than a precise battery tester. I still highly recommend building this little project as it is both fun and educational.
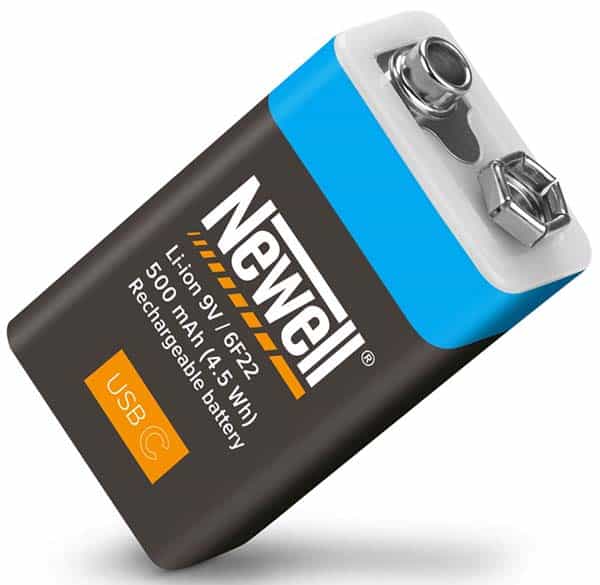
9V Battery – Quick Overview
9V batteries are one of the most common battery sizes widely used in everyday DIY (do it yourself) electronics hobby projects as well as household applications like smoke alarms, healthcare devices, remote-controlled toys, doorbells, walkie talkies, and radios and they can easily be replaced and installed.
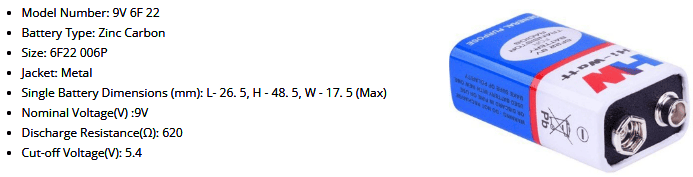
Below is a quick specification chart of the most popular and cheapest HW Hi-Watt 6F22 9V battery.
Keep in mind that a Zinc-Carbon 9V battery such as this one is ideal in a situation where one needs to power a device for one occasion (such as a toy to be used for a few days) but an Alkaline 9V battery is great for long-term use in a device.
Also, the energy density of an Alkaline battery is higher than that of a Zinc-Carbon battery. An Alkaline battery is more tolerant of high current discharge and has more capacity, and it outlasts a Zinc-Carbon battery in terms of shelf life.
Here is a datasheet of the Duracell MX1604 9V (6LR61) Alkaline-Manganese Dioxide (Zn/MNO2) battery.
However, Alkaline battery is high-priced so you might prefer a Zinc-Carbon battery, also known as Carbon-Zinc battery, if you are on a really tight budget and you do not need it to last very long.
Additional Reading https://www.microbattery.com/blog/post/battery-bios:-everything-you-need-to-know-about-the-9v-battery
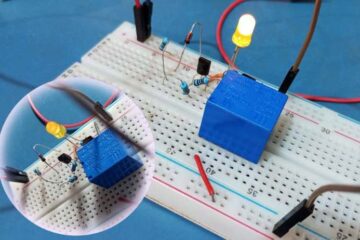
9V Battery Tester – DIY
Now see how to build a quick-and-dirty 9V battery tester!
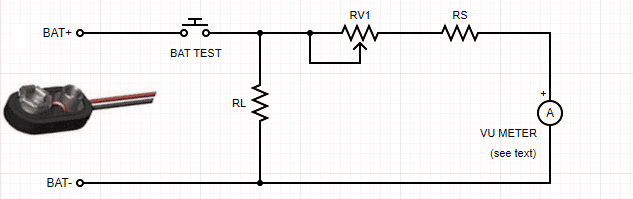
The basic schematic is pretty simple as it has just a few passive electronic components only. The momentary pushbutton test switch (BAT TEST) is used to test the 9V battery while the load resistor (RL) is used to apply a load across the battery under test. A single 390Ω or 330Ω ¼W resistor will do the job well, dissipating about 200mW or 240mW. The discharge current would be 23mA or 27mA (a good amount indeed).
Probably the only thing that might need explanation is the values of the variable and fixed resistors RV1 and RS on the schematic above. Actually, it all depends on what type of meter you are going to use to display the battery level. Note, that almost any common uA/mA meter or analog VU meter (see below) will work here.
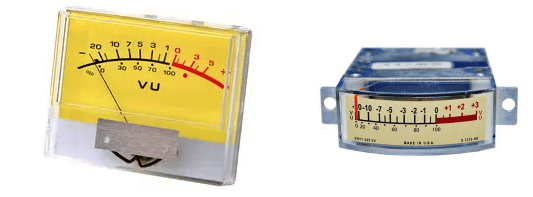
An analog VU meter is a cheap, relatively abundant kind of electro-mechanic measuring instrument. Since it is a moving coil galvanometer, it can serve as a voltmeter or ammeter. Its accuracy is often low and the coil parameters are not the best for either voltmeter or ammeter, however, the cost advantage makes it an alluring solution in many low-cost applications.
The most common analog VU meters are 0-200uA or 0-500uA sensitivity types with 650Ω or 600Ω resistance. According to Ohm’s Law, the FSD (full-scale deflection) voltage on the coil of a 0-200uA/650Ω meter is 130mV.
As an example, for a 1mA FSD meter, RV1+RS = 10.0V/0.001A = 10KΩ.
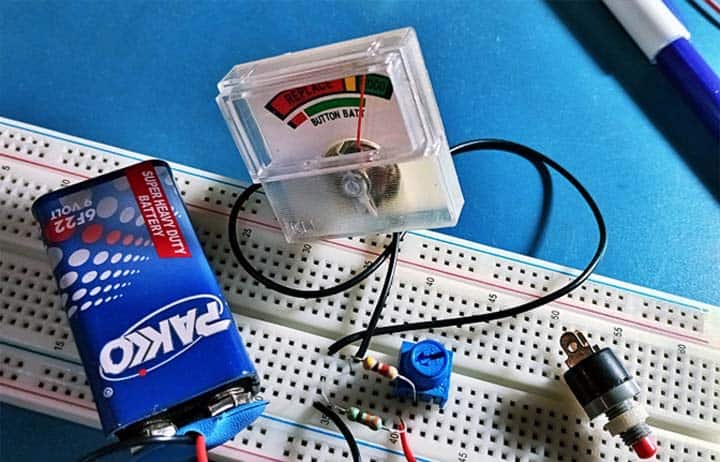
The one that I got for my experiment was a ~280Ω (~1.4mA FSD) analog VU meter lifted from a discarded cheapo battery tester.
So, I did some quick back-of-the-envelope estimations, plucking some values out of my head…
- RL: 330Ω ¼ W
- RV1: 10KΩ TRIMPOT
- RS: 4.7KΩ ¼ W
And, it worked sensibly as expected…
Next Steps
In an upcoming post in this series, you will see more useful pointers on battery discharge tests, AC impedance measurements, etc.
Did you enjoy this post? If you did and want to show your appreciation, maybe share this post with your social media friends and followers and let others know!