I’m afraid, someone might wonder whether this was the right thing to do with a cheap bicycle electronic horn made in China! It’s quite natural all right, but let me take this space to explain the whys and wherefores. I’d like to share some random thoughts with you, as well. So let’s start.
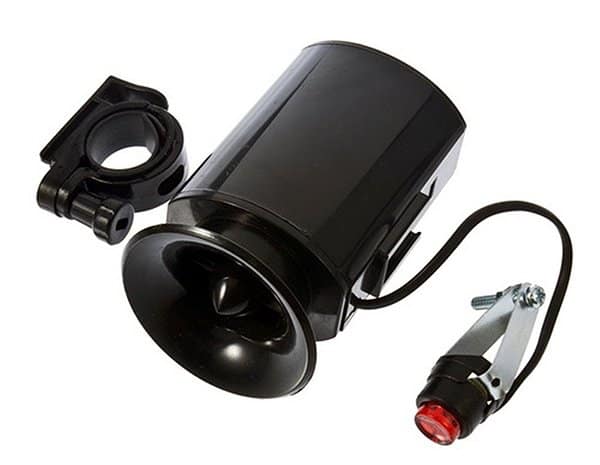
Recently while surfing for new listings in Flipkart, I came across a very cheap bicycle electronic horn. Since I had some good experiences with similar horns/hooters, I rushed down the floor to by a pair of them. Not a bad decision, indeed!

The particular model is a compact 6F22 9V battery operated bicycle horn with an ear-splitting sound output of six different alarm/siren tones generated in cycling sequence. Overall, a pretty cheap but pleasant collection of things boxed together. The package includes the battery pack and a handlebar mount (plus some rubber rings to hold it in place).
So how well does this bicycle horn setup work in practice? Pretty darn well. So let’s get right to learning its internal electronics up.
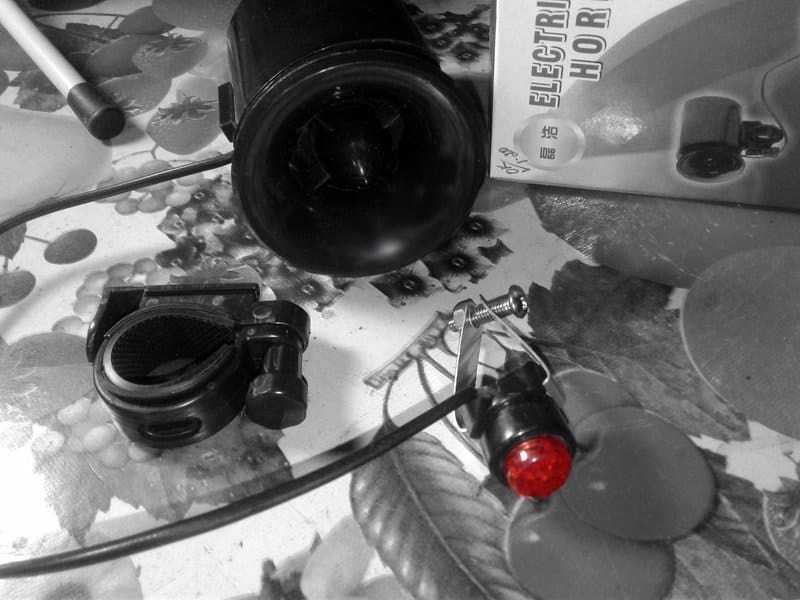
The enclosure is made from reinforced plastic. We need to remove two small screws to open the lid of the enclosure located at its rear. There’re two compartments inside – for the battery and the circuit board. One side of the stamp-sized circuit board is populated entirely with chip components (SMDs).
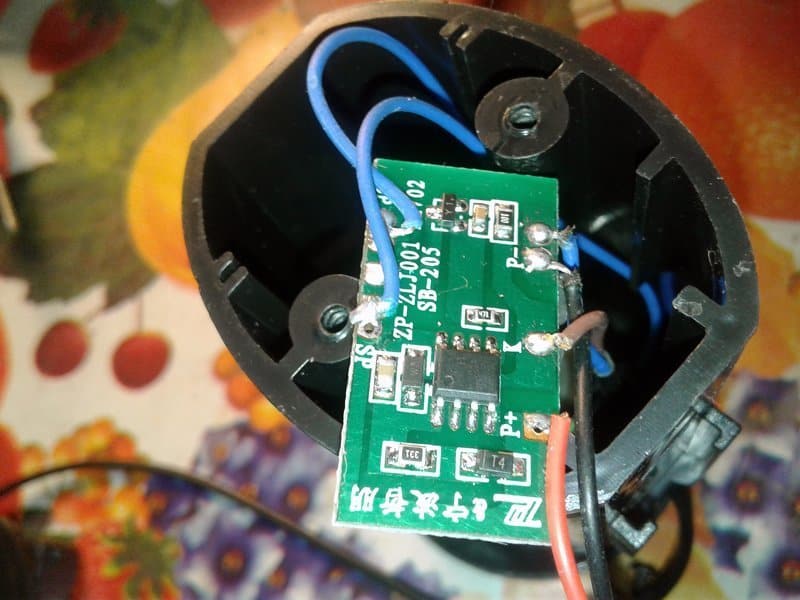
The one and only ‘leaded’ component is mounted on the other side of the circuit board, which is a small drum-core inductor for driving the piezo- disc as a powerful loudspeaker.
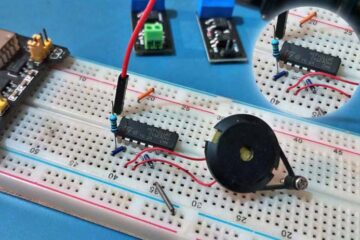
Even though the core part – the 8-pin chip – is a defaced one, I’m sharing the retraced schematic of the electronic bicycle horn, merely for your reference.
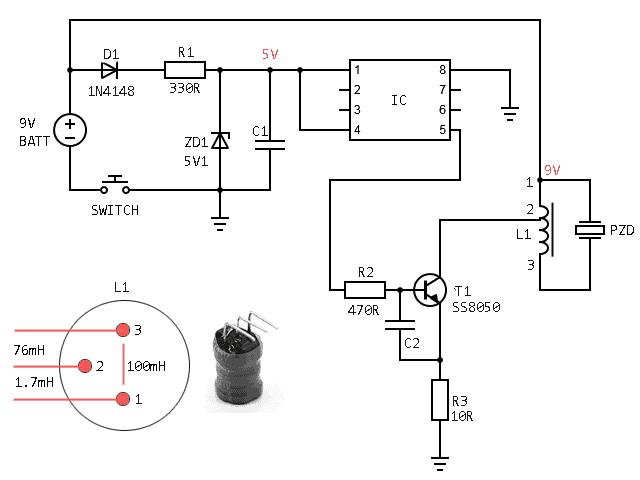
The scheme is straight forward. The ground (0V) of the 9V battery power supply is routed to the main circuit through the horn switch (push-on type). Positive rail of the 9V supply is wired directly to the piezo-disc driver portion of the circuit while it’s down-converted to regulated 5V through a zener diode-based shunt regulator. The regulated, low-current, 5V power supply is then utilized to power the 8-pin alarm/siren tone generator IC up. Pin 5 of the IC drives the piezo-disc with the help of a SS8050 transistor (T1), and a 3-pin ‘alarm boost inductor’ (L1).
1.7mH + 76mH = 100mH! How? As you might noticed, the ‘auto-transformer’ like 3-pin inductor has an inductance of 1.7mH between its pins 1 and 2, and 76mH between pins 2 and 3. But the total inductance (between pins 1 and 3) is 100mH!
Yes, it looks a bit mysterious. However, note that since the two inductors are coupled (on the same core), this is the maths to get the total inductance:
Ltotal = (√L1 + √L2)^2
√L1 = √1.7 = 1.3
√L2 = √76 = 8.7
1.3 + 8.7 = 10
Therefore, Ltotal = 10^2 = 100

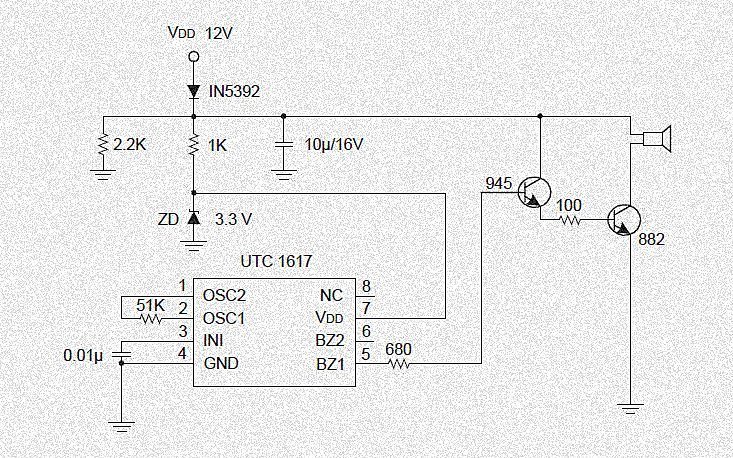
Back into the circuitry, still I don’t have any idea about the defaced alarm/siren generator chip, anyway now I think about famed UTC1617 6-tones alarm/siren generator IC from Unisonic Technologies. I already made a few vehicle security alarm projects using UTC1617 a while ago. This is the typical application circuit diagram of UTC1617, copied from my circuit notebook.
So then…what about a quick hack?
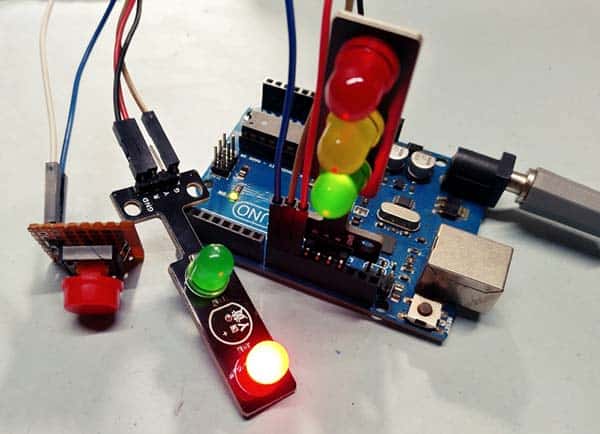
On certain occasions you may need a battery operated, portable, and powerful external electronics alarm/hooter for your electronics projects. Based on my personal experience, it’s always better to try a readymade one (if handy) rather than making a new one using costly and/or difficult to get discrete components. Also think about the arduous work of preparing an elegant enclosure.
Hope, at this point you’re ready to go forth with ‘hacked’ ready-mades. Now, I’m going to try and keep the hack relatively simple. Partially because at the end of the day it’s essentially an add-on microcontroller-compatible switching interface for the bicycle horn. Also, I’ve got more than a dozen other projects and related experiments to fill this week and not enough cookies to power me through all of that. So, let’s get to it!
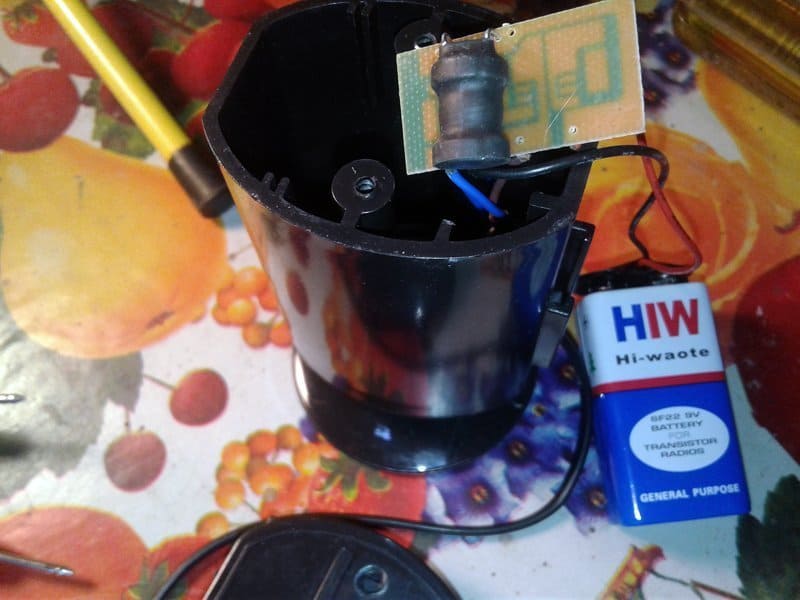
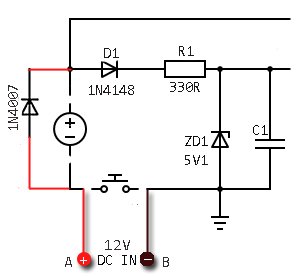
The hack begins with the removal of the internal 9V battery. At first, detach the battery from the battery snap, and ‘bypass’ the battery snap connector with a 1N4007 diode as shown in the below figure. Thereafter, bump off the horn switch from its cable and prepare the horn switch cable as the power supply input cable. The 9V 6F22 batter was a little concerning, so I swapped it out for a better power source. That being said, the ‘transistor radio battery’ did perform just fine with the bicycle horn – it’s just a bit poor for other intents. Powering it directly using an external power supply source or driver circuitry may be a better option.
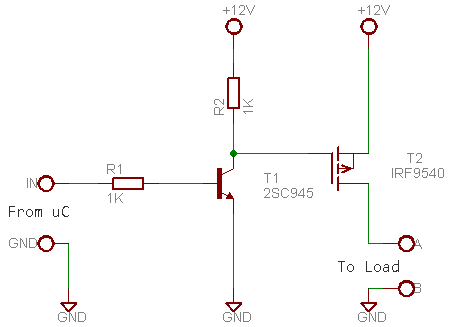
Now, the modified electronics is appropriate especially for an automobile security alarm. So you can build your own shock/vibration/impact detector with the help of your pet microcontroller. However, there’s a drawback that a microcontroller’s I/O pin can deliver very limited output current (20mA for instance). Therefore, you need one ‘adapter’ to drive a device (load) needing current and voltage higher than the I/O pin’s maximum rating.
Following is the basic schematic of a ‘load switch’ which is in fact a MOSFET based high-side driver to source requisite current (and voltage) to the bicycle horn. Note that the circuit switches 12VDC from the power supply on or off, based on the state of the microcontroller’s I/O pin. Obviously, you need to output 5V (HIGH) from the I/O of the uC to turn the bicycle horn on.
End matter…
Hopefully, you found this little article useful. At the end of the day, I am (just like you) looking for the most detail conceivable on a new buy. So, this article is penned from the standpoint of how I used and hacked the device. And as always, feel free to post comments, suggestions, and questions in the comments box below. Thanks for reading!