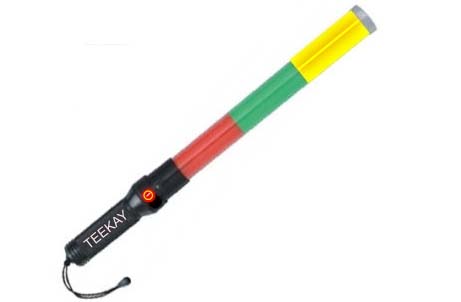
An LED signal baton (also called marshalling torch) is a proven gadget to head traffic. Primarily it is widely used by traffic police, attendants etc. to channelize traffic but it is a great handy aid for peculiar applications like emergency signaling as well (see below).

With this in mind, this little post is used to share a simple idea of designing and making a tricolor signal baton that can be used in various situations. Ready to give it a try?
Aimed primarily at electronics hobbyists and students, this design concept is centered around an Arduino Nano microcontroller. Below you can see the hardware setup diagram of the tricolor signal baton!
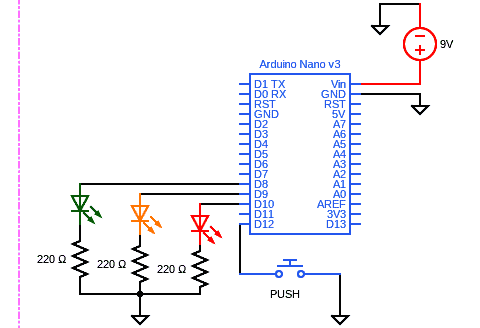
As shown, the setup has three LEDs (R-Y-G) and a momentary push button to control them. As usual a 6F22 9V battery is used to power the entire electronics (another power source idea will be provided at the end of this post).
According to the code shown next, the first pushbutton press will turn on the green LED, the next will turn on the yellow LED, and the last will turn on the red LED. The fourth press turns off the baton.
int pin_GLED = 8;
int pin_YLED = 9;
int pin_RLED = 10;

int pin_button = 12;

boolean oldSwitchState = HIGH;
boolean newSwitchState1 = HIGH;
boolean newSwitchState2 = HIGH;
boolean newSwitchState3 = HIGH;

byte state = 0;

void setup()
{

  pinMode(pin_GLED, OUTPUT);    digitalWrite(pin_GLED, LOW);
  pinMode(pin_YLED, OUTPUT);   digitalWrite(pin_YLED, LOW);
  pinMode(pin_RLED, OUTPUT);      digitalWrite(pin_RLED, LOW);

  pinMode(pin_button, INPUT_PULLUP);
}

void loop()
{
  newSwitchState1 = digitalRead(pin_button);
  delay(1);
  newSwitchState2 = digitalRead(pin_button);
  delay(1);
  newSwitchState3 = digitalRead(pin_button);

  if (  (newSwitchState1 == newSwitchState2) && (newSwitchState1 == newSwitchState3) )
  {

    if ( newSwitchState1 != oldSwitchState )
    {

      if ( newSwitchState1 == LOW )
      {
        state++;
        if (state > 3) {
          state = 0;
        }
        digitalWrite(pin_GLED, LOW);
        digitalWrite(pin_YLED, LOW);
        digitalWrite(pin_RLED, LOW);

        if (state == 1) {
          digitalWrite(pin_GLED, HIGH);
        }
        if (state == 2) {
          digitalWrite(pin_YLED, HIGH);
        }
        if (state == 3) {
          digitalWrite(pin_RLED, HIGH);
        }

      }
      oldSwitchState = newSwitchState1;
    }
  }
}
Sometimes safety goes beyond passive alerts/warnings, and you need to grab attention or give directions at darkness. An electronic signal baton provides highly visible, linear, selectable multicolour lights on its handle which can be practicable in most hazardous/dangerous situations.
Admittedly, the final construction is a bit more difficult task because you have to build the enclosure yourself and decorate it accordingly. Note, it is best to buy an “optical grade” white polycarbonate diffused light pipe of the correct size to make the shell of the signal baton.
Or if you have enough materials, you can 3D print it yourself. My proposed scheme is illustrated in the artwork shown below (it is not yet finalised though).
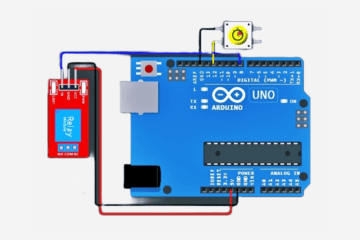
On an improvement thought, you can create a better power source for the signal baton with one 18650 lithium-ion battery (3.7-4.2V output) when combined with a cheaper 5V/1A power bank module (see below). Oh, now you have the USB-chargeable tricolor signal baton!

Go back to this old post to get some more useful hints on this https://www.codrey.com/electronic-circuits/sewing-machine-light-v1-0/
And, here is the link of a related project https://www.codrey.com/arduino-projects/arduino-led-signal-wand-light/
Finally, here is another crude code for this tricolor signal baton. When using this code, holding down the pushbutton will flash all three LEDs simultaneously (otherwise they will remain in the off state).
#define LED_1_PIN 8
#define LED_2_PIN 9
#define LED_3_PIN 10
#define BUTTON_PIN 12

#define LED_NUMBER 3

byte LEDPinArray[LED_NUMBER] = { LED_1_PIN, LED_2_PIN, LED_3_PIN };

void initAllLEDs()
{
  for (int i = 0; i < LED_NUMBER; i++) {
    pinMode(LEDPinArray[i], OUTPUT);
  }
}

void powerOnAllLEDs(bool powerOn)
{
  for (int i = 0; i < LED_NUMBER; i++) {
    if (powerOn) {
      digitalWrite(LEDPinArray[i], HIGH);
      delay(125);
      digitalWrite(LEDPinArray[i], LOW);
    }
    else {
      digitalWrite(LEDPinArray[i], LOW);
    }
  }
}

void setup()
{
  initAllLEDs();
  pinMode(BUTTON_PIN, INPUT_PULLUP);
}

void loop()
{
  byte buttonState = digitalRead(BUTTON_PIN);

  powerOnAllLEDs(buttonState == LOW);
}
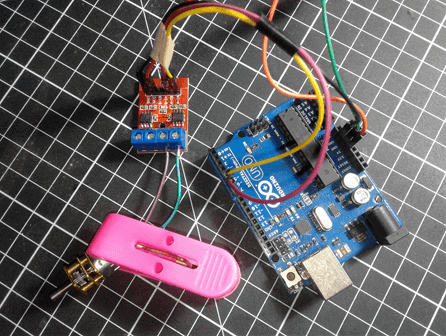
SPOILER: I already dismantled a cheap Chinese traffic signal wand to put my own design idea on it. After a few relatively long trials I was able to fulfill the task in a successful manner (see below).
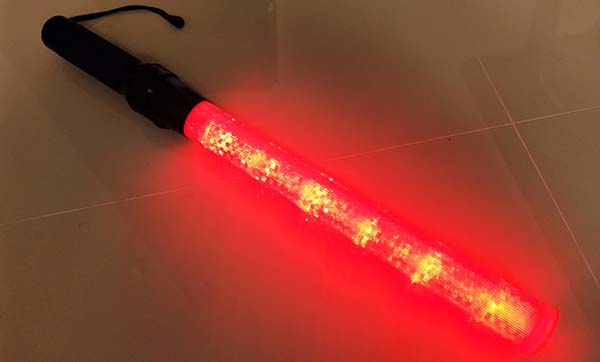
That funny mod is a story for another article. Also, a teardown article of the actual traffic signal wand will also be published later.