 I believe most readers are familiar with Hak5’s USB Rubbery Ducky. Well, simply it is a $45 key stroke injection tool, masked as a generic usb flash drive, widely used to hack unlocked computers. Computers recognize it as a regular keyboard and accept pre-programmed keystroke payloads at speeds beyond 1000 words per minute. In this post, I will show you how you can make a poor man’s replica of the usb rubber ducky for just 1.5$.
Prerequisites
Hardware: Digispark Attiny85 Development Board (Rev 2)
Software: Arduino IDE (1.6.9 +)
Transformation
First of all you should learn how to setup and install Digispark in your Arduino IDE and upload a sketch in Digispark (https://digistump.com/wiki/digispark/tutorials/connecting). Below is the tested code for Digispark. Execution of the uploaded code opens the default web browser of the connected machine up and directs the user to a pre-defined website.
/*
* Poor man's USB Rubber Ducky
* Hardware: Digispark Attiny85
* Arduino IDE 1.6.9 / Windows 7x64
* T.K.Hareendran/2018
* Codrey Electronics https://www.codrey.com
*/
#include "DigiKeyboard.h"
#define KEYSTROKE_DELAY 1000
#define KEY_ESC 0x29
#define KEY_MODIFIER_LEFT_GUI 0x08
#define KEY_R 21
boolean doLoop = 1;
void setup() {
}
void loop() {
DigiKeyboard.delay(500);
DigiKeyboard.update();
if (doLoop == 1) {
DigiKeyboard.sendKeyStroke(0);
DigiKeyboard.delay(KEYSTROKE_DELAY);
DigiKeyboard.sendKeyStroke(KEY_ESC, MOD_GUI_LEFT);
DigiKeyboard.delay(KEYSTROKE_DELAY);
DigiKeyboard.sendKeyStroke(KEY_R, MOD_GUI_LEFT);
DigiKeyboard.delay(500);
DigiKeyboard.print("www.facebook.com/tkhareendran");
DigiKeyboard.sendKeyStroke(KEY_ENTER);
DigiKeyboard.delay(KEYSTROKE_DELAY);
doLoop = 0;
}
}
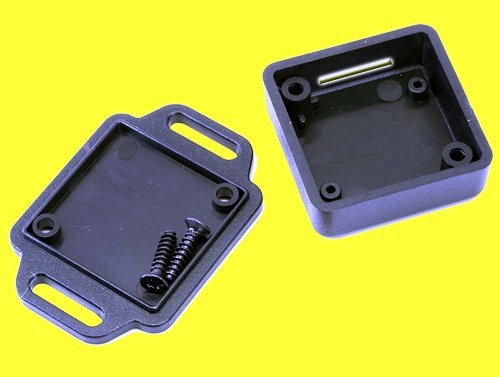
After the successful upload, all you have to do is connect the “ducky” Digispark to your victims unlocked computer. From here, Digispark works as an HID (Human Interface Device) keyboard that sends pre-programmed keystrokes within 6 seconds after its insertion into the usb port. Look, a tiny enclosure obviously gives your rubber ducky a polished look. You can use a readymade prototype enclosure or a 3D-printed one, as that also provides suitable protection for the inside electronics against accidental electric contacts with the mess of cables around computers.
 Real Magic
Now it’s time to think about the functions you want your HID keyboard to have. In addition to turning Digispark into a simple keyboard which secretly types your payloads, there are many more trickeries that can be done. Just for instance, you can create a code which when executed in the victims machine initiates a reverse TCP connection. Fortunately, for USB Rubber Ducky, there is a good resource (https://github.com/hak5darren/USB-Rubber-Ducky/wiki/Payloads) which helps you show the real magic.
Often it is better to use something that is already available, rather than trying to re-invent the wheel. This link will direct you to another (somewhat higher-level) Digispark Rubber Ducky project: http://0xdeadcode.se/archives/581.
Well, with this prefatory article, let’s get the ball rolling for a cracking start. Happy Hacking!
Disclaimer: The proposed device provides keyboard inputs to a computer outside of user control. It is intended for experimentation and demonstration purposes only. Usage of the device is beyond our control and we are not responsible for any damages resulting!