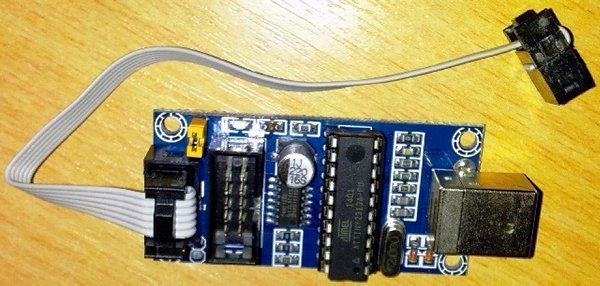
While Googling for nothing, I noticed a little device “USBtinyISP” helpful for programming Attiny85 microcontrollers using the same setup method as for handling Arduino sketches. There’s also no difference in the development environment as we can use the same Arduino IDE, for instance Arduino IDE 1.8.5. On an impulse I quickly purchased two of such USBtinyISP (v2.0) programmers from Deek Robot. These are available off e-Bay, Amazon, and various other electronics vendors websites. Stumbling around the web for one more day, I came across a few articles and learned that the structure of my device looked utterly alike the USBtinyISP programmer from Adafruit (and Sparkfun) – based off of the USBtiny code & design (http://dicks.home.xs4all.nl/avr/usbtiny/), so it’s pretty handy for burning bootloader in Arduino chips, too!
In this article, you’ll learn all things you need to know about USBtinyISP programmer to be able to program Attiny85 chips and use them effectively. When you have a little leisure, try searching the web more to see how many sites are dedicated to these programmers and the guys that make cool projects on the back of them.
First step
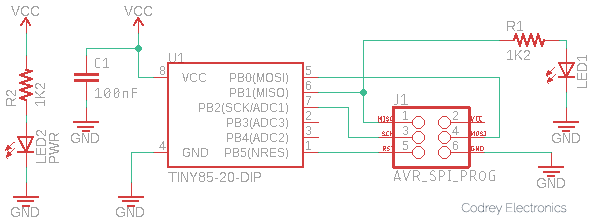
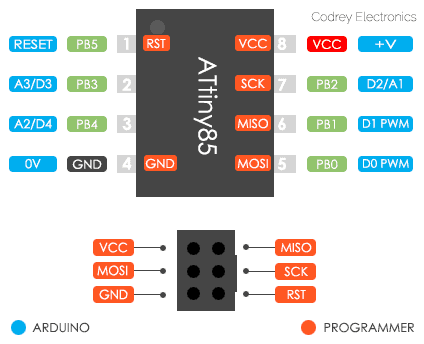
Simply, you can use the USBtinyISP Programmer to program the Attiny85 microcontroller using the standard 6-pin in-system programming (ISP) header. You’ll need the 6-pin Socket/Socket IDC cable available with the programmer, and an optional tiny programming adapter/mini development board as it offers the little convenience of a zero breadboard-jumper experiment. See the schematic shown below:
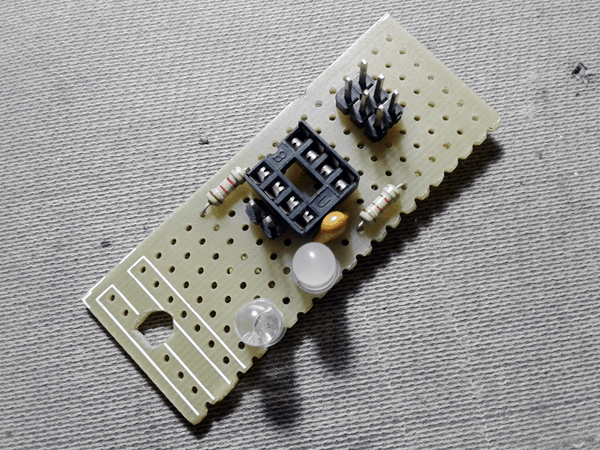
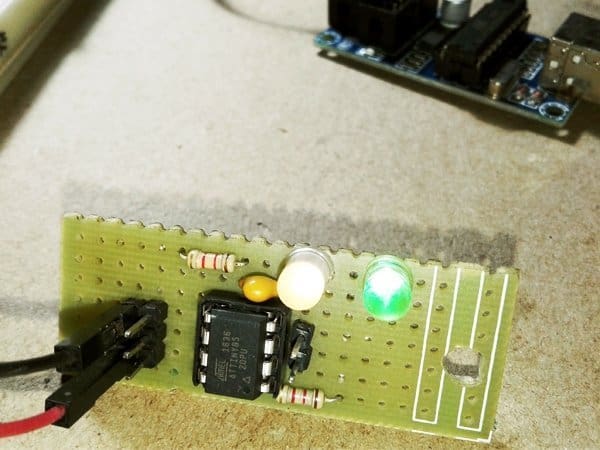
Here’s the photo of author’s quick (home-brewed) tiny adapter:
Now just load up a fresh Attiny85-20PU chip into the programmer setup, plug it into the USB port, run your Arduino IDE, and you’ll be generating a solution for your project in short order. However, be aware, you have to download and install requisite device drivers (for the programmer) in your computer, and add up some board definitions (for attiny) to your Arduino IDE at first. One valuable resource – https://github.com/damellis/attiny/archive/master.zip
In the middle
After completion of the initial steps, copy-paste the given test code in your Arduino IDE, compile and upload it as usual simply this time to the Attiny85 chip (put in the adapter) linked to the USBtinyISP programmer. Lets look at the code:
int userLED = 1;    // userLED connected to PB1 (Pin 6) of Attiny85
//int userLED = 0;  // userLED connected to PB0 (Pin 5) of Attiny85

void setup() {
// Nothing to do here
}

void loop() {
  for (int fadeValue = 0 ; fadeValue <= 255; fadeValue += 5) {
    analogWrite(userLED, fadeValue);
    delay(30);
  }

  for (int fadeValue = 255 ; fadeValue >= 0; fadeValue -= 5) {
    analogWrite(userLED, fadeValue);
    delay(30);
  }
}
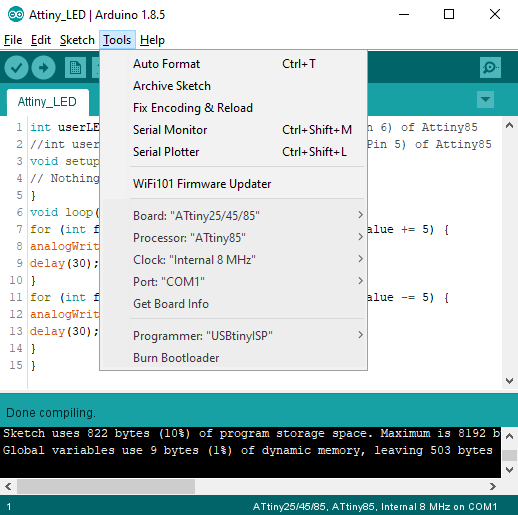
Remember to configure “Tools” menu of the IDE as showed in the succeeding image (don’t panic you will not see a serial port in the tools menu). In addition, just hit the “Burn Bootloader” before uploading the actual code because the Attiny85 runs at 1 MHz (by default), but this just configures the fuse bits of the virgin chip to run at 8 MHz. The USBtinyISP red LED should light up now.It will take a minute or two to program the chip, and when it’s done, the IDE will notify you it has completed and the red LED will be off. After uploading the test code you should see the “user” LED in the adapter starts fading happily as inscribed (watch the test video). Now you can detach the programmer, and by providing 5V to VCC and GND pins, it will still work (as it should)!
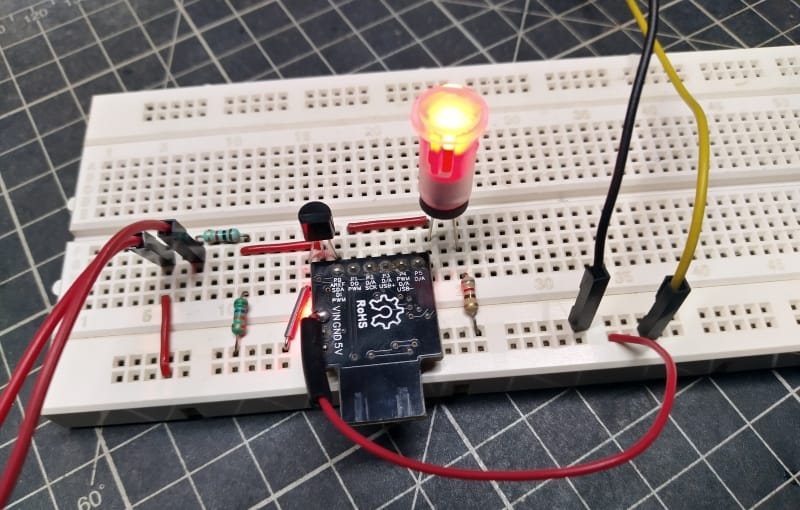
& see one random snap from author’s workbench:
Meliorations
The Attiny85 is a little 8-pin microcontroller with 8KB of flash, 512 bytes of EEPROM and SRAM. It also has some hardware support for I2C makes it ideal for many great scaled down Arduino projects. Obviously it’s a perfect chip for physical programming projects with just a few I/Os because it can be programmed in the Arduino IDE (as described here) as well. Next is a an Attiny85 ready reckoner (tacked by the author) for beginners want to make/shrink their “tiny scale” Arduino projects!
Lastly, for a hassle-free USBtiny driver you can try the digitally-signed tool “Zadig”, widely used for installing “libusb drivers” on Windows 7 or later (mine is Win10x64). This brilliant article will guide you through that proven Zadig trick.
I hope this primer served you well to get a line on how to have an Attiny85 up and running for the first time. Enjoy wetting your tiny feet!
Assorted Additional Resources

Signed drivers for USBTinyISP:
https://github.com/sparkfun/Tiny-AVR-Programmer/tree/master/Drivers
@Ruchira: It is included in the Assorted Additional Resource section of this post.
Anyway, thank you for reaching out to me. Your feedback is highly appreciated 😊