Here’s an automatic minder to keep your stairway alighted while you’re near to it. One presence sensor wired to a microcontroller scans its environs and automatically activates a light source 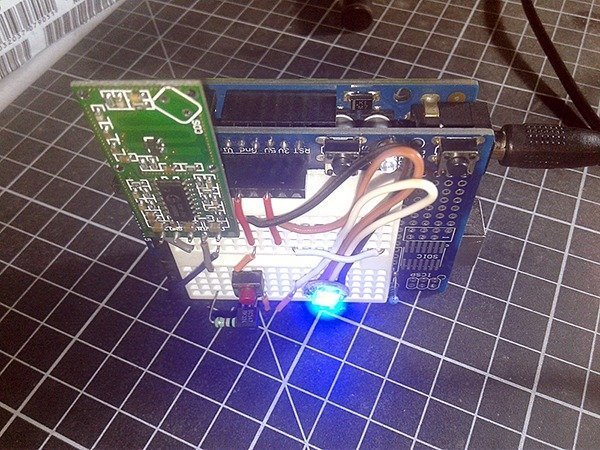 when it sees an object.
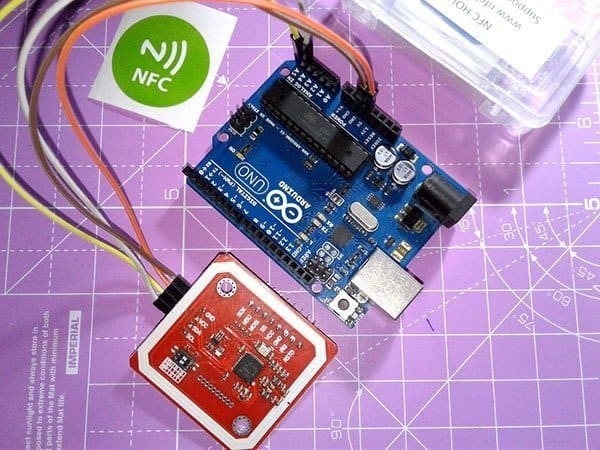
The staircase light system I introduced here is based on an Arduino Uno microcontroller which reads the object sensor and controls the light source. The light source is nothing but a bunch of the pretty nice Neopixel LEDs. For the presence detector part, you can either try a cheap passive infrared motion sensor, or a microwave radar sensor. Likewise you can replace the somewhat bulky Arduino Uno board with a comparatively small Arduino Nano board. The extremely cheap and minuscule Attiny85 development board – Digispark – is another cheerful alternative, as well.
Okay, let me begin with the schematic of a universal sensor interface tailored exclusively for this project. At first glance you might think it’s superfluous but trust me this extra circuitry lets you connect your favorite sensor as the input device of the system. Nevertheless you can connect any sensor that has a logic-high level output signal (in active state) to the first sensor input port, or any sensor with an open-collector/open-drain output connector to the second sensor input port.
Nowadays you can buy superb Neopixel LED strips from many online vendors for cheap, and such a Neopixel LED strip usually needs a clean 5VDC power supply source. So it might be better to run your entire system from the same LED power supply source rather than employing a separate power source for the microcontroller and sensor setup. Anyway I shall leave this to the individual constructer.
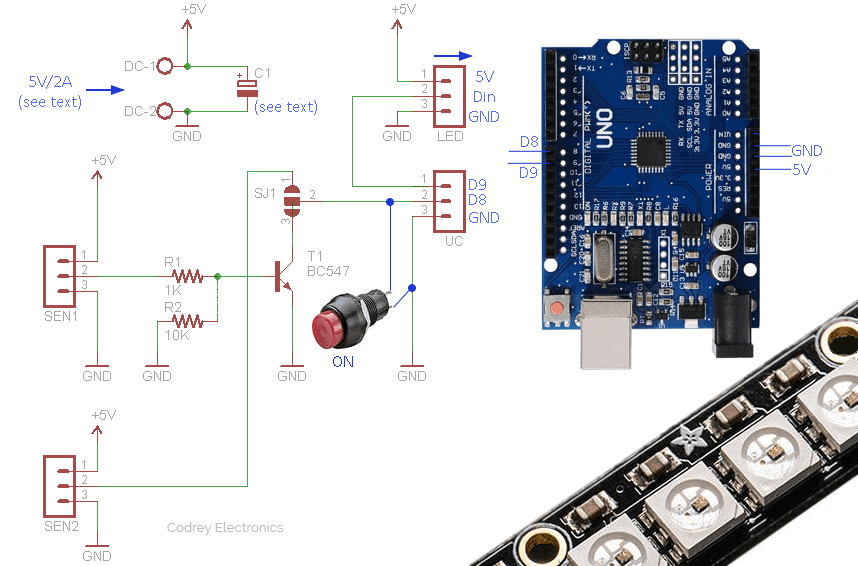
In the above basic hardware setup you can see that D8 of the Arduino Uno is the sensor input pin while D9 is the data output pin for the Neopixel LED strip. This basic setup can be powered conditionally from a 12V/2A regulated linear/switch mode power supply. Solder jumper SJ1 allows you to set either one sensor input as desired. The push-on button switch is included in the circuitry to turn-on the system initially. It can also be used as a trigger button for manual activation of the staircase light(s).
The Neopixel LED strip (WS2812B addressable LED strip) comes in several models that differ in LED count. So choose the one that best fits your specific purpose.
![]()
The LED strip should be powered by a 5VDC power source that can cater ample current as demanded. Note that at 5V, each Neopixel LED consumes about 50mA of current, when set to its full brightness. For small projects (for example, with a one meter strip) an AC to DC power adapter that provides 2A at 5V should do the job. Also remember to use a large electrolytic capacitor (C1) across the power supply rails to smooth out the power supply because it prevents the initial inrush current from destroying the Neopixel LEDs. Just try a value in 470uF-1000uF (6.3V) range, or higher. Likewise, you’ve to insert a resistor between the digital output D9 pin of Arduino Uno and data input DI of the Neopixel LED if it’s not already fitted by the LED maker. Neopixel LED used by me has a 75Ω chip resistor onboard!
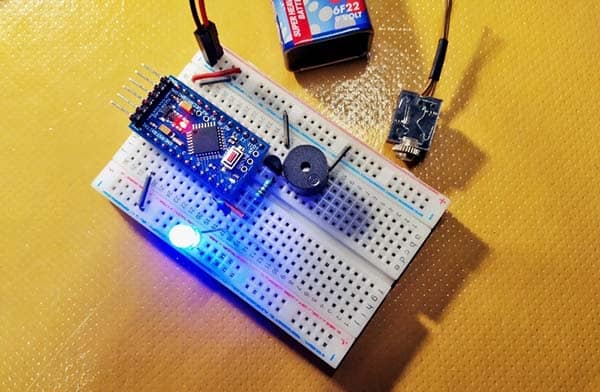
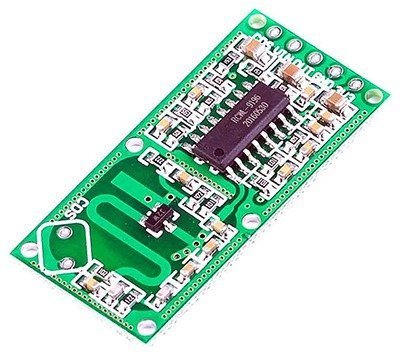
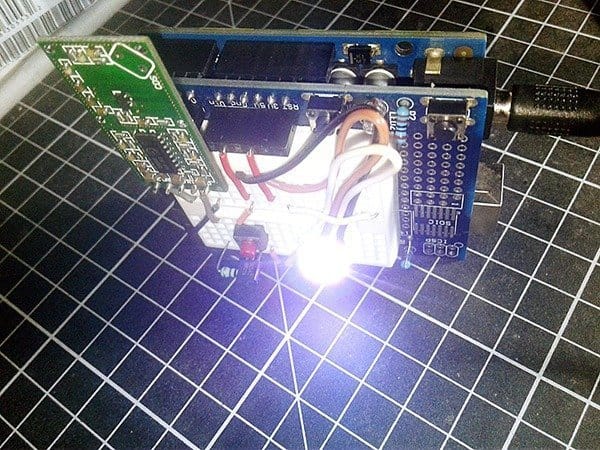
In my ‘proof-of concept’ setup, the Neopixel LED is powered using the low-current 5VDC provided by Arduino board because I simply have a single Neopixel LED. And, in my case, the Arduino Uno board is powered by means of a small 9VDC/500mA switch mode power supply (SMPS). Even though my vast experience with various passive and active infrared presence detectors seemed to suggest an infrared approach to staircase light control might work well, I decided to run some tests to find out more before committing to the idea. So I ran a lengthy experiment with the so cheap microwave radar sensor module RCWL-0516, and discovered that the results it produced were actually fairly impressive.
Here’s what it looks like up close. And, as you can see, the whole breadboard assembly, even with the Arduino Proto Shield, is quite small. With this setup, I made several test runs successfully!

Note that you need to press the push button once to switch on the staircase light at the start. Then the stair lamp gives a dim (50% or 25%) blue light continuously until it’s triggered by the presence sensor. Once triggered, a strong (100%) white light replaces the soft blue light but only for a limited time as defined in the code, and returns to the blue light mode immediately thereafter.
Following is my crude code. You’ve to change the N_LED in the code to the actual number of Neopixel LEDs in your LED strip.
/*
  * Arduino Automatic Staircase Light v1
  * NeoPixel LED Project with Arduino Uno
  * with Universal Presence Sensor Interface
  * just another Experimental Sketch/Code
  * author T.K.Hareendran/2019
  * publisher codrey.com
 */

#include <Adafruit_NeoPixel.h> // Required Library
#define D_PIN 9 // Data Out = D9 Arduino
#define N_LED 1 // Number of LEDs = 1
Adafruit_NeoPixel strip = Adafruit_NeoPixel(N_LED, D_PIN, NEO_GRB + NEO_KHZ800);
const int SWpin = 8; // Sensor Input = D8 Arduino
uint8_t senState = HIGH; // Stores state of the sensor

void setup() {
 pinMode(SWpin, INPUT);
 digitalWrite(SWpin,HIGH); // Internal Pull-Up Enabled
 strip.begin();
 strip.show(); // Initialize all pixels to 'off'
}

void loop() {
 int sense = digitalRead(SWpin); // Read Sensor Input Status
 if(sense == LOW) {
 if(senState == HIGH) {

 colorWipe(strip.Color(255, 255, 255), 1); // White Full (255 = 100%)
 delay(5000); // 5 Seconds On Time
 senState = LOW;
 }
 } else {
 if(senState == LOW) {

 colorWipe(strip.Color(0, 0, 127), 1); //Blue Half (127 = 50%)
// colorWipe(strip.Color(0, 0, 63), 1); //Blue Quarter (63 = 25%)


 senState = HIGH;
 }
 }

}

void colorWipe(uint32_t c, uint8_t wait) {
 for(uint16_t i=0; i<strip.numPixels(); i++) {
 strip.setPixelColor(i, c);
 strip.show();
 delay(wait);
 }
}
This article is a mere introduction to the construction of an automatic staircase light with Neopixel addressable RGB LEDs. As mentioned before, I’ve just experimented with a single Neopixel LED. You should revise the hardware and code to make it work as you want. I hope you’ve found this primer interesting and useful. Thanks for reading!