Now you don’t have to drain your wallet to buy an EMF meter. Whether you are searching for a ghost hunter or just looking to gauge the electromagnetic field disturbance in your house, a do it yourself EMF detector can assist you in the process of monitoring the electromagnetic field. In this post you can see a couple of design ideas to develop an EMF detector that you can build at ease, the first being very crude while the second being a bit more complex.
What is EMF? Electromagnetic forces represent an essential part of the physical world, although they cannot be seen. See, electric and magnetic fields are present whenever electricity is used – electric fields are produced by voltage, and fields are produced by current. Their sources are the charged fundamental particles of matter.
The first thing you need to do is to build this fairly simple basic EMF detector. The purpose of this electromagnetic field detector is to locate sources of electromagnetic radiation and provide a mere indication of the EM field. The reason why I’m calling this an EMF detector rather than an EMF meter is because it can only detect an electromagnetic field rather than provide you with accurate measurements of the electromagnetic disturbance. Well, just do it for the fun of it!
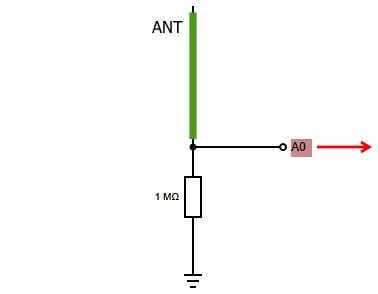
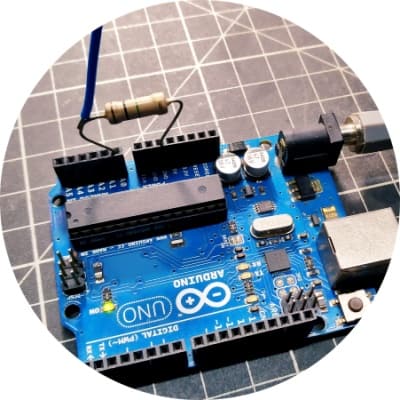
As usual, the idea revolves around an Arduino with least additional hardware. So, my basic circuit should look something like this. Plain simple!
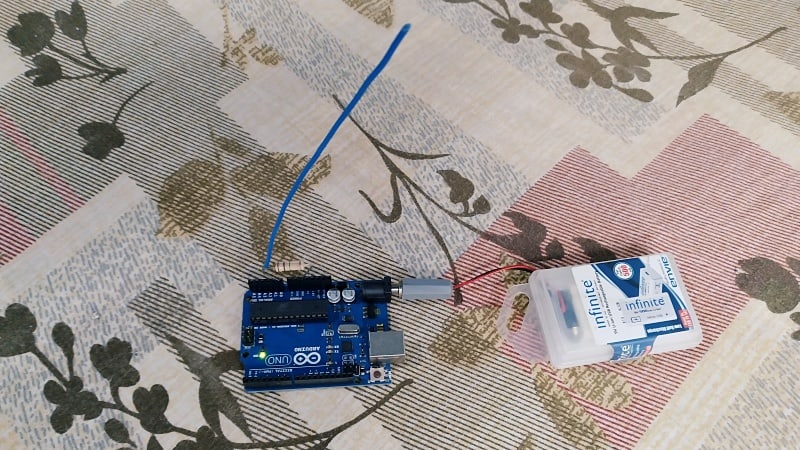
We’ll walk through this now. For this EMF detector you can use 15 cm of stiff wire (22 or 24 AWG breadboard wire for example) as the antenna – the longer the antenna, the more sensitive the EMF detector. So, be generous and be prepared to tweak the antenna length to ensure better results once it starts working.
As you can see, one analog input (A0) of Arduino Uno is used as the antenna input, and there’s a high-value resistor wired to ground (GND) rail. Although it’s 1MΩ, if you have anything higher than that is fine too.
When it’s finished, your basic EMF detector should look something like this. Finally, power it using a 6F22 9V battery or a 9V USB Lithium-ion battery (https://www.codrey.com/electronics/9v-rechargeable-battery-right-wrong/).
In the crude Arduino sketch (code) given below, you’re reading from A0, and control an indicator. Also note that the analogWrite expects a value between 0 and 255, and a value of 100 is pretty small. So, the Arduino map function is utilized to scale the value to between 0 and 255. The constrain function ensures that the readings are between 0 and 100.
Compile and upload this code (or a better one tailored by you) onto your Arduino Uno, and plug it into a portable Arduino power source. Hopefully, you should see the onboard (D13) LED flicker when the antenna is in close proximity of an EMF source. Try pointing the antenna at laptop or mobile phone chargers to trigger it.
unsigned int state = 0;

void setup() {}

void loop() {

  state = analogRead(A0);
  state = constrain(state, 0, 100);
  state = map(state, 0, 100, 0, 255);
  analogWrite(LED_BUILTIN, state); // D13 LED - See Note!

  }
The 1MΩ resistor does not have to be as large as the one I used. It was chosen for my ‘soldering’ convenience. So, you can use a 1MΩ ¼ watt one or ½ watt one. Likewise, it’d be better to use D11 I/O (or D10/D9) of Arduino to drive an external LED (series resistor needed).
This simple EMF detector reacts to EMF that can be detected in a small area. The antenna is a piece of stiff wire that induces a small current when EMF is in the vicinity. We put together an Arduino microcontroller to drive its onboard LED when the antenna picks up EMF from its surroundings. That’s all for this basic EMF detector project!
Ready to hunt ghosts?
Although there’s some debate on whether or not ghosts are real, the internet contains a plethora of websites demoing and selling Ghost Detectors/Ghost Hunters. You can also see YouTube videos depicting how handheld devices detect spirit entities. Does it communicate with spirits? I don’t know!
But I know one thing that is real is that if you open such a device up and take a peek inside, the trickery will be revealed. Probably you can see a lush EMF detector circuit board, often with some LEDs, and a battery.
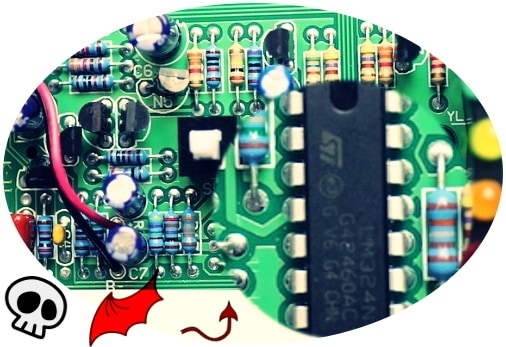
Is it a paranormal detection device? While examining a cheapo eBay ghost detector, I noticed that my hand itself was increasing the reading causes its LED bar graph display to dance rapidly. Further, there is no evidence to back up the claim that ghosts have any effect on the EM field, or that any EMF detector has the ability to detect or be manipulated by a ghost. Let’s close this ghostly topic here!
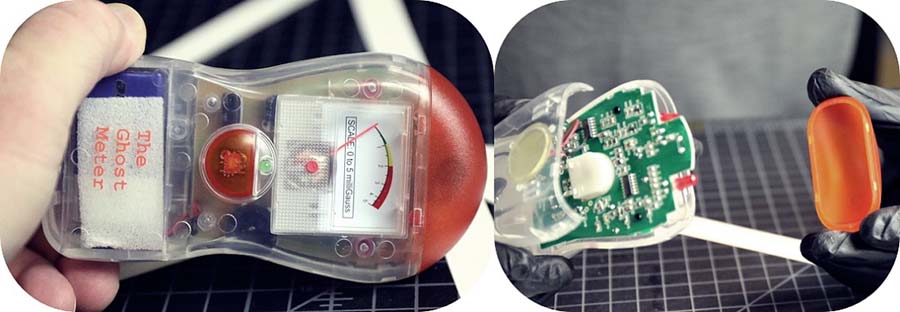
Below is the photograph of another commercial ghost meter. Thanks to https://www.lensrentals.com/blog/2019/11/how-to-not-check-for-ghosts-in-equipment/
However, I do not want to discourage you. So, let’s build a Ghost Detector/Hunter toy, at least to scare your neighbor. Look, this is just a slightly improved version of the basic EMF detector discussed earlier. It has nothing to do with ghosts!
As stated, I changed the code a bit and added an averaging program which’s originally prepared by Zac Bohon. I also shifted the LED drive output to D9 to add an external LED and a 510Ω series resistor. Remember though this is only a simple idea and there’re numerous sparks out there.
#define SAMPLE_SIZE 50
int pinLED = 9; // LED OUT = D9
int pinANT = 0; // ANT IN = A0
int val = 0;
int rSample[SAMPLE_SIZE];
long avg = 0;

void setup(){}


void loop(){
val = analogRead(pinANT);
rSample[0] = val;
for (int i = SAMPLE_SIZE - 1; i > 0 ; i--){
avg = avg + rSample[i];
rSample[i] = rSample[i-1];
}
avg = avg / SAMPLE_SIZE;
val= int(avg);
avg = 0;
if(val>=1){
val = constrain(val, 1, 100);
val = map(val, 1, 100, 1, 255);
analogWrite(pinLED, val);
}
else {
analogWrite(pinLED, 0);
}

}
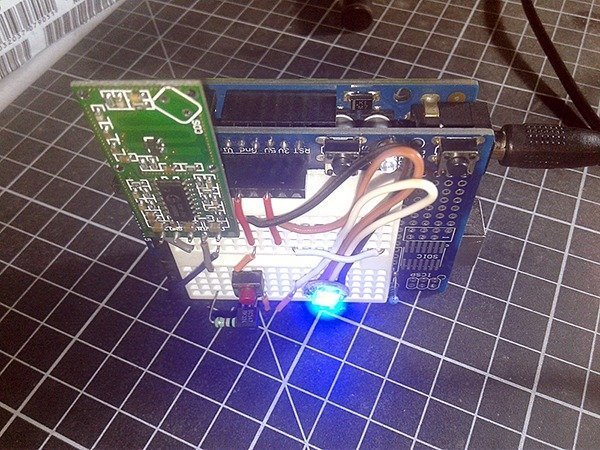
Below you can see my updated Arduino Uno hardware setup for the ghost detector – Ha Ha, now I have a device that doesn’t seem to do what it’s supposed to!

At this point, remember that Arduino provides a convenient way to read analog input using the analogRead() function. The analogRead() function takes 100 microseconds leading to a theoretical sampling rate of 9600 Hz.
As you might know, the ADC clock is 16MHz divided by 128 (16MHz/128 = 125kHz). Since a conversion takes 13 ADC clocks, the sample rate is about 125kHz/13 which results in 9600 Hz (http://www.optiloading.be/willem/Arduino/speeding.pdf).
We can of course speed up the analogRead() function by tweaking the Prescaler, but that is a different story (fast signal sampling). I’m not going into that right now.
Going Further…
Is there any way to see how a ghost detector actually works when encountering ghosts? I have already built a “Ghost Simulator” for such fun experiments that you can use to test your EMF detectors as well. Details of that project will be shared in a new article.