Sewing is a complex art that requires a lot of skill, precision, and patience. So, it’s critical to be able to see what’s doing, and a well-lit needle zone is very essential. Some high-end sewing machines come with built-in lights, but most don’t, so I’d like to share a quick idea to build your own simple sewing light. Let’s get started!
See my role models
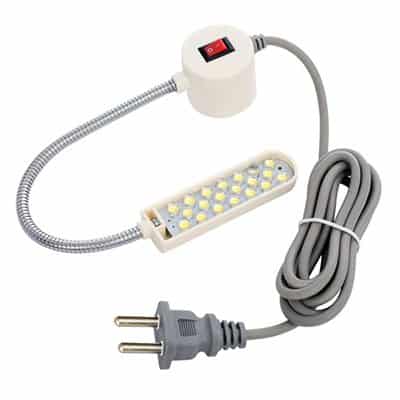
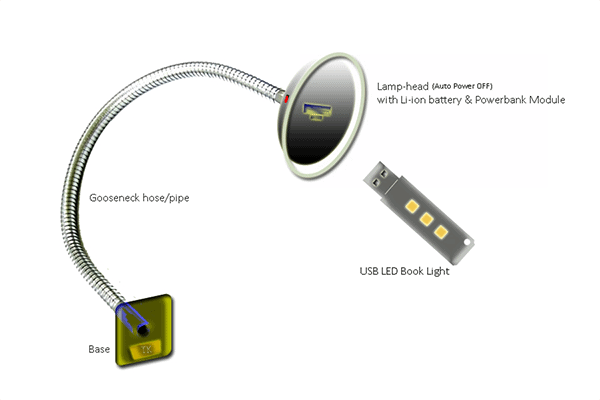
While trying to build my version of the sewing machine light I considered a lot of factors, did thorough research, and valuated many ‘eBay’ models. The most popular one is the model shown below which is a portable sewing machine light that comes with a flexible LED lamp head and a magnetic/adhesive mounting system. The long power supply cable lets you connect the lamp directly to the sewing machine’s motor or nearby power outlet at ease. Besides, the flexible gooseneck pipe adds extra versatility and more convenience. So far so good!
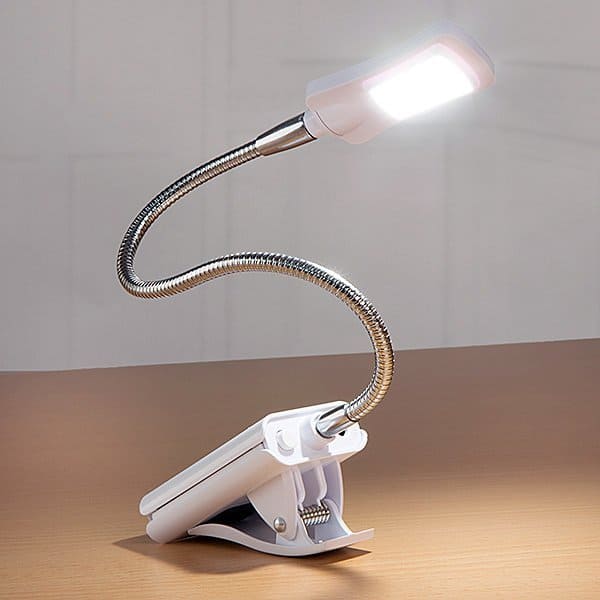
Next up is an affordable sewing machine light in the form of a clip-on flexible LED lamp that provides bright illumination and features standalone operation.
About my quick build theme
First entry in the above list is an AC230V model while the second one is a DC operated type. I’d like to go farther with the latter idea where a utile little bonus to have, giving ‘wire-free’ experience to the user, which should be the right (and safe) play in most situations.
Below, you’ll find the construction project of a pretty simple sewing machine light based on my first theme, ofcourse with build instructions and betterment thoughts. It can also be modified as a flexible LED lamp that attaches to the sewing machine or other metal surfaces through the use of a magnet or adhesive tape. The magnet/adhesive tape holds the lamp base in place, and then the user can bend the long, flexible neck around as needed. So you won’t need to worry about it being difficult or inconvenient to install. It’s perfectly sufficient for most tailors but can equally be useful at home in a crafting area or office, or even just as a reading or inspection light.
Make your first sewing machine light
Quite simply, my sewing machine light is a clever bend of one rechargeable power source and a solid-state light source. There’s ofcourse a bit of electronics in between to handle them rightly. Now see the list of key components required to make out the project with success.
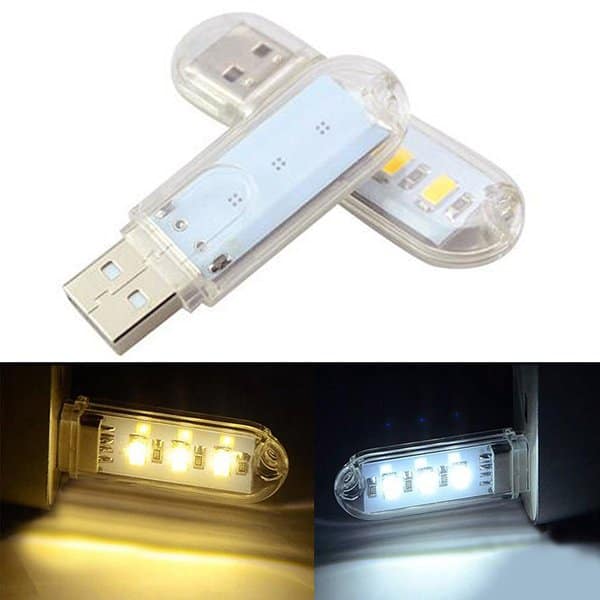
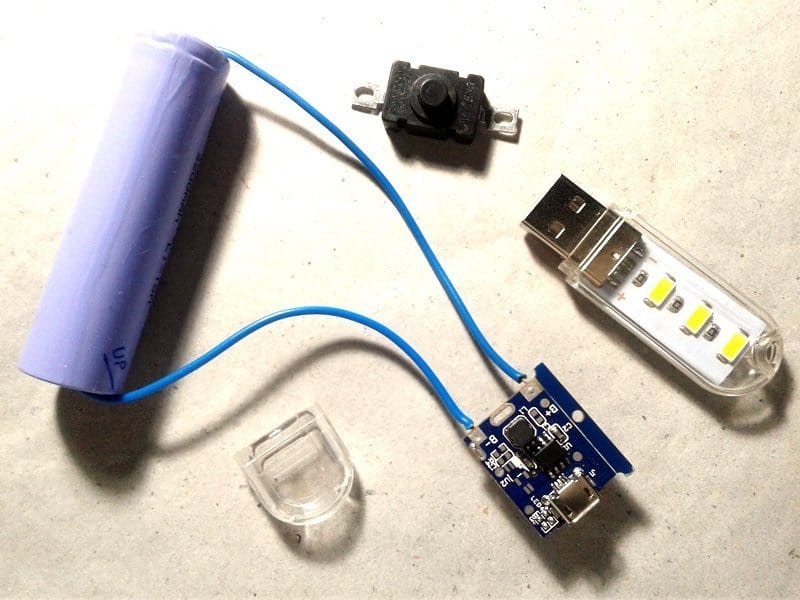
First of all, buy a cheap “USB LED Book Light” from your favorite Amazon or Flipkart seller. Current consumption of the device I got (amber light) is about 210mA at 5VDC.
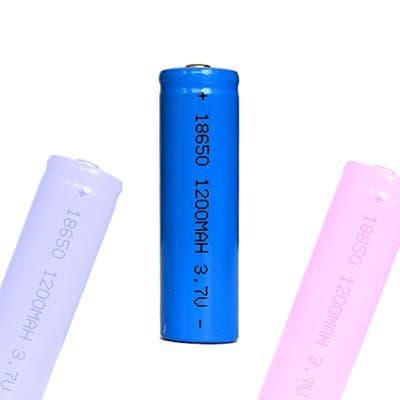
Next, grab one 18650 type 1S lithium-ion (3.7V/1200mAh Li-ion) battery. The capacity (mAh) of the selected battery is not vital but never go for a type with less than 1000mAh rating as it doesn’t make sense here.
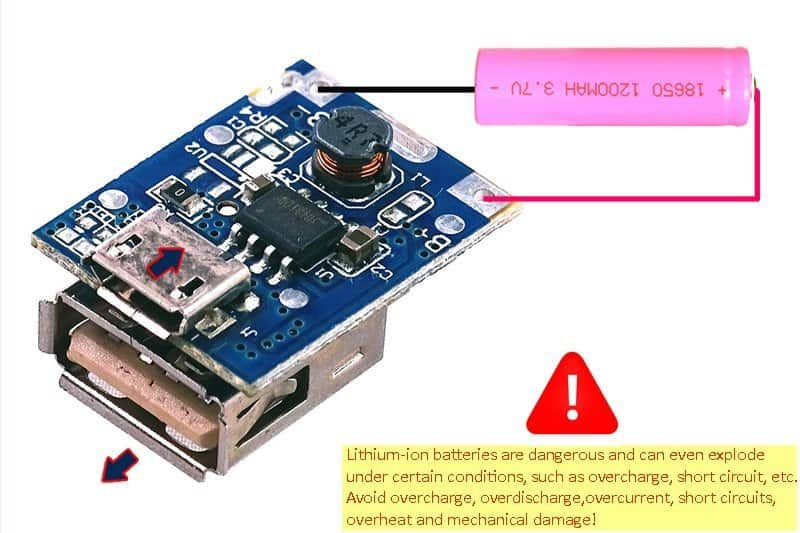
Finally, you need to prepare the electronics, merely a little circuit comprises one 1S Li-ion battery charger, and one DC-DC boost (step up) converter (3.7V to 5V). As I’m too lazy to play with any chip parts this time (designing one properly takes a bit of skill and good component selection), I barefacedly suggest pre-wired Chinese electronics – just pick one piece of the seemingly popular “5V/1A Power Bank Module”, again from Amazon or Flipkart.
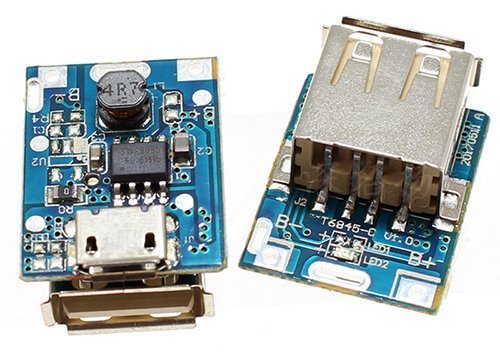
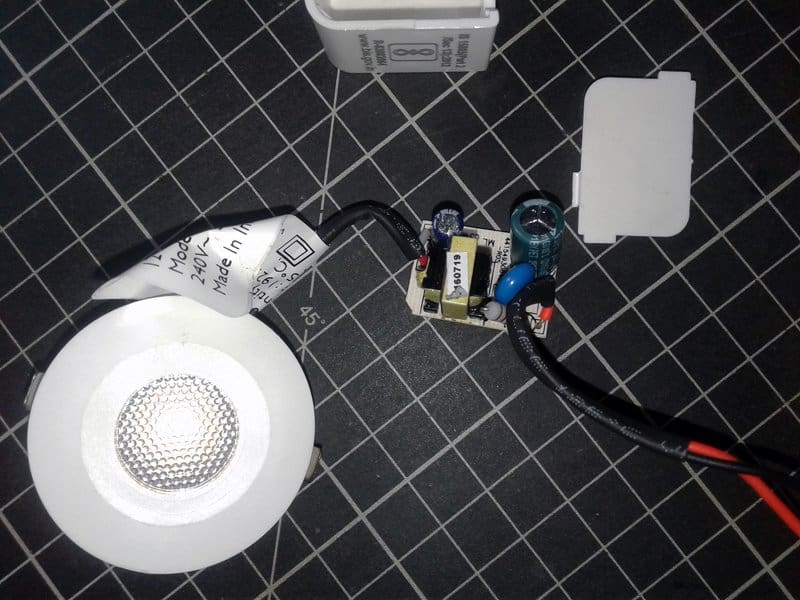
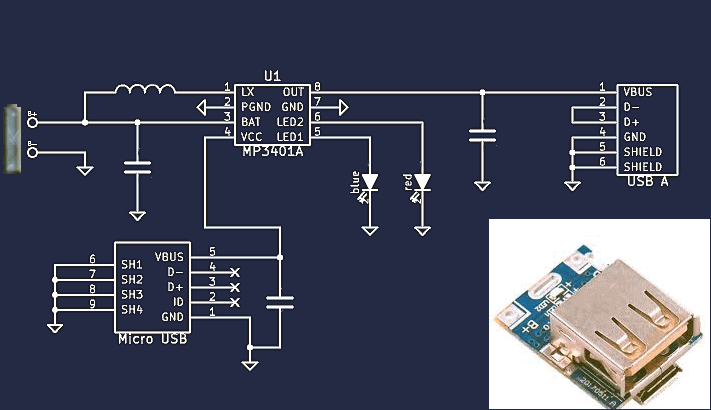
This little power bank module is based on MP3401A (thanks for not rubbing it off) all-in-one controller chip, claims to have linear charging, synchronous boost discharge with up to 700mA charge current and 1A output current. Charge termination is C/10 with 4.2V charge voltage termination accuracy of 1%. A micro-USB connector is employed for power input to charge the ‘unprotected’ 18650 battery. Surprisingly many chip parts locations are left unpopulated, pointing this may be a ‘lite’ version of the original design. Besides, there’s only one red indicator LED. The red LED indicates charging status (blinks during charging, steady when charged). The red LED also lights up when a load above approximately 20 mA is connected and starts blinking when the battery gets low.
It’s noted that the boost converter doesn’t run continuously when there’s no output load, and shuts down after around 5 seconds incase of a no load (or a very low current load) condition. It’s also observed that the MP3401A chip heats up quite a lot during charging, however, it works and seems to be fairly decent, considering the low price and small size.
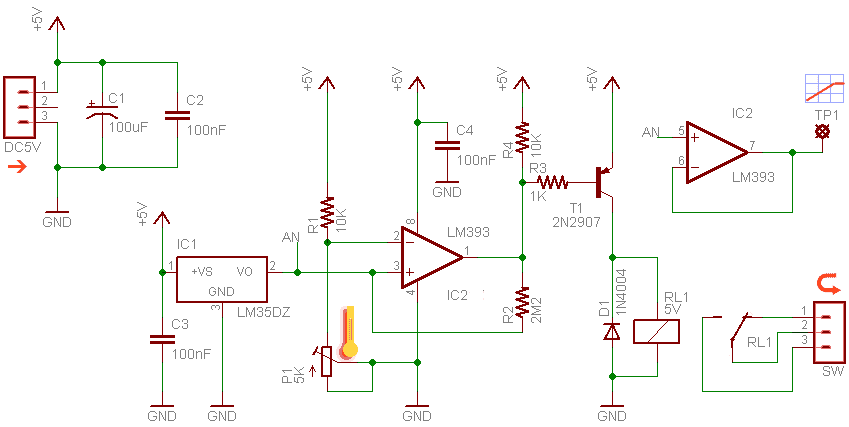
This is a copy of the original Chinese schematic of the above-discussed power bank module, provided by me but without any warranty.
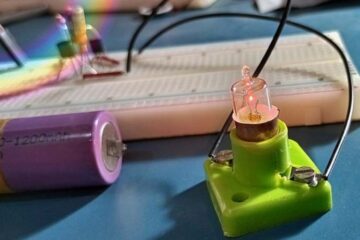
Further down the page, you’ll get the recommended wiring diagram, and a glimpse of the quick experimental setup laid on my workbench. My only worry so far is about the difficulty in wiring an on/off switch aright to control the output but that’s not a serious issue because the USB light head can be attached to and detached from the USB ‘A’ female port without taking much pain!
Needless to remind you, after a detailed inspection, ensconce the final assembly inside a rigid plastic (round/ rectangular) shell, leaving off the flexible light head. The light-weight shell itself should be a little rough in its construction as it’s intended to be used in a harsh (dusty/oily) environment.
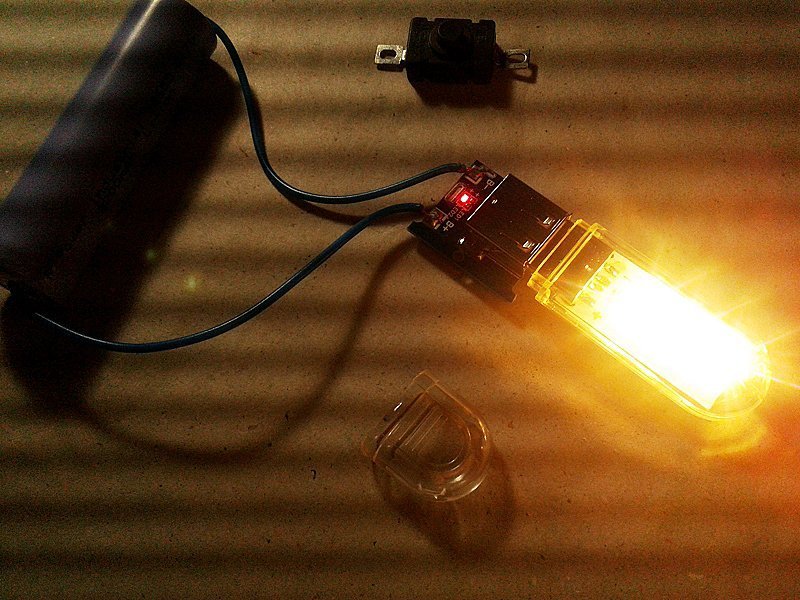
Look below to find casual shots of my evaluation setup that worked pretty well.
Getting it all together
Finally, some mechanical work is called for but fortunately not much. The entire assembly can of course be built into a single enclosure mounted to the surface using a flexible gooseneck hose, making a compact sewing machine light (see the recommended framework below).
The above-suggested arrangement also provides a good way of modularizing the overall build, as the same system can easily be used in conjunction with different USB LED lamps. If you don’t like to use a readymade USB lamp, simply build one yourself by following the below schematic. If so, you can also add one small on/off slide switch in your PCB for your own convenience (see the sample art next to the schematic).

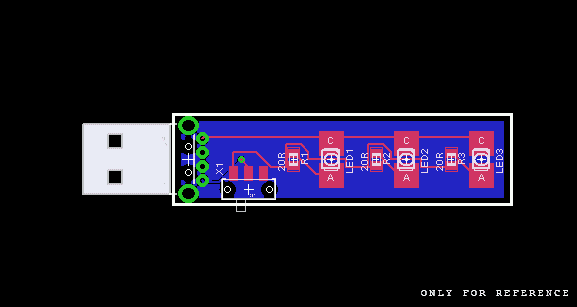
As observed by me, the 5630 SMD amber and white LEDs are by far very bright. It’s not only due to the larger lighting surface I think, but there’re some other factors that go into the output (luminous flux/lumens) of the LEDs. That means certain things in relation with the design of the chips and the amount of power that they draw.
Finally…
To be honest, I’ve not complete the project yet as I failed in multiple attempts to place my online order for some project enclosures on Corona Virus Days (COVID 19). Since almost all online sellers suspended their operation indefinitely, I started trying to do something different with pinewood sheets and acrylic sheets lying around. I need a bit more time to accomplish the work, but I would certainly post photographs of the final build in the comments box below after a few weeks.
As always, just drop a line if you need any help, I’m happy to offer advice!