Using light is a common way to trap fish in fishery industry. Attracting fish by using artificial light source is to induce them to form a large shoal at night taking advantage of fish’s photo taxis. Since fishing light attractor is indispensable for most of fishing fans or anglers., here’s a primer to help you build your own low-budget fishing light attractor!
What’s a fishing light attractor?
According to Wikipedia, the fishing light attractor is a fishing aid which employs lights attached to structure above water or suspended underwater to attract both fish and members of their food chain to specific areas in order to harvest them. It has been known for a long time that a light attracts fish, shrimp and insects at night. Note that the best color for a light attractor should be green or blue – the space colors of fish and members of their food chain. Moreover, a perfect fishing light would have the following properties: 1) high intensity, 2) emit its light in a color similar to the fishes space (blue or green), 3) be powered by a portable electrical supply and 4) be submersible.
Simply an inspired project
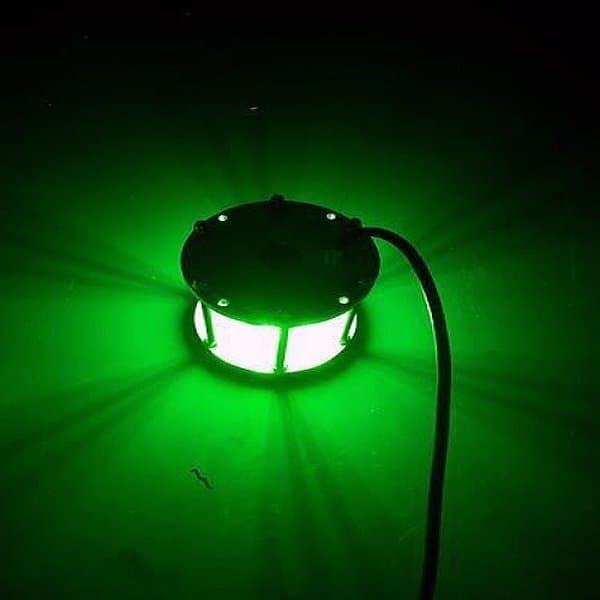
Recently I was inspired by one eBay item – a submersible fishing light that shines a bright green light directly into the water. A brief inspection of the electronics told me that I too can make such a fishing light at home but using inexpensive and commonly available electronics parts and some other cheapo accessories. Following is the eBay photograph of the 12VDC submersible fishing light with 36 green LEDs.
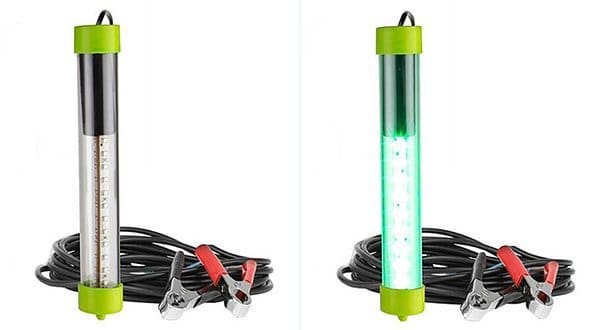
Actually, in these times we can easily find green, blue, white, and yellow color underwater LED (360° beam angle) fishing lights in the market. Anyway, green is believed as the best color for penetration in freshwater lakes and other intercostal waterways. In areas with poor visibility, green will also make the water appear cleaner and reflect less particulate. So, let’s start with the color of growing grass!
More on the build process
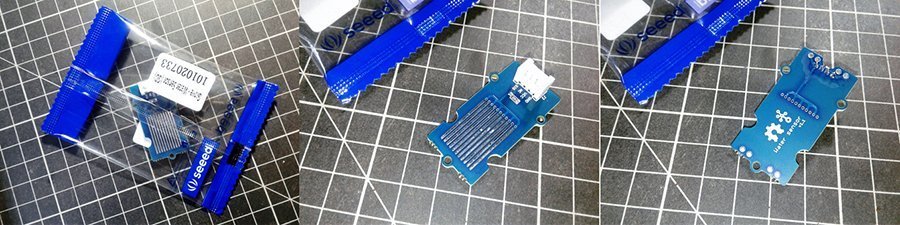
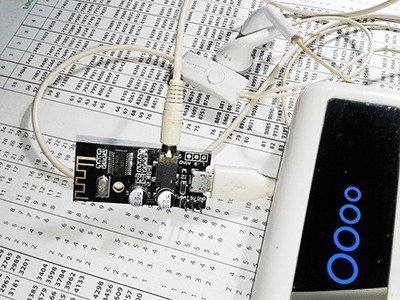
At this time you can find out how I made the first model of my fishing light attractor. First of all note that after a little further research and experimentation I determined to build a low budget model with a water-sensor switch that senses the presence of water and automatically powers the light source once water is detected. So, initially I purchased one Grove-Water Sensor (v1.1) from an Indian online seller.
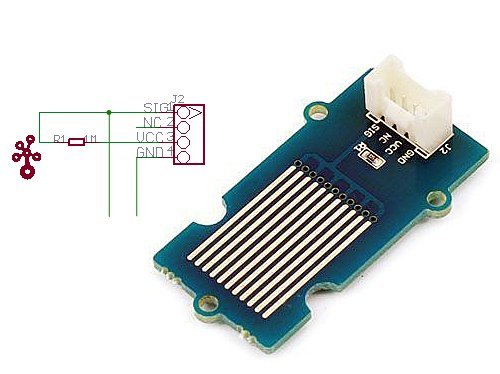
In the below picture you can also see its schematic drawn by me. The one and only component used in the Grove-Water Sensor (v1.1) is a 1MΩ resistor to give a high-level output signal in dry state, and a low-level output signal in wet state.
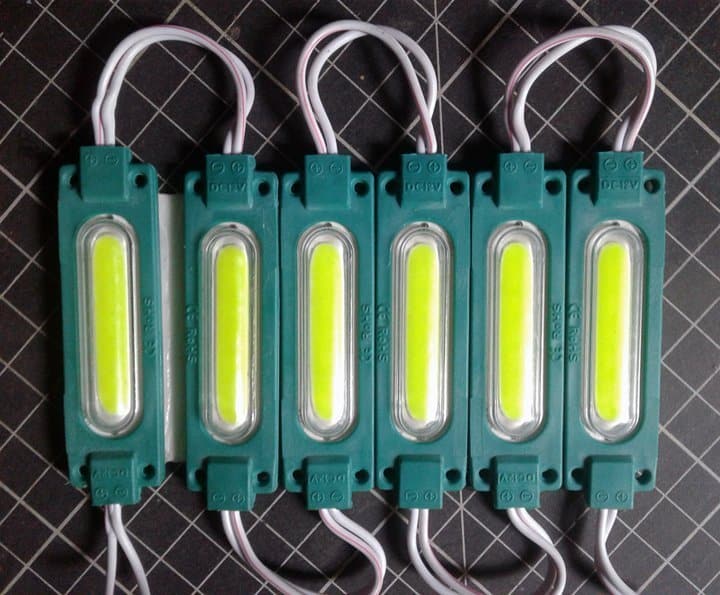
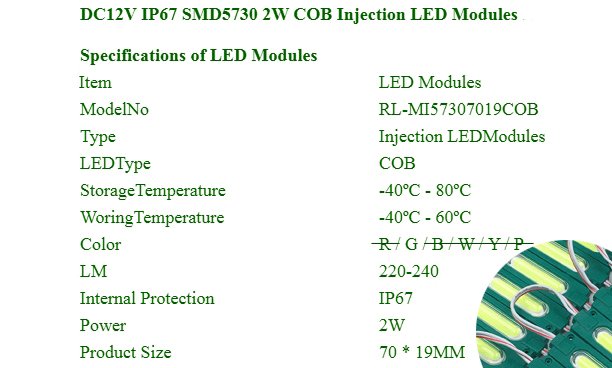
The second pick was ofcourse the LEDs. Fortunately, I got a bunch of ultra bright, waterproof, green COB LEDs from another online seller for cheap. One SMD5730 LED module in the string holds 6 chip LEDs, and is rated for 12VDC operation. Power consumption of the single module is about 2W at 12VDC. You can do a Google search for “COB LED injection module DC12V Waterproof IP67 Module” to find and buy them handily.
Now see its key specs (thanks to the vendor):
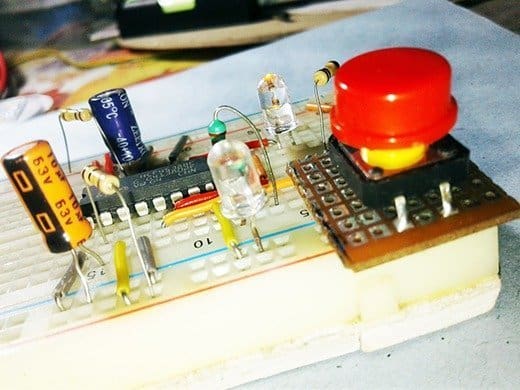
And then, I rigged up a small electronic circuitry to work as a ‘translator’ i.e. to help the Grove-water sensor to drive the COB LEDs as and when required. Below you can see its schematic centered on the ubiquitous 555 timer chip.
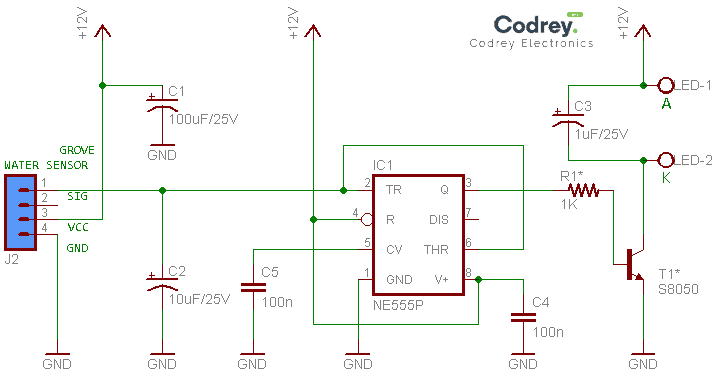
Needless to say, the 12VDC circuitry is optimized to work entirely with the Grove-water sensor module (can work in both fresh water and salt water). So if you want to use some other water sensor module here, be prepared to carry out requisite modifications. Likewise, if you’re using a different LED light head, you may need to change the S8050 driver transistor (T1) and/or the 1KΩ base resistor (R1) to cope with the revision of the principal design. Further, it might become necessary to change the value of the 10uF capacitor (C2) in such situations. The 10uF capacitor is included intentionally to provide a little turn-off delay of around 10 seconds – an absolute must to ensure smooth operation in turbulent water.
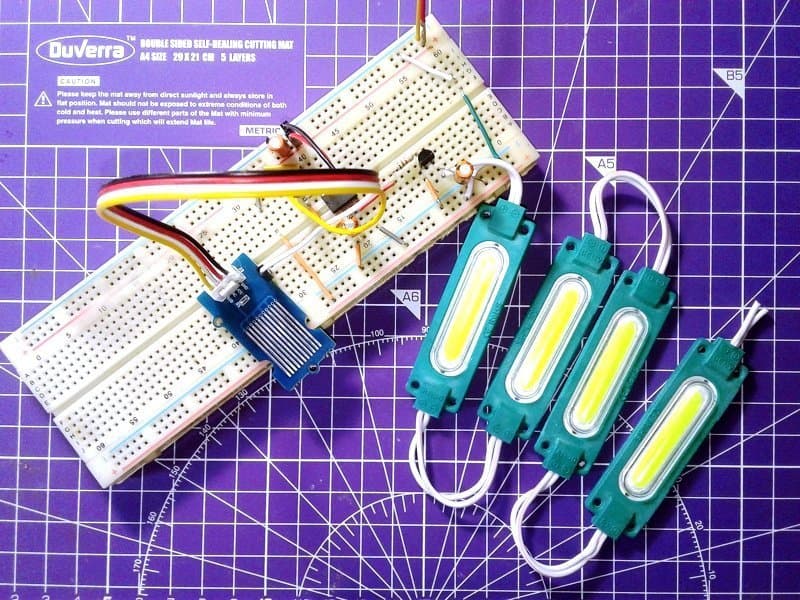
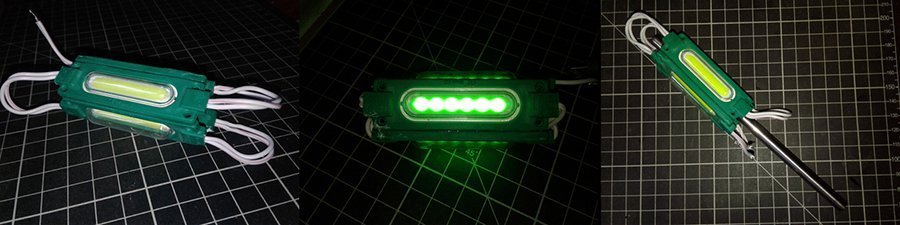
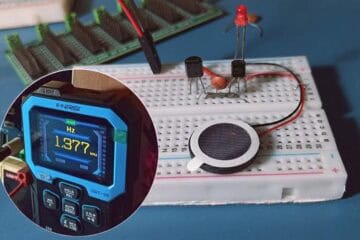
As usual, I made an initial test with a breadboard model, and it worked with success. See the casual snaps.
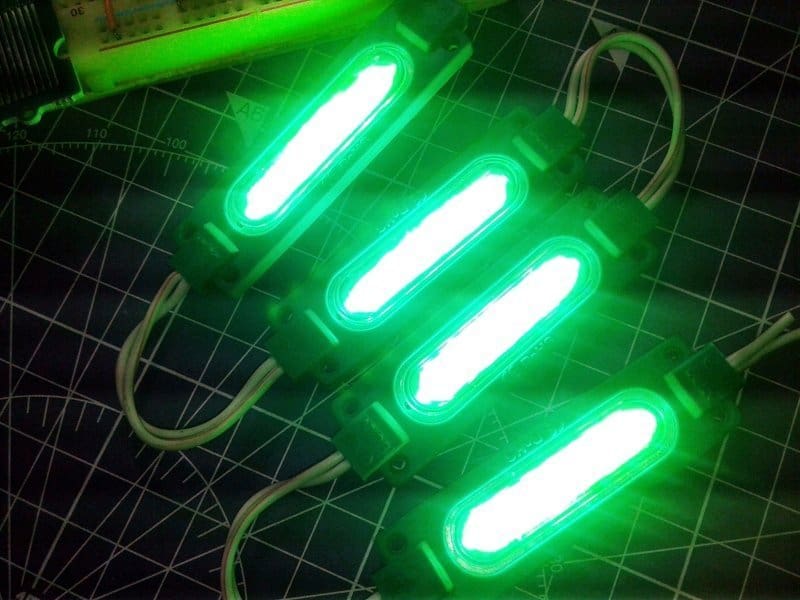
Note that, to make the 360° light head, finally I affixed the four green COB LED modules (wired in parallel) with glue, put a small support pipe in the middle, and run the power cable along the support pipe (see the random snaps). If you have similar goals, feel free to create your own setup like this one and tweak it as necessary to meet your needs.
Enclosure & Daydreams
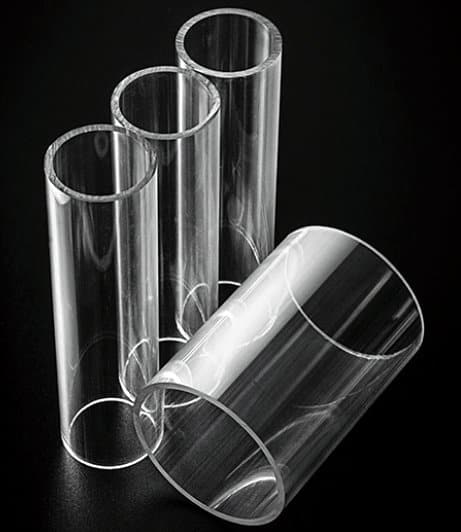
Nowadays transparent polycarbonate tubes in various diameters and wall thicknesses are easily available at reasonable prices. You can order impact resistant polycarbonate tubes per piece in webshops (look below). And then, build a compact waterproof enclosure as per your individual requirement and taste – hope you’ve an artistic mind!
Waterproofing joints is a crucial requirement when fabricating enclosures that will be submerged underwater, or assembled near water. In order to keep water and air out, a breathable, water-resistant sealant must be used to fill gaps while still allowing for expansion and contraction. Silicone is one of the most frequently used sealant to achieve a waterproof, protective joint seal. If properly applied, silicone is a multipurpose sealant that creates a waterproof, protective seal, and can last many years.
Even though I didn’t get my final fishing light attractor (underwater fishing light) model yet, I already visualized it and bought a couple of transparent polycarbonate bottles (not polycarbonate tubes on account of certain reasons). Below you can see the dreamed-up version of my proposed model.
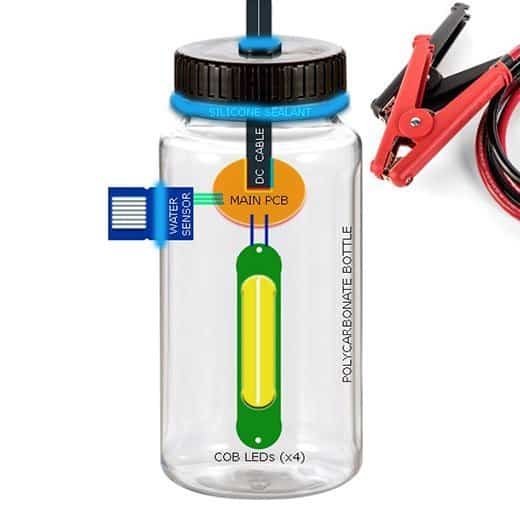
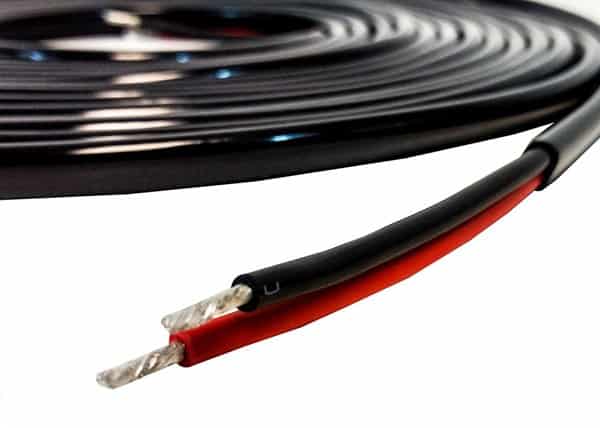
I also bought a bunch of 14AWG, twin-wire 12V cable spools (10ft each) for better underwater cabling (the cable can then be extended freely if necessitated – ha ha). Usually, underwater fishing lights are submerged several metros below the boat or over a net.
Next things to do
My next plan is to replace the green LED light head with a multicolor LED light head so that the operator can remotely change its color and intensity through the connection cable. It’s worth noting that, at sea, the color spectrum dissipates underwater of approximately:
- Red -15 feet
- Orange -30 feet
- Yellow -65 feet
- Green -98 feet
- Blue -197 feet
Well, the following is about the aforesaid second iteration of my fishing light attractor. It ofcourse requires a decent amount of setup, but once it’s up, it’s good to go, and it will serve its purpose of filling the gap exist between having an idea and doing something more fruitful with that idea. That’s all for now. Remember to take it slow, plan everything out in advance and enjoy the project. Good luck creating your own underwater fishing light. See you again soon!
Thank you for this good advice it helped so much