There has been a drastic and steep increase in the number of monkeys coming into my backyard over the last few months. Below you can see a shot taken by my surveillance camera. So, naturally I started thinking about setting up a make-do handheld monkey scare device using a few common electronic parts lying around my workbench.
I admit that this old news published by Bangalore Mirror also inspired me a lot.

In this post, I’m going to share a few things about the design idea of my laser monkey scarer. I hope this post will be useful for those who’re interested in making simple devices that scare monkeys. However, note that my project is still in its infancy and the prototyping phase is not yet complete. Oh well, it’s still an interesting trial!
So, I’ve recently become interested in making a simple monkey scarer. I was sorting through some of my junk bin stash the other day and came across various servo motors and laser pointers.
Next day I thought it would be fun to try and get a tiny electronics setup controlling a laser pointer glued securely on the horn of a sweeping servo (I’ve done something similar before, I remember).
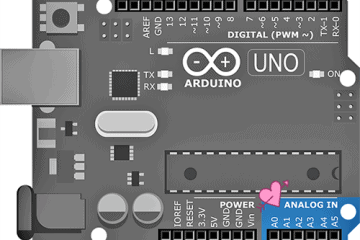
So, for a quick and dirty test, I wired up an RC hobby servo and an Arduino Uno as shown below.
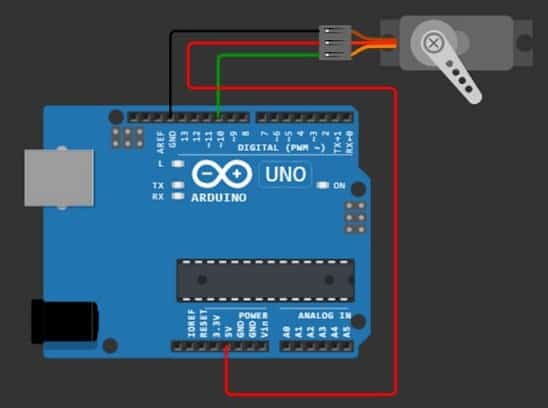
And then, ran my servo sweep code which’s only a bare Arduino Sketch that makes a servo rotated left and right forever at random. It worked perfectly. Yup, we’re getting there!
The code to do the random sweep is pretty simple – even a novice can understand it!
#include <Servo.h>
Servo tkservo;

int tkpos;

void setup()
{
tkservo.attach(10);
}

void loop()
{

tkpos = random(180);
tkservo.write(tkpos);

int delayAmount = random(800,2800);
delay(delayAmount);
}
RC hobby servos are wonderfully useful little devices. Anytime you need something to rotate to a specific position, think of the hobby servo. In order to test my idea, I used a fairly low cost metal gear micro servo – the TowerPro MG90S (such as the one pictured below).
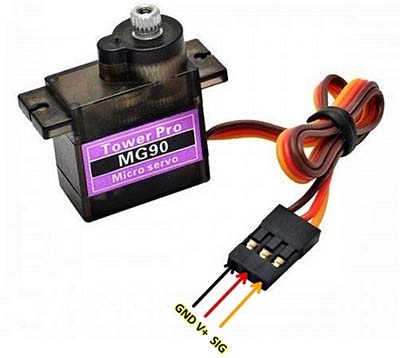
TowerPro MG90S (https://www.electronicoscaldas.com/datasheet/MG90S_Tower-Pro.pdf) will be a good pick for applications in low-cost robotics and automation. This servo motor can be powered directly from any 5V Arduino board, and can be controlled using the servo library included in most Arduino IDEs.
Its key specifications:
- Weight: 13.4g
- Dimension: 22.5 x 12 x 35.5mm
- Stall torque: 1.8kgf-cm (4.8V )
- Operating speed: 0.1s/60°
- Operating voltage: 4.8V
- Dead bandwidth: 5µs
Now, you may go through this link to understand it a little better https://www.electroschematics.com/micro-servo/
My laser pointer (https://en.wikipedia.org/wiki/Laser_pointer) is a 100mW (as advertised) 532nm Green Laser Pointer (see below).
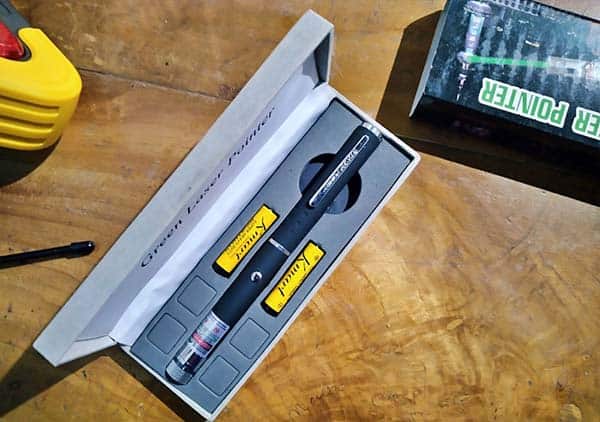
WARNING! Laser beams should never be aimed at aircraft, moving vehicles, or strangers. The very bright small spot makes it possible to dazzle and distract drivers and aircraft pilots, and they can be dangerous to sight if aimed at the eyes!
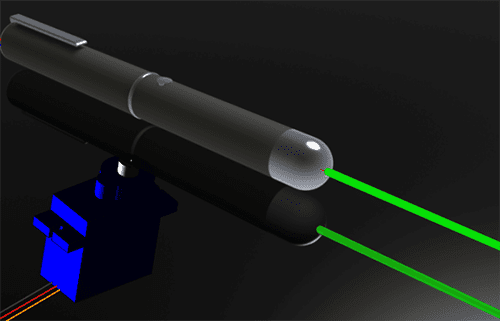
As the project is not yet complete, I cannot show the final mechanical setup of the laser monkey scarer at this time. Anyway, you can see a rough idea of how to mount the laser pointer(s) on the servo horn/arm in the drawing below (Original images are from GrabCAD Library).
Green laser pointer is awesome but it’s a power-hungry device. Besides, green laser diodes generally have very precise drive requirements, that means, too little current and they don’t lase and too much current and they die entirely.
Well, what I’ve in my hands is a 3V (1.5V AAA x2) battery-operated green laser pointer that has a tiny internal electronic circuitry to limit the laser diode current (instead of the single resistor trick usually found in common red laser pointers). Since the internal driver circuitry sets the operating current to a safe value between threshold and maximum, it takes care of battery voltage variations up to an extent.
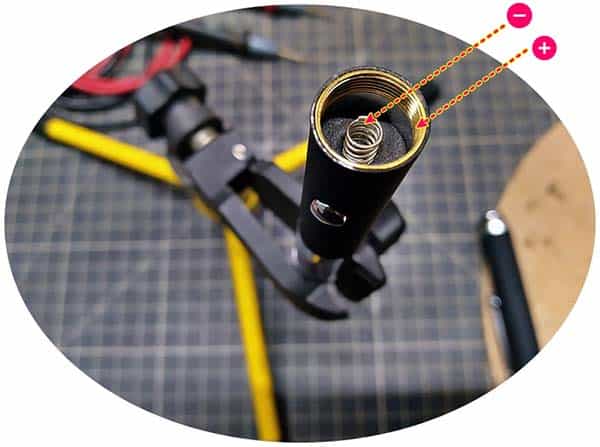
So, when it comes to run the green laser pointer from an external power source, the best thing to do would be to obtain a 1S lithium-ion battery (3.7V) with an adequate current that matches the capacity of the laser pointer’s battery. Then, add a regular silicon diode (1N4007 for example) in series with the power supply rail to introduce a significant voltage drop (just to make the external voltage at the laser pointer somewhat the same as when it’s powered with the internal battery). Also, note that the metallic body of the laser pointer is its positive (+) rail.
It’s easy to keep the laser pointer always on with a few simple tricks. We can use a nylon cable tie or plastic binder clip of a suitable size to hold the power button permanently. This is the simplistic way to keep your laser pointer always on without breaking its enclosure to do some power button hacks.
The below image is borrowed from Instructables (https://www.instructables.com/Keeping-your-Laser-Pointer-on-easily-with-Binder-o/).

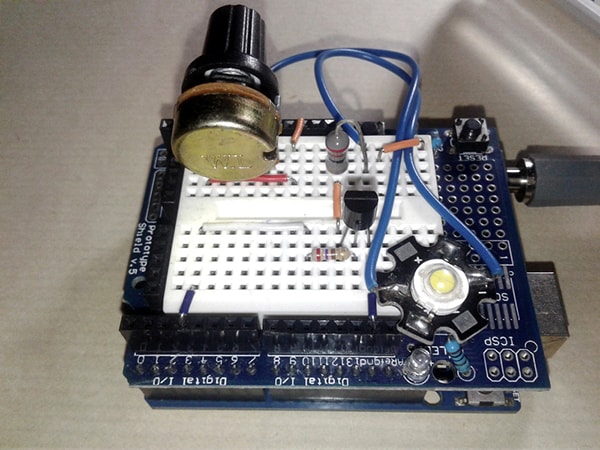
Next is to switch the laser pointer power supply on and off through a digital I/O pin of Arduino. This obviously needs a bit of external hardware and a few more lines of code.
I haven’t tried this option yet, because the main purpose is to use my prototype as a handheld device similar to a pocket torch with an automatically sweeping light beam. However, in perdurable installations, add-on features like these are absolutely essential, I know.

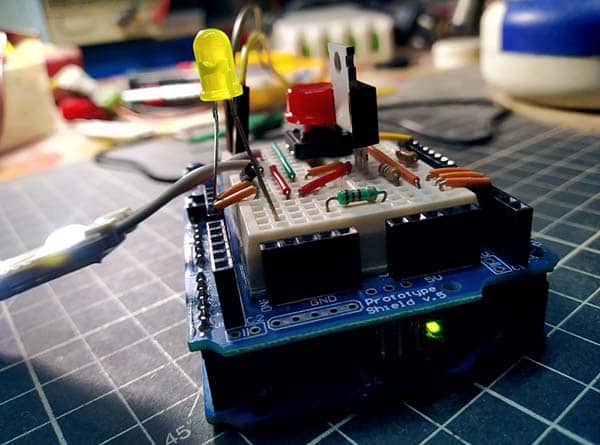
Finally, below is a candid shot from my workbench taken at the initial stage of this project.
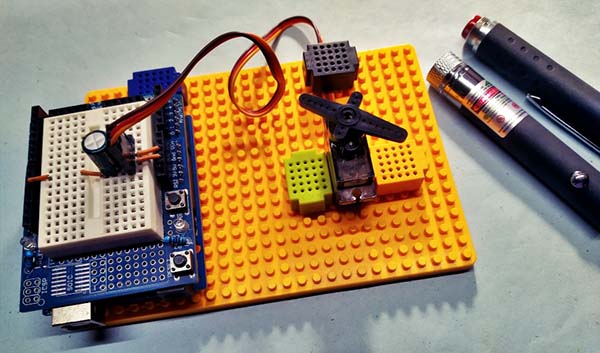
Yikes, very much still a dirty experimental setup. Plenty of work still to do, but that will be for another time and blog post.
Oh, I almost forgot it! There is also a 470uF/25V electrolytic capacitor parallel to the power leads (5V & GND) of the MG90S servo motor.
So, what do you think? We got the idea to build a laser monkey scarer. But does it fit the intended purpose? After some extensive field trials, I think I can report back. Anyway, if you’ve any questions on this idea or would like to make suggestions, feel free to leave a comment. I’d love to hear about your experience. See you then!
Author’s Note: You can now watch a quick video clip related to this post through this link (there are no commercial motives behind this) https://youtu.be/GI9oV7a6BTQ Have Fun!