Now is the time to make something that lights up! As promised in one of my previous posts, I’m sharing some crude design ideas for making your own coaster that wakes up as it listens to some nearby sound /music playing. Okay, let’s get started!
For the project we will need the following key parts:
- Arduino Uno (or Nano)
- Sound Sensor Module
- Common LEDs/LED Strips of your choice
In this build we’ll make a good-looking light that reacts to all sounds and music, using simple components and some basic Arduino code. Well, learn how to flash LEDs/LED strips to the beat of music using a small sound sensor module and a microcontroller.
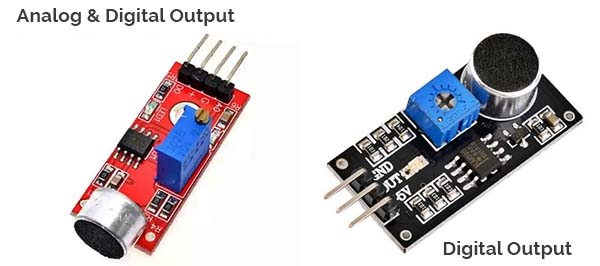
First off, note that a standard sound sensor module provides both analog (AO) and digital (DO) outputs, there’re a few exceptions though. However, we will be using one of those outputs in this project at a time.
Moreover, we can supply power to the Arduino board using any clean +9V to +12V power source through its onboard DC input jack but we might need another appropriate external DC power supply when employing mighty LEDs or LED strips. More useful pointers will be added as this write-up progresses. So, no need to think more about that now!
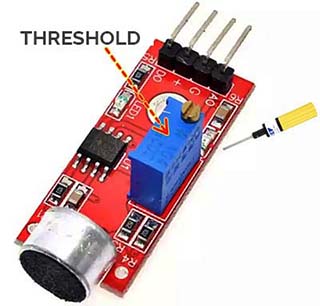
Following is a simple piece of code to handle the digital output (DO) of a sound sensor module. In this setup, Arduino’s onboard LED (D13) flashes when it receives a logic-low level input signal available from the sound sensor module. This happens only when the sound level picked up by the microphone is above the threshold value defined beforehand by the sensitivity adjustment trimpot of the sound sensor module.
Needless to say, we can use the D13 output to drive more external LEDs, however, we need to bring a suitable BJT/MOSFET-based LED driver circuitry if the extended setup demands operating currents above 40mA (and/or operating voltages above 5V). Hope you are familiar with similar LED driver circuits!
int ledPin=13; // LED Pin = D13
int sensorPin=12; // DO Pin = D12
boolean val =0;

void setup(){
  pinMode(ledPin, OUTPUT);
  pinMode(sensorPin, INPUT);

}

void loop (){
  val =digitalRead(sensorPin);
    if (val==LOW) {
     // if (val==HIGH) {
    digitalWrite(ledPin, HIGH);
  }
  else {
    digitalWrite(ledPin, LOW);
  }
}
This is a slightly revised version of the above-discussed code. Now the LED/LEDs wired to the D9 pin delivers a dim glow in an idle state but wakes up at once in full brightness when the sound sensor module’s output is at a logic-high level. The DO pin here is D8. Again, think of an LED driver circuitry for your project extension!
#define LEDstrip 9 // LED PIN = D9

void setup()
{
  pinMode(8, INPUT); // DO Pin = D8
  pinMode(LEDstrip, OUTPUT);

}

void loop()
{
  boolean soundstate = digitalRead(8);
  if (soundstate == 1) {
    analogWrite(LEDstrip, 64); // ~1.2V
    delay(100);
  }
  else {

    analogWrite(LEDstrip, 255); // ~4.9V
  }
}
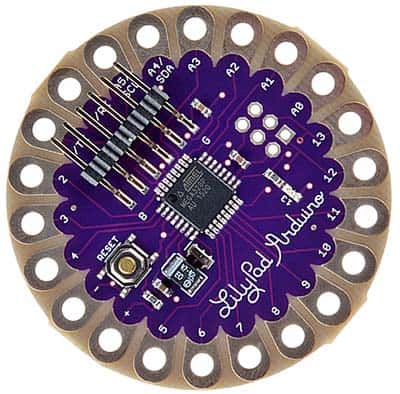
In order to get maximum compactness, you may use an Arduino Nano or Pro Mini instead of the Uno for lights-up coaster projects. The LilyPad Arduino will be another cheerful pick here (https://www.mouser.com/catalog/specsheets/lilypad.pdf). If this is your first LilyPad attempt, start your homework well to get into minimalistic LED projects (https://learn.sparkfun.com/tutorials/choosing-a-lilypad-arduino-for-your-project/all).
Next is the experimental code for a 3-channel sound-activated RGB LED light-up coaster. A sound-activated LED Coaster is the perfect way to illuminate any beverage. You can use your homemade light-up coaster at your next soiree or nighttime party to impress your guests. Below is an enclosure idea for your RGB LED light-up coaster (thanks to internet).

int ledPin1 = 13;//D13 = LED1 Output
int ledPin2 = 12;//D12 = LED2 Output
int ledPin3 = 11;//D11 = LED3 Output
int sensorPin = A0;//A0 = AO Input
int val = 0;

void setup() {
  pinMode(ledPin1, OUTPUT);
  pinMode(ledPin2, OUTPUT);
  pinMode(ledPin3, OUTPUT);
  pinMode(sensorPin, INPUT);
  Serial.begin (9600);//For Debug Purpose
}

void loop () {
  val = analogRead(sensorPin);//AO Sound Level
  Serial.println (val);


  if (val >= 670) { //LED1 Threshold
    digitalWrite(ledPin1, HIGH);
  }
  else {
    digitalWrite(ledPin1, LOW);
  }

  if (val >= 780) { //LED2 Threshold
    digitalWrite(ledPin2, HIGH);
  }
  else {
    digitalWrite(ledPin2, LOW);
  }

  if (val >= 890) { //LED3 Threshold
    digitalWrite(ledPin3, HIGH);
  }
  else {
    digitalWrite(ledPin3, LOW);
  }
}
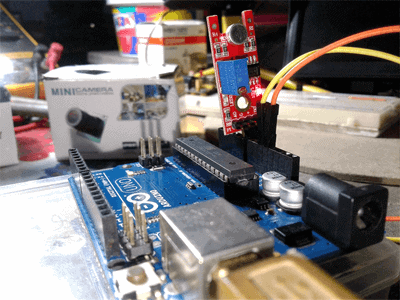
This time we need the analog output (AO) of a sound sensor module as that’s better here. And, SeeedStudio’s Grove Sound Sensor will be a good candidate for this application (https://www.electroschematics.com/sound-activated-switch-2/).
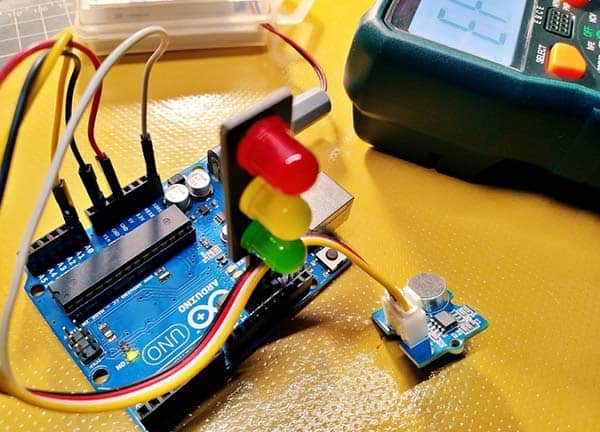
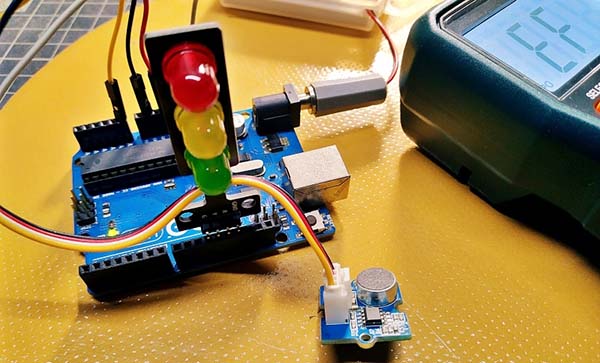
I already have a large collection of discrete R-G-B LEDs and flexible LED strips. But for the quick progress of the experiment, I tested my crude setup with an RYG Traffic Light LED module.
In a common (12V/Common-Anode) non-addressable RGB LED strip (see below), each LED is capable of displaying red, green, blue, or all three (white), driven by three input power rails. All the LEDs display the same colour at any one time, but the colour can be manipulated by switching/varying the voltage applied to each of the three power inputs (https://learn.adafruit.com/rgb-led-strips?view=all).
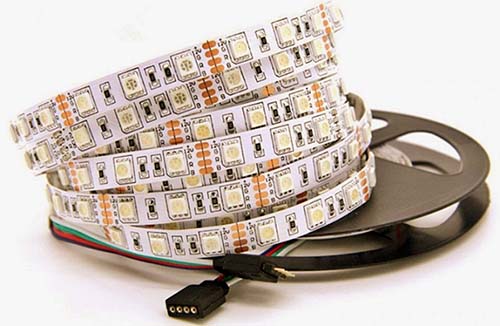
The common 12V RGB LED strip will draw about 24W per reel (5 meters), or about 2A. Take note that whenever you are driving something which demands higher voltage and current than your Arduino can provide, you need something in between to stop your delicate microcontroller from getting fried!
One of the simpler ways to do this is to use a logic-level N-Channel Power MOSFET between the final load and the I/O of the microcontroller. The Power MOSFET should be wired as a low-side switch (https://www.rohm.com/electronics-basics/ipds/high-side-and-low-side-drive). The Si2302 (SMD code A2SHB) is the logic-level Power MOSFET I regularly use in my little LED projects (https://www.sunrom.com/p/si2302-a2shb-sot23-n-ch-mosfet).
That’s all for now. Well, stay tuned here to get more fascinating digital lighting projects. Make the sparks fly!