At this time, we’re going to generate various sounds using an Arduino microcontroller!
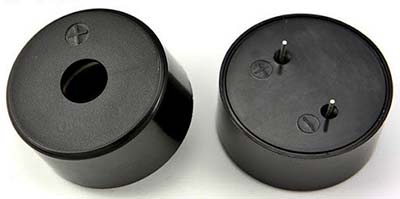
We’ll initially make sound using a regular piezoelectric buzzer which makes use of a material that has piezoelectric properties. When a material is piezoelectric, applying an electric charge will cause the material to stretch or expand a very small amount. By pulsing the piezoelectric buzzer on and off we make the piezoelectric material inside quickly expand and contract, and this produces the vibrations we hear in the air.

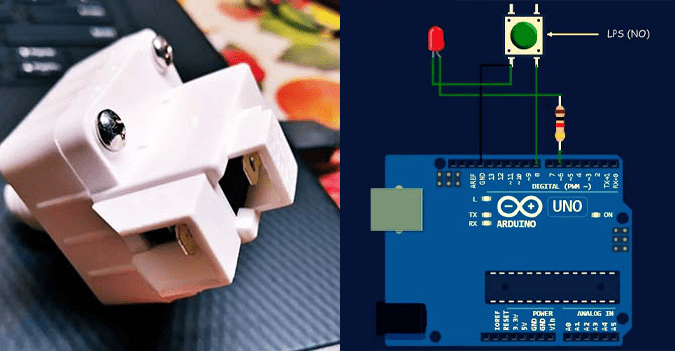
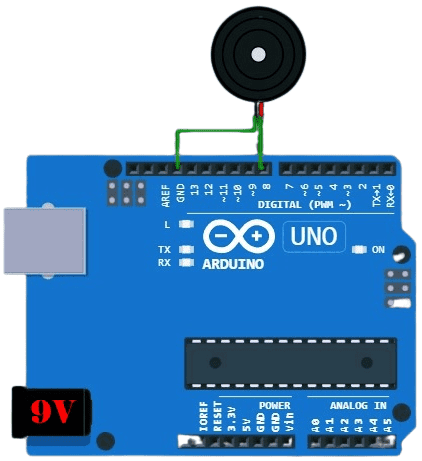
Okay, to start the experiment, follow the below steps. Since the only component, we’ll need is the piezoelectric buzzer, the hardware setup in this experiment is very simple. The only catch is that our rudimentary loudspeaker (the piezoelectric buzzer) has a polarity as it’s an “active’ piezoelectric buzzer. Note, an active piezoelectric buzzer is a piezoelectric buzzer with an internal drive circuit (http://www.farnell.com/datasheets/2171929.pdf).
- Connect the buzzer’s negative pin/wire to ground (GND) of Arduino
- Connect the buzzer’s positive pin/wire to D8 of Arduino through a 150Ω ¼ W resistor
- Upload the below Arduino Sketch (code) to Arduino
- Power the Arduino with a 6F22 9V battery
int piezoPin = 8;

void setup()
{
pinMode(piezoPin, OUTPUT);
}

void loop()
{
digitalWrite(piezoPin, HIGH);
delay(500);
digitalWrite(piezoPin, LOW);
delay(500);
}
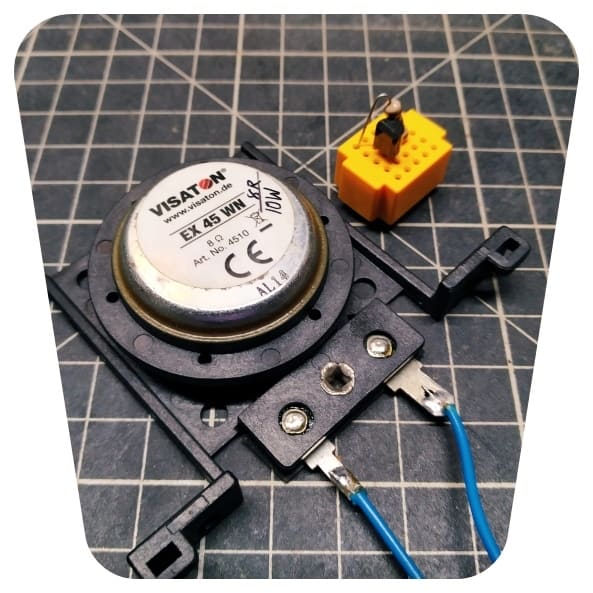
If you want to experiment further with this idea, then pick a “passive” piezoelectric buzzer (external drive type) also known as contact microphone, and:
- Connect the buzzer’s negative pin/wire to ground (GND) of Arduino
- Connect the buzzer’s positive pin/wire to D8 of Arduino (see below)
- Upload the below code to Arduino, and power up the setup as done before
Note, the passive piezoelectric buzzer is an electronic component made of a combination of two discs of different materials. One of them is metallic and the other one is usually ceramic, having piezoelectric properties. When applying a voltage to the component, the materials will repel each other, making an audible click (making the voltage difference zero will cause the materials to return to their original position, again making a click sound). By applying a voltage of a sufficiently high frequency, the click produced by the piezoelectric will modulate into an audible tone (https://www.murata.com/~/media/webrenewal/support/library/catalog/products/sound/p37e.ashx)
int piezoPin = 8;

void setup() {
pinMode(piezoPin, OUTPUT);
}

void loop() {
for (int i = 0; i < 80; i++) {
digitalWrite(piezoPin, HIGH);
delay(1);
digitalWrite(piezoPin, LOW);
delay(1);

}
delay(50);
 for (int j = 0; j < 100; j++) {
digitalWrite(piezoPin, HIGH);
 delay(2);
digitalWrite(piezoPin, LOW);
 delay(2);

 }
delay(100);
}
The Arduino sketch shown above will generate two different tones by turning on and off a piezoelectric buzzer at different frequencies using a delay.
By this stage, keep note that the function delayMicroseconds() is much more appropriate for sound generation because you’ll get a better time resolution to create a richer selection of tones. Below is the revised Arduino Sketch.
int piezoPin = 8;

void setup()
{
pinMode(piezoPin, OUTPUT);
}
void loop()
{
digitalWrite(piezoPin, HIGH);
delayMicroseconds(1136);
digitalWrite(piezoPin, LOW);
delayMicroseconds(1136);
}
The sound output from the passive piezo buzzer was so quiet, so I added a transistor to raise the tone output of the piezoelectric transducer buzzer (see below).
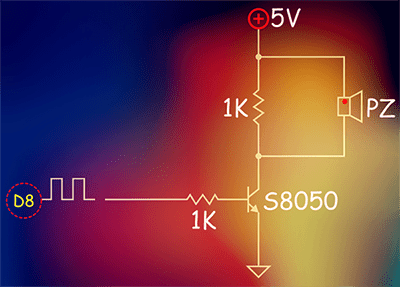
Here you can find more interesting ideas to increase the audio output of piezoelectric transducer buzzers https://www.cuidevices.com/blog/how-to-increase-the-audio-output-of-a-piezoelectric-transducer-buzzer
Melody Time
Returning to the main topic, there’s more to sound playing than just a tone!
As you’re aware, musical scores are expressed in notes, which are the tones played for just a certain amount of time (a melody consists of notes and silences). However, sound is expressed in frequency while a microcontroller works with time. The total amount of time a HIGH/LOW oscillation lasts is what we call the period, which is the inverse of frequency (and vice-versa). So, we have to do some math!
For example, the tone frequency of the musical note C4 is 261.63Hz, so its period in a microsecond (us) is 3822. If you want the above Arduino Sketch to play C4, you need to modify it so that the total time in both calls to delayMicroseconds() adds up to 3822 microseconds (see the modified code).
int piezoPin = 8;

void setup()
{
pinMode(piezoPin, OUTPUT);
}
void loop()
{
digitalWrite(piezoPin, HIGH);
delayMicroseconds(1911);
digitalWrite(piezoPin, LOW);
delayMicroseconds(1911);
}
So, now we will begin to delve into how to prepare our Arduino play simple tunes. This portion of the experiment requires that you understand some basic music theory (musical notes, octaves, sharp notes, etc). Look, when referring to notes on a piano, there are 7 major octaves. In each octave, there’re 12 total notes i.e., there are 84 notes in all, which is a lot of frequencies to keep track of!
In order to simplify the task of playing basic tunes using Arduino, we can utilize a library called “tone” to the system that handles almost all the math behind.
There’re two functions to play sound, called the same, but with a different number of parameters:
tone(pin, frequency); // Play a tone
tone(pin, frequency, duration); // Play a note, duration in milliseconds
Now we are going to see how to play a melody stored as an array of numbers. Actually, this is a copy of the Example Sketch inside the Arduino IDE (File → Examples → Digital → toneMelody).
#include "pitches.h"

// Notes in the melody
int melody[] = {
  NOTE_C4, NOTE_G3, NOTE_G3, NOTE_A3, NOTE_G3, 0, NOTE_B3, NOTE_C4
};

// Note durations: 4 = quarter note, 8 = eighth note, etc.
int noteDurations[] = {
  4, 8, 8, 4, 4, 4, 4, 4
};

void setup() {
  // Iterate over the notes of the melody
  for (int thisNote = 0; thisNote < 8; thisNote++) {

   // To calculate the note duration, take one second divided by the note type
   //e.g., quarter note = 1000 / 4, eighth note = 1000/8, etc.
    int noteDuration = 1000 / noteDurations[thisNote];
    tone(8, melody[thisNote], noteDuration);

    // To distinguish the notes, set a minimum time between them
    // The note's duration + 30% seems to work well
    int pauseBetweenNotes = noteDuration * 1.30;
    delay(pauseBetweenNotes);
    // Stop the tone playing through D8
    noTone(8);
  }
Break off: Slightly sad, but a single blog post is not enough to cover this topic, so I take a short break. Definitely, a lot more to explore, so stay tuned for my next post in this series – Arduino & PCM.
Thanks,
WokWi, Elektor, Digilent, CUI Devices, Murata, Spark Fun