Arduino is an easy way to introduce kids to a whole new world of electronics and microcontrollers, because it is not only something your kids can play with, but it also helps them learn something new every day. So do not hesitate to gift them an Arduino today.
Coming to the title of this post, it is nothing more than a fancy word referring to an Arduino board loaded with a discrete Hello World LED Blink program. Do not laugh at the theme. This was deliberately chosen because it is a simple idea that your kids do not have to deal with deadly electricity to experiment with. They also have no chance of burning their cute fingers with a jumbo soldering iron (ha ha).
So, if you want your kids to get their hands dirty with a far-famed microcontroller development board, an Arduino Uno should do the job. Blinking its onboard LED is extremely simple yet effective as such a small feat is empowering for little makers. They can of course scale up to tons of innovative projects later that are still easy to cobble together. Just make sure they get hold of some legible instructions.
Nevertheless, before you get out the hardware and before your kids start coding away at their first microcontroller project, take a moment to make sure those smart kids are old enough to enter the world of electronics and computers!
Hopefully the kids now have everything they need to get off to a good start.
Well, let them go through the well-worn code to blink the built-in LED first (https://www.arduino.cc/en/Tutorial/BuiltInExamples/Blink).
Next, show them that the one line of code below can do almost the same thing!
void setup() {
  pinMode(LED_BUILTIN, OUTPUT);

}
void loop() {
  digitalWrite(LED_BUILTIN, millis() % 500 > 250);//blink it!
}
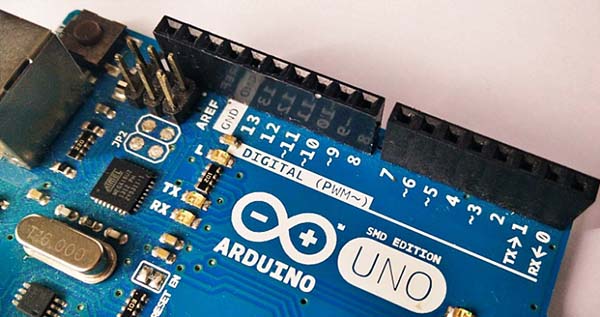
Now let them note that the Arduino Uno has three more LEDs onboard besides the built-in LED (D13). One is used as a power indicator and the other two are used to show the operation of the TX and RX pins. So, following is a tricky (and a bit complex) code to blink two LEDs using Uno, but without wiring any external LEDs. Spoiler: We are going to employ the built-in LED and the TX LED for this experiment.
#include <Arduino.h>

#define lamp_Monitor LED_BUILTIN
//Onboard D13 LED

const int delayCount = 4;
const uint32_t delays_lamp[delayCount] = {1500, 100, 90, 200};
//Blink times in millis (State: OFF-ON-OFF-ON)

int delayID = 0;
uint32_t interval;
uint32_t millisNow;
uint32_t millisPrevious;
bool lampToggle = false;
char printout[50] = {0};

void setup() {

  Serial.begin(9600);
  delay(6000);
  Serial.println("READY...");

  pinMode(lamp_Monitor, OUTPUT);

  interval = delays_lamp[0];
}

void loop() {

  millisNow = millis();

  if ((millisNow - millisPrevious) >= interval) {
    digitalWrite(lamp_Monitor, lampToggle);

    sprintf(printout, "%d, %d, %d", delayID, lampToggle, interval);
    Serial.println(printout);
    lampToggle = !(lampToggle);
    millisPrevious = millisNow;
    interval = delays_lamp[delayID];
    delayID ++;
    if (delayID >= delayCount) {
      delayID = 0;
    }
  }
}
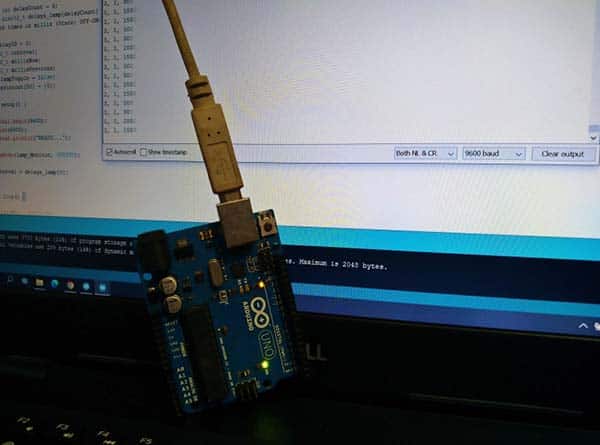
I like to call this an adapted sketch because I took this ludicrously odd code snippet from a webzine and refactored it for lucidity. As a result, now your kids have a BlinkyDuino with two flashing LEDs, but without spending a single extra coin!
Oh, I almost forgot that, you need to open Arduino IDE’s Serial Monitor (Ctrl+Shift+M) while running this code.
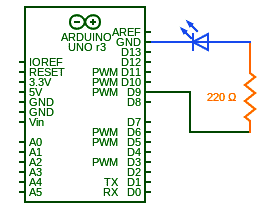
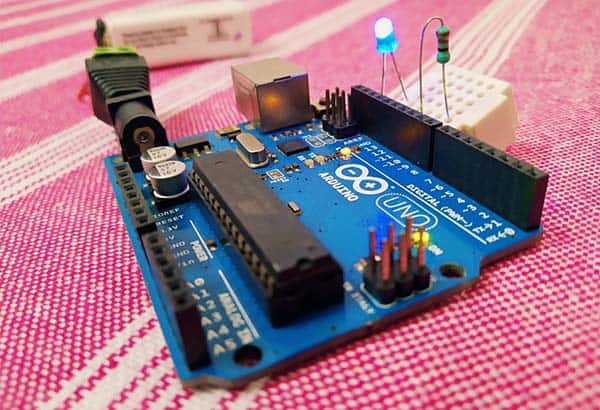
What is more, you can easily set up a beautiful breathing lamp with an external LED and a 220 Ω resistor as shown in the wiring diagram below. The breathing lamp can then be powered from USB or a 6F22 9V battery.
This is the code (Thanks to original coder Adam Meyer):
#define fadeLED 9

void setup() {
  pinMode(fadeLED, OUTPUT);
}

void loop() {

  for (int i = 0; i < 360; i++) {
    float rad = DEG_TO_RAD * i;

    int sinOut = constrain((sin(rad) * 128) + 128, 0, 255);

    analogWrite(fadeLED, sinOut);

    delay(15);
  }
}
Reminds: Blinking LEDs with simple codes is the most popular and traditional Hello World project for Arduino microcontrollers. There is no need to follow the common way as the basic blink scheme can be tweaked and there are several possible solutions (we only tried a few). So, teach your kids to understand the codes in use deeply and write their own codes for BlinkyDuino.
Hints: Harking back to the codes played here, below are some points to note.
- In the basic blink code, digitalWrite ( ) function is used to set the value of the D13 pin as HIGH or LOW. Recall, the delay () function is a blocking function to intermit the program from doing a task during the specified duration in milliseconds
- In the one-line code, millis() is the number of milliseconds since reset. The %500 divides it by 500 and creates a repeating pattern, and >250 is midway between 0 and 499 so it roughly creates a 50% duty cycle
- In the dual-LED code, the Sprintf() is used to combine text and variables into a string for output to the Serial Monitor
At last, the breathing lamp code creates a sin wave like fade effect. The float rad = DEG_TO_RAD * i; converts 0-360 angle to radian while int sinOut = constrain((sin(rad) * 128) + 128, 0, 255); calculates sin of angle as a number between 0 and 255.
Conclusion
It is really not hard to teach kids once you get the hang of it. But if you are simply not in the mood to get the hang of it right this moment then checkout countless tutorials published here for everything you need to get going without the need for purchasing big-ticket Arduino programming books and starter kits. I will be back later with more ideas for your STEM (science, technology, engineering, and mathematics) kids. I hope to hear some comments as well. Thanks!