Whether you are a soldering artist or not, checking your soldering iron out should be a steady routine. So, it’s always good to have a soldering iron tip thermometer handy.
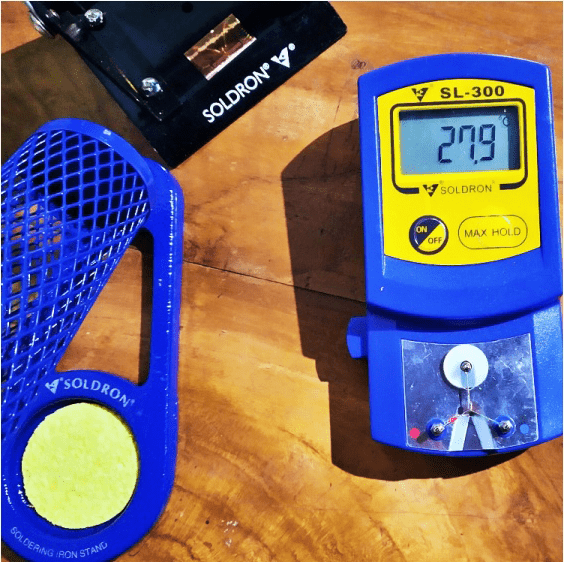
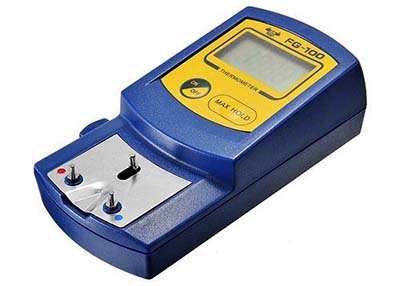
There’re different types of tip thermometers out there, but for the purposes of this post, I’m showing you the SOLDRON SL-300 soldering iron tip thermometer made in my country.
I’ve to admit, despite being an Indian brand, it really looks like a replica of the very popular FG-100 soldering iron tip thermometer. Alas, let’s forget all that for a moment!
The soldering iron tip thermometer comes with a set of disposable tip sensors. These tip sensors need to be looped onto the posts on the sensor plate. Be sure to match the red and blue sides of the sensor wire with the posts that are marked with red and blue dots on the sensor plate because these tip sensors are in fact thermocouples and their polarity matters.
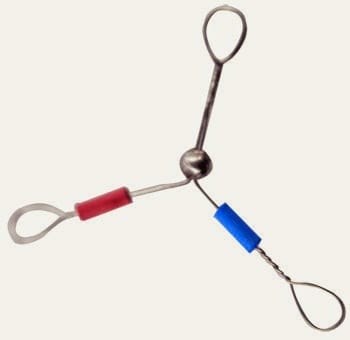
Based on my experience with the SG-300, each tip sensor typically lasts 20 to 40 tests, and the replacements are relatively cheap (buying them will not be easy, though).
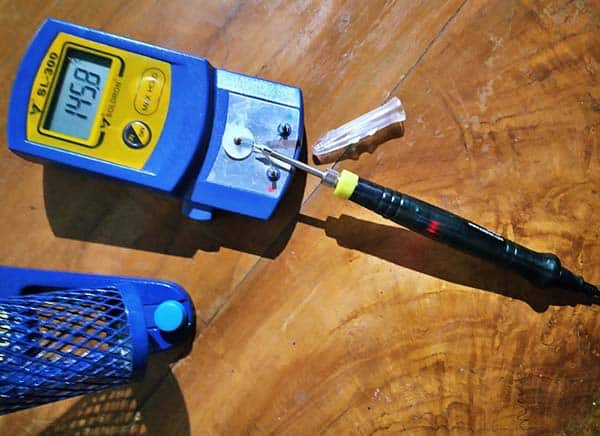
Using a thermometer is just a walk in the park! For that, simply touch the soldering iron tip against the midpoint of the tip sensor. Be cautious, do not push it down against the tip sensor’s wires as it could cause the wires to stretch which will result in erroneous readings.
Then keep the tip pressed against the tip sensor until the thermometer finishes the measurement. Once the reading of the thermometer stops moving upward, you will see the exact value of the maximum tip temperature. Note, there’s also a MAXHOLD button on the thermometer to detain the temperature readout at any time.
My first test was with a Chinese USB soldering iron. This wretched photo is proof that I tried it myself (ha ha).
In order to create a good heat bridge, however, the soldering iron tip should be wet with molten solder when you measure the tip temperature. This naturally makes the fine CA wire tip temperature sensor (thermocouple) mucky in short order. That’s why it needs episodic replenishments.
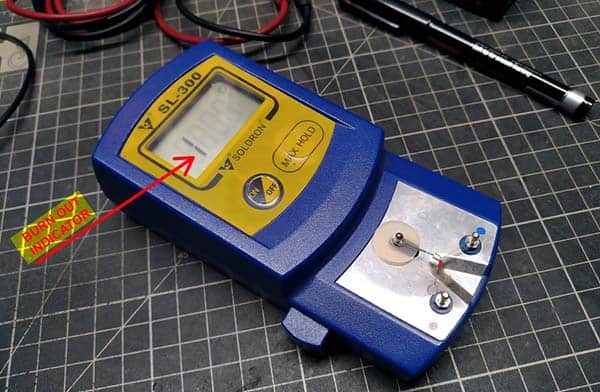
This device features auto shut-off function, that means, if no measurement operation is performed within 3 minutes, the power will be automatically shut off. It also offers “sensor burn out” and “battery low” indications.
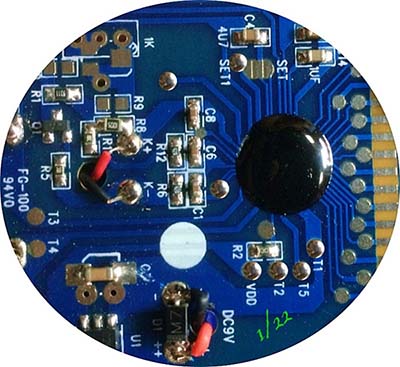
Obviously, I’ve taken my soldering iron tip thermometers, SL-300 and FG-100, apart too. I’m disappointed to say, FG-100 is in fact a HAKKO model number but my FG-100 is clearly a dirty clone. That’s a funny tale for another post.
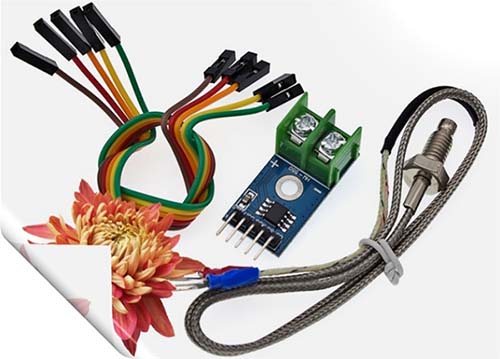
Admittedly, only minor hacks and tweaks are possible with these pretty cheap devices (that’s another story). Anyway, you can follow this idea to make your own unique soldering iron tip thermometer. Apart from a K-type thermocouple module/shield, all needed is just an Arduino microcontroller and an LCD/OLED display.
Oh, I almost forget it. The tip temperature sensor used in these cheapo thermometers appears like a copy of the HAKKO 191-212 (https://www.tequipment.net/Hakko191-212.html) K(CA)-type thermocouple (0 to 700°C).
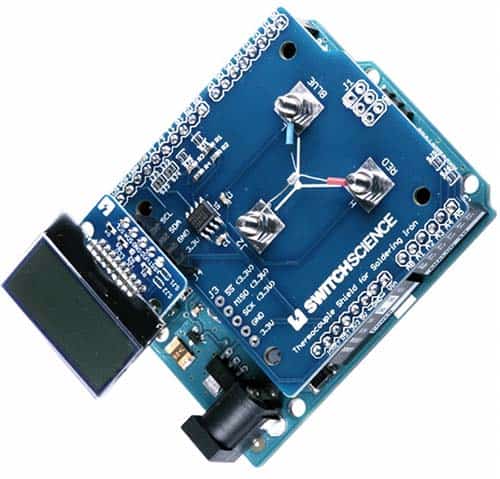
This is the Soldering Iron Thermometer Shield for Arduino that measures the temperature of a soldering iron. This ludicrously odd K-type thermocouple shield has a MAX31855 IC on board (http://trac.switch-science.com/wiki/Thermocouple_Shield). I should have a couple of them in about a month.
I’ve already done some experiments with K-type thermocouples, so you can see an entry-level project with MAX6675 IC here https://www.electroschematics.com/handheld-digital-thermometer-using-arduino/
Okay, let me take a coffee break. Good luck, and see you next week!