Walking a dog in the dark is always a risky thing because both you and your dog are difficult to see. Fortunately, an illuminated dog collar helps you see and be seen during dog walks after dark. Yes, the illuminated dog collar makes not only your dog easier to spot but you easier to spot as well!
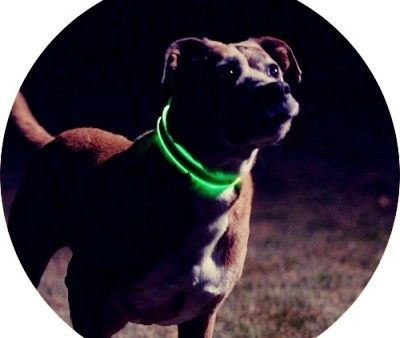
An illuminated dog collar makes a lot of sense, so I decided to make one out of a few things I’d got lying around. In this post, you’ll see how to build a simple illuminated dog collar yourself!
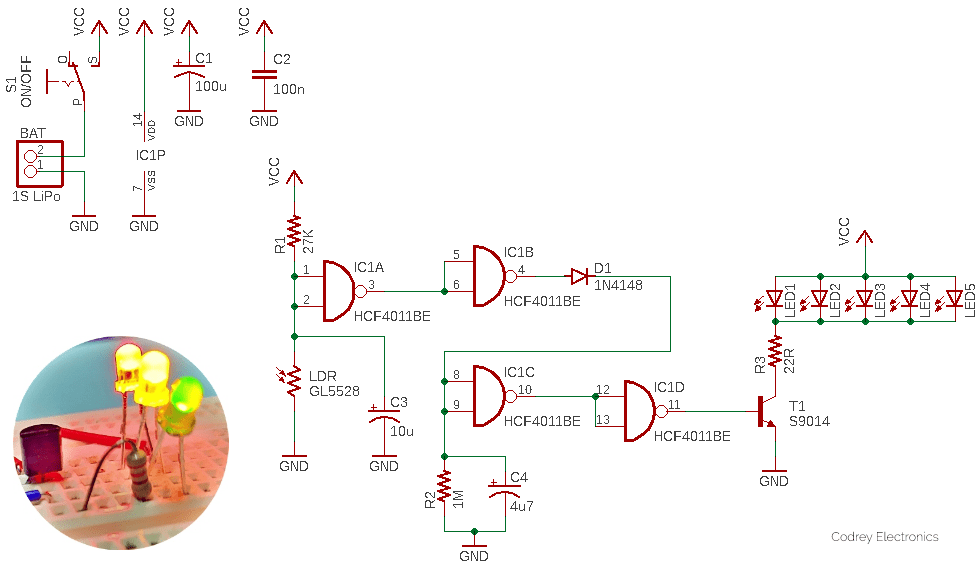
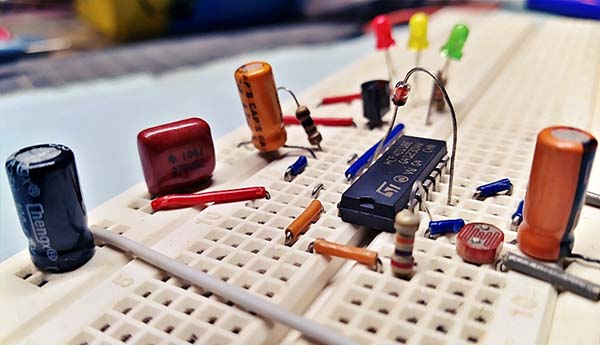
To get started, you can follow the little schematic below. Simple, eh?
The parts list is nothing extensive:
- IC: HCF4011BE x1
- TRANSISTOR: S9014 x1
- PHOTORESISTOR (LDR): GL5528 x1
- DIODE: 1N4148 x1
- LED (3mm/5mm): Red/Green/Yellow x5
- CAPACITOR: 100uF/16V x1, 10uF/16V x1, 4.7uF/16V x1, 100nF x1
- RESISTOR (¼ W): 27K x1, 1M x1, 22Ω x1
- MISC: 1S LiPo Battery (3.7V/500mAh) x1, Slide Switch x1, JST Connector (2-Pin) x1
Links to key component datasheets:
- HCF4011BE Datasheet https://www.st.com/resource/en/datasheet/cd00000361.pdf
- S9014 Datasheet: https://www.rcscomponents.kiev.ua/datasheets/s9014-datasheet.pdf
- GL5528 Datasheet: https://pi.gate.ac.uk/pages/airpi-files/PD0001.pdf
So, you just got the design idea of an inexpensive dark-activated LED dog collar. And, you may have started to think that you do not always need a fancy microcontroller to make something amazing, can you?
The circuit diagram doesn’t need an in-depth explanation, but here’re a few significant things to keep in mind:
- The front end of the circuit senses when it’s dark and switches on power to the LEDs so they light up. The level of darkness that triggers the switch can be adjusted by changing the value of the 27KΩ resistor (R1). To keep the design simple, the threshold detector doesn’t have a built-in trim pot to tweak it. This means you need to change the resistor R1 with the right value appropriate for your application.
- The 1MΩ resistor and the 4.7uF capacitor (R2 and C4) sets a small turn-off delay so the LEDs do not turn off instantly when the dog collar moves from dark to light again.
- When the voltage at the base of the S9014 Transistor (T1) rises enough, it switches on fully, and as a result, the LEDs are fired. The 22Ω current limiting resistor (R3) is enough for the default 5-LED setup. Anyway, if you want to use more LEDs in your dog collar, you will need to replace the resistor, but only after considering the drive capacity of the LED driver transistor and the current demand of the LEDs you are using.
- The suggested power source is a 1S LiPo battery with 500mAh capacity but nothing to worry about as it’s not a critical demand. So, you can opt for another 1S LiPo battery pack with a different current capacity. Of course, your LiPo battery must be able to gently deliver the current your circuitry wants to draw!
I’ve tested my breadboard prototype over a narrow range of voltages (3.6 to 4.3V) and different types of LEDs.
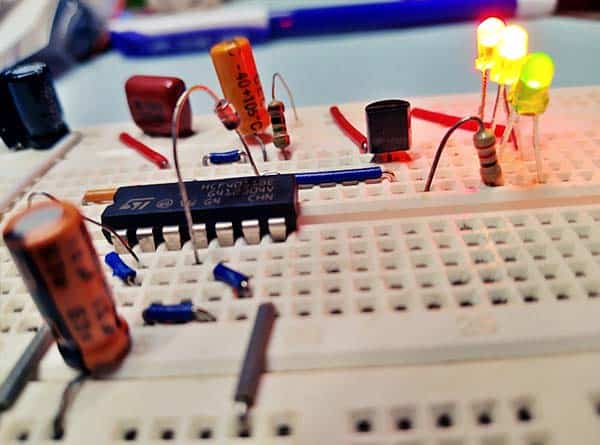
As you’ll see, I’ve used just three pre-used LEDs harvested from a circuit board from an old broken toy car I had in my box of bits. I’ve come to accept that I’m totally a parts and tools hoarder. I have a huge assortment of unused electronics components next to me, but I’ll still spend hours disassembling a broken gizmo to harvest yet another (haha)!
Needless to say, all things work well as anticipated! However, it’s observed afterward that as darkness falls (and if the light level returns slowly) the LEDs start flickering for a while but that effect is negligible.
Truth be told, the final construction of the illuminated dog collar obviously needs some skill and patience. It might look extremely complicated with lots to do but it isn’t.
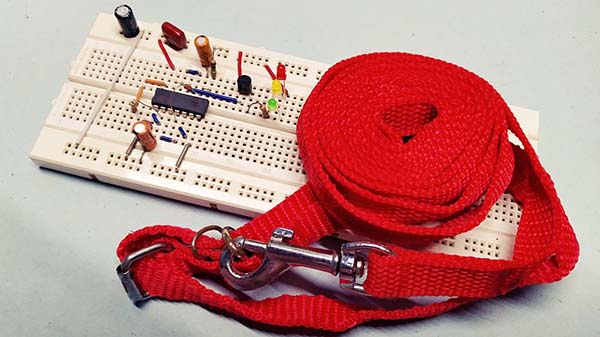
There’re so many types of common dog collars in the market. Whichever type you have, you now have to carefully mount the LEDs and route the wires. When you’ve done that, you’ll need to secure the encapsulated core electronics (perhaps assembled on a stripboard) in a desirable place on the dog collar with a dab of hot glue.
Make sure you installed the photoresistor in the right place before finalizing your build so that its eye can “see” the ambient light well but the light from the LEDs should never disturb it. Remember, you also need to waterproof the entire setup.
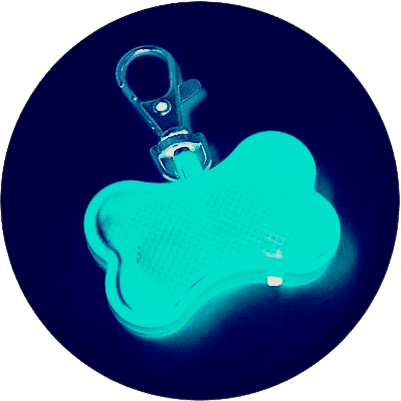
Another (perhaps much simpler) idea is to include all the electronics inside a rigid box that can be easily clipped onto a stock dog collar (see below).
Almost there! When you’re sure it all looks good, you’re ready to start the pre-flight test of your build. That means, now it’s time to test your dark-activated illuminated dog collar and make sure you successfully set all aright. Well, whichever way you go, enjoy the fruits of your labor!
Other intended add-on ideas for this illuminated dog collar (so far, more to come later):
- Steady/Blink LED Modes
- Customizable Colour Patterns
- Various Trigger & Signal Modes
- Built-in LiPo Battery Charger