Shoving all your home theatre device into a single cabinet makes sense when you want to keep your living room neat and tidy. But there’s just one (usually overlooked) problem – overheating. Yes, with a lack of proper air circulation those things can get steamy!
An obvious solution here is to install a media cabinet cooling fan system that keeps your cabinet cool and your gadgets happy. The goal of this post is to provide you an elementary design idea of thermally-controlled cabinet cooling fan system.
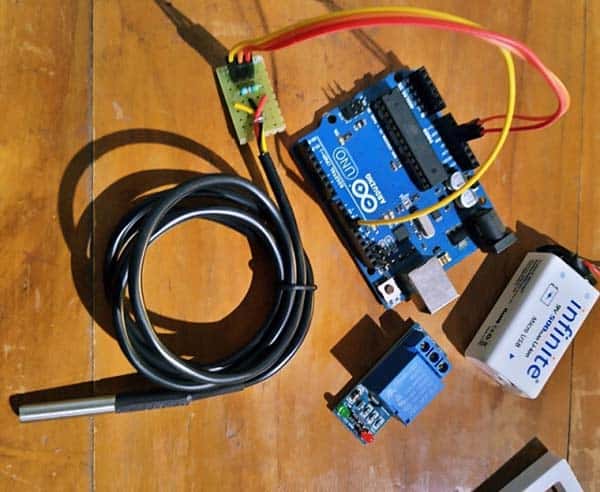
So, now is the time to build your own home theatre and audio/video cabinet cooling fan system using a handful of common parts laying around your workbench. Well, let’s get started!
As you’re well aware, an analog or digital temperature sensor can be used to detect any rise or fall of temperature in its surroundings and can be employed for the purpose of ambient temperature monitoring. And the signal outputted by the temperature sensor can further be processed to activate an appropriate electromagnetic or solid-state relay mechanism which provides room for us to control any desired electric load wired through the relay’s switching contacts.
The below schematic represents the overall system diagram you need to build a minimalistic device for switching a cooling fan ON and OFF according to ambient temperature. This circuit operates as an adjustable electronic thermostat with an electrically-isolated output. Simply, you can use this hardware to energize a cooling fan when it is too hot. The temperature setpoints can also be adjusted as per individual requirements but only through the software.
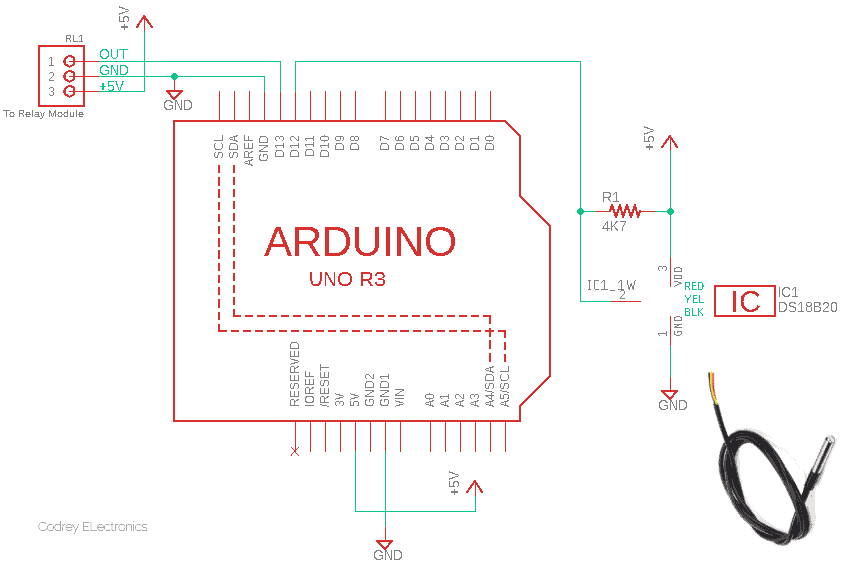
The temperature is measured in this circuitry with a DS18B20 digital temperature sensor (cheap, relatively accurate, sufficient range). The Arduino board provides power to the temperature sensor and reads the sensor output via a 1-wire bus. The Arduino board is also responsible for generating a “digital output” that switches the final relay on and off. That is, the digital output alternately connects and disconnects the cooling fan from the AC power source (from the wall) via the relay in order to turn it on and off. The control logic employed for determining when to switch the relay on and off is implemented within the Arduino Sketch, which is also employed for monitoring the temperature and generating the control signal.
As you already noticed, this little project uses a handful of supplies, all of which are pretty common and you may already have them on-hand today. Here is the simplistic code that I used, feel free to tweak it as needed to meet your project needs.
#include <OneWire.h>
#include <DallasTemperature.h>

const int TEMP_THRESHOLD_UPPER = 35; // Upper threshold
const int TEMP_THRESHOLD_LOWER = 30; // Lower threshold

const int SENSOR_DQ_PIN = 12; // D12 to DQ of DS18B20
const int RELAY_OUT_PIN = 13; // D13 to Relay Driver Module

OneWire oneWire(SENSOR_DQ_PIN);
DallasTemperature sensors(&oneWire);

float temperature; // Temperature in Celsius

void setup()
{
  sensors.begin(); // Initialize DS18B20
  pinMode(RELAY_OUT_PIN, OUTPUT); //Set D13 as Output

}

void loop()
{
  sensors.requestTemperatures();             // Send the command to get temperatures
  temperature = sensors.getTempCByIndex(0);  // Read temperature in Celsius

  if (temperature > TEMP_THRESHOLD_UPPER) {
    digitalWrite(RELAY_OUT_PIN, HIGH); // Turn Relay ON
  } else if (temperature < TEMP_THRESHOLD_LOWER) {
    digitalWrite(RELAY_OUT_PIN, LOW); // Turn Relay OFF
  }

  delay(1000);
}
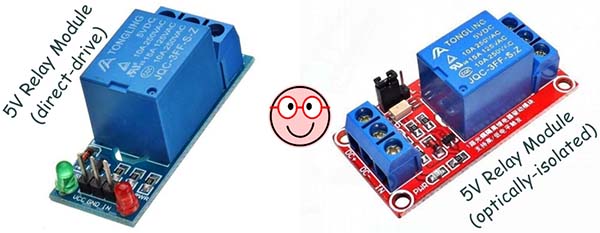
As might be expected, the 3-pin connector RL1 is the 5VDC relay module interface. Now note that almost all relay modules that require some form of on/off command from the Arduino are designed to wait for a specific condition to be met in order to activate the relay. Usually, these “direct-drive” modules energize the relay coil when the drive signal goes HIGH but there’re “optically-isolated” relay modules as well. The latter types usually have a selection jumper to accept either a HIGH or LOW drive signal as the input.
To finish off, here’re a few important things to look at:
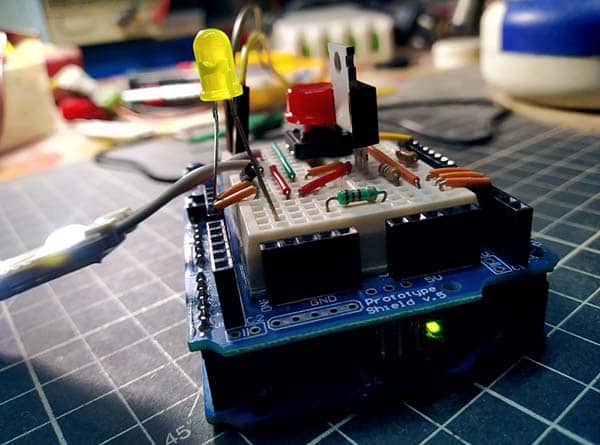
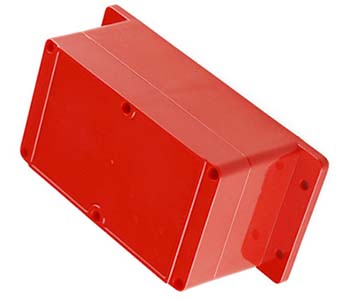
- A good (and a bit beefy) plastic enclosure will give your Arduino prototype the protection (and attention) it deserves.
- The temperature sensor DS18B20 must be mounted close to a thermally critical area or hot spot of the media cabinet. Note that due to the relatively slow transfer of heat to the sensor through the stainless-steel probe, the sensor does not provide a sufficiently fast response but that’s not a perturbing problem in this application.
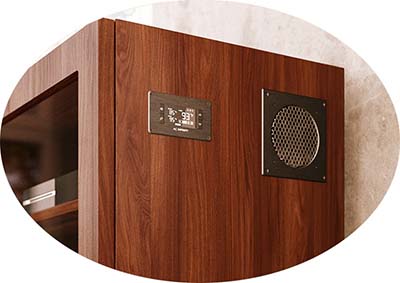
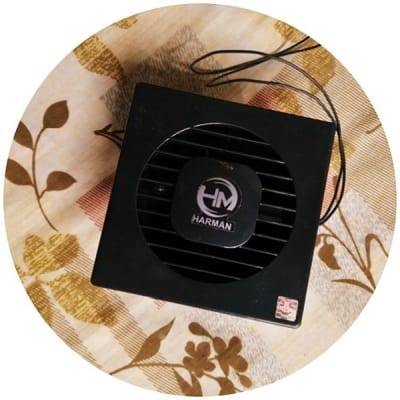
- Like many, most project makers could not talk about the difference between a ventilation fan and an exhaust fan off the top of their head. As the name implies, a ventilation fan is used to bring fresh air from the outside and into an enclosed space. And, an exhaust fan removes pollutants and contaminants entered the air in order to provide clean air. Each fan has its own unique advantages and applications, so it is always important to install them in the right manner. All you really need here is an AC230V cabinet cooling fan (mine is a ventilation fan – see below).
- The default temperature detection threshold settings (setpoints) in the code are adequate for most practical applications, however, the user has the ability to change them to suit specific circumstances and requirements. Note, the acceptable operating temperature for most electrical devices is 40°C, and the optimal temperature set point for a media cabinet cooling device is approximately 35°C.
- You should also keep an eye on the CFM rating of your fan. What does CFM mean? Put simply, CFM stands for cubic feet per minute. The measurement of how much air a fan move is usually taken when the fan is at its maximum speed and uses both the volume of air and the rate at which it moves. The CFM number actually depends on a few things like the fan’s motor, the blade pitch, and the length and/or shape of the fan blades. The higher the CFM, the more air a fan will move.
Well, mind the advice, thermal management is a simple task, but it has to be approached in the correct way!
Finally, this is a quick shot I took while preparing my hardware assembly. The experiment is still in progress, and perhaps you will soon see a revision of this little project here. It may have some nice features, including a digital keypad and display panel. Merci, au revoir