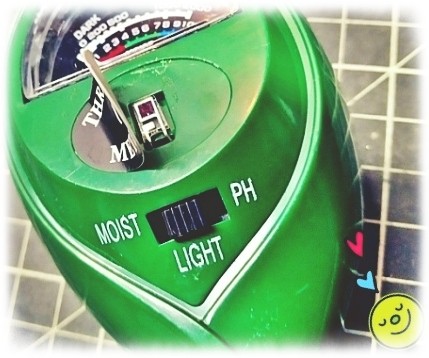
Some small experiments on a cheapo soil meter I did recently remind me of the nostalgic photodiode BPW34. So, I think this is the right time for a quick review. Well, let me go further with that!
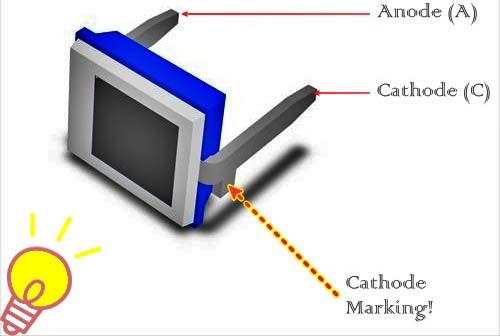
BPW34 PIN Photodiode
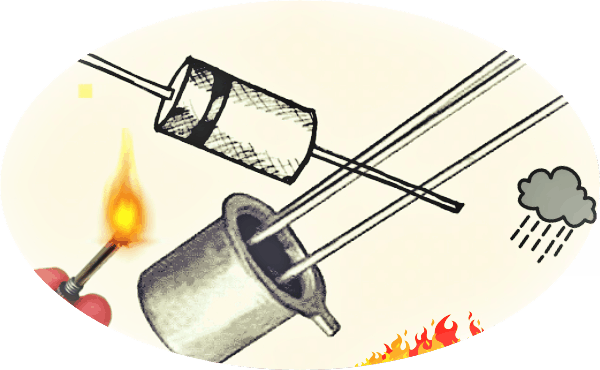
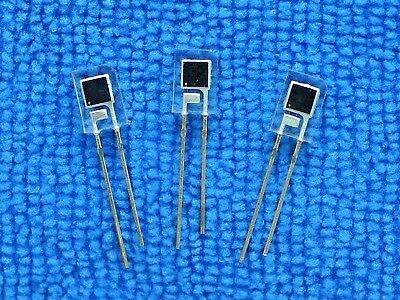
BPW34 is in fact a PIN photodiode (https://en.wikipedia.org/wiki/PIN_diode) with high speed and high radiant sensitivity in miniature, flat, top view, clear plastic package. Since very sensitive to visible and near-infrared radiation it’s a minuscule photodiode suitable for visible and near-infrared radiation. Its range of spectral bandwidth (λ0.1) is 430 to 1100nm.
Its rated open-circuit voltage is 350mV (900nm, 1mW/cm2 light source), and short circuit current is 47μA.
- BPW34 Datasheet (Vishay Semiconductors) https://www.vishay.com/docs/81521/bpw34.pdf
That’s fun, of course, but we can use this cute photodiode as a mini solar cell to power tiny electronics circuits. It’s also useful as an excellent speedy optic for light sensor projects. At this point, note that a photodiode is a variation on the familiar silicon photocell used in solar power conversion, but the photodiode is constructed and operated for optimum sensitivity and accuracy, while the solar cell is optimized to generate maximum electrical power!
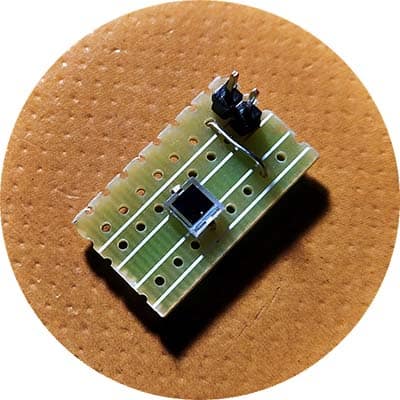
In order to ease up my experiments, I built a simple BPW34 breakout board using a small circuit board as shown below. The sensor, when closely exposed to a 9W/AC230V cool white LED bulb, rendered around 500mV dc output (measured with my trusty digital multimeter)!
How to Measure Light with a Photodiode?
Sensing and measuring the amount of light falling on a surface is certainly an interesting experiment to do. In the following, I show a few ways of converting incident light on a BPW34 photodiode into an output voltage that could be used for further experiments.
To start, just leave the BPW34 photosensor exposed to various types of light sources for a while and do take some measurements. Note, the photodiode can be connected directly to a Pico ammeter (actually a high-priced device), permitting the most sensitive measurement of the light power.
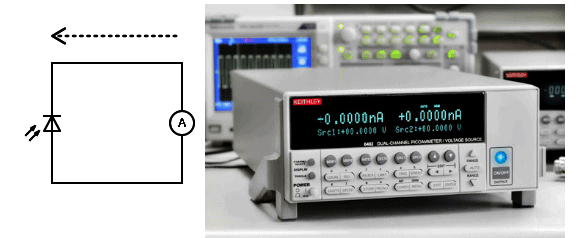
The photodiode can also be reverse biased to measure higher powers at faster speeds. In either mode of operation, the photocurrent is proportional to the power of the light illuminating the photodiode.
A photodiode generates a current proportional to the light that strikes its active area. Most measurement applications involve using a trans-impedance amplifier to convert the photodiode current into an output voltage. Figure below shows a simplified schematic of what the circuit could look like. This circuit operates the photodiode in photovoltaic mode, where the op-amp keeps the voltage across the photodiode at 0V.
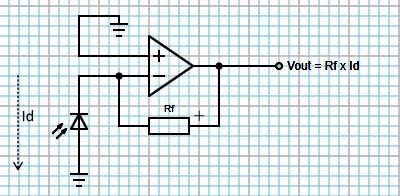
In this “conceptually simpler” circuit, current flows from cathode to anode when light strikes the photodiode’s active area. Ideally, all of the photodiode current flows through the feedback resistor generating an output voltage (Vout) equal to the photodiode current (Id) multiplied by the feedback resistor (Rf).
To sum up, as far as real implementation goes, photodiodes are typically used in one of three configurations.
The first configuration consists of a photodiode connected to a current-measuring device. This configuration is sufficient for use with ammeters and dataloggers which can measure uA/mA current.
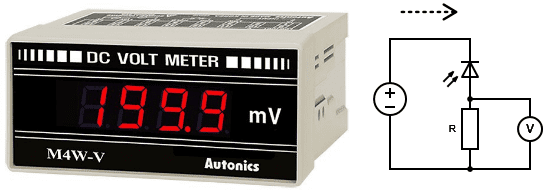
The second configuration, in its basic form, depicts a very simple circuit with a photodiode wired in series with a resistor. Here, the current produced by the photodiode is forced to pass through the resistor, thus resulting in a voltage drop across the resistor’s leads that could be readily measured by most mV/V meters.
In the third configuration, the photodiode has been incorporated into a trans-impedance amplifier (TIA) circuit, which converts the photodiode’s output current into a measurable voltage. If necessary, we can amplify the output of the photodiode by varying the value of the feedback resistor.
- Photodiode Terminology https://www.aptechnologies.co.uk/support/SiPDs/terminology
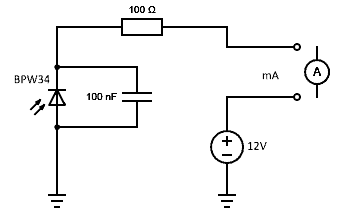
The following figure proposes another little test setup to measure detected current with various types of light sources. The entire circuit, if assembled on a small perf board, can be behold firmly by hand just below the light source under examination. Not to mention, through this the photodiode can come nearer to the light source, which might feed a higher current in the photodiode.
As a side note, if it’s difficult to find BPW34 photodiodes in your area, you can use PD638C photodiodes for your experiments because it’s more readily available online. The PD638C is another high-speed and sensitive silicon PIN photodiode available in a flat side view plastic package. Due to its water-clear epoxy, this photodiode is sensitive to visible and infrared radiation.
- PD638C Datasheet (Everlight Electronics) http://www.vtm.co.uk/PDF/Everlight/PD638C.pdf
Quick & Easy Passive Light Meter
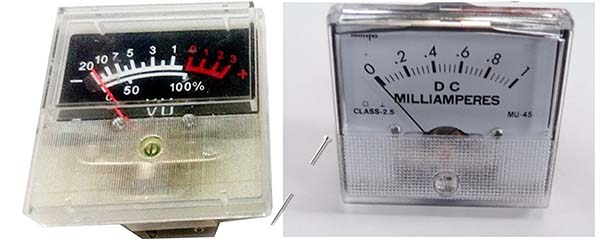
Now the tricky part: see, you can build your own crude light meters (https://en.wikipedia.org/wiki/Light_meter) simply using common photodiodes and volume unit meters. A VU meter is a usual panel instrument usually installed on most audio amplifiers to show the instantaneous power delivered to the loudspeakers. Here, the basic idea is to connect a photodiode – BPW34 for example – parallel to a VU meter to make a hobby-level light meter. One of the big advantages of this simple idea is that it’s completely passive and requires no power supply!
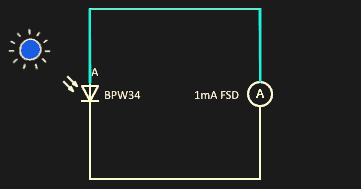
A standard VU meter (microammeter) with 1mA FSD (full-scale deflection) would be fine for this application (at least, for me). Such a meter has around 1KΩ internal resistance. Nevertheless, you can use a 1mA FSD milliamperes meter instead. The peak current value I observed in my setup was about 0.65mA (in intense daylight).
Future Work
More projects related to this later… but for now, you can play around with the crude ideas introduced here. In an upcoming post, I’ll also show how to use tiny solar cells and photodiodes with an Arduino/Raspberry Pi board. As always, I welcome comments and suggestions from the reader community out there on other fun ways to use regular photodiodes and tiny solar panels.