As I mentioned and proved in an earlier write up, a regular light emitting diode can also be used as a light sensor (https://www.electroschematics.com/led-2/). So, this is a post that goes into a bit more detail about that funny idea. Well, let us get started!
A light emitting diode can work perfectly as a narrow-band photodiode with peak sensitivity to slightly shorter wavelength than it emits. That is that, light emitting diodes are amazingly good photodetectors, which are sensitive to specific light, comparing to other trad photodiodes.
Let me prove it again…
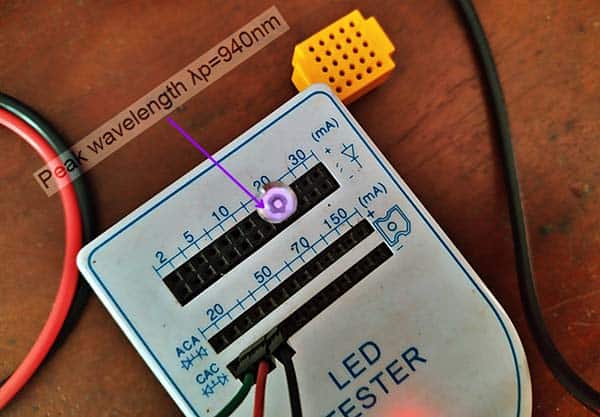
Unlike my previous experiments, this time I am going to use a standard 5mm water clear infrared LED (https://www.mouser.com/datasheet/2/143/EAILP05RDDB1-708504.pdf) as the light sensor.
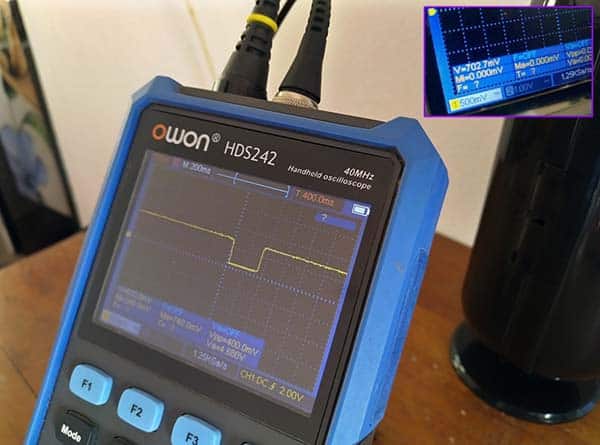
See, aiming a small white LED torch at the infrared LED about 20mm away yields circa 700mV of photovoltage. That is when it is directly connected to the oscilloscope in photovoltaic mode (https://www.aptechnologies.co.uk/support/SiPDs/operation). And, the quick dip comes from the edge of a visiting card travelling through the beam.
Well, follow the crude circuits given below and get ready to start your fun experiments. In these schemes the infrared LED (IRED) has become a light sensor/photodiode, so the low-current red LED lights up (often faintly) when you shine a flashlight on the IRED. Now see how both ideas work for you!
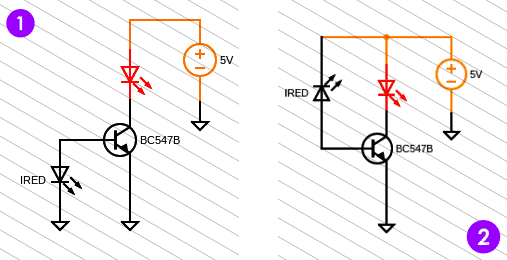
These silly circuits do not have a current-limiting resistor for the light-emitting diode because only a very feeble current flows through the transistor.
You can of course use an appropriate NPN Darlington transistor such as the BC517 (https://www.mouser.com/datasheet/2/149/BC517-888613.pdf) instead of the BC547, but be prepared to make some circuit modifications.
As a quick reminder, a silicon photodiode can be operated in either the photovoltaic or photoconductive mode. In the photovoltaic mode, the photodiode is unbiased, while an external reverse bias is applied for the photoconductive mode.
Next is a tricky darkness detector circuit based on the omnipresent op-amp LM358. The red LED at the op-amp’s output lights up when it is dark, and turns off when enough light hits the infrared LED, which acts as a light detector. Simply, this circuit can deliver either “1” or “0” depending on the light level that the light detector can see. The red LED is added for testing so you can just ignore it (or let it sit there).
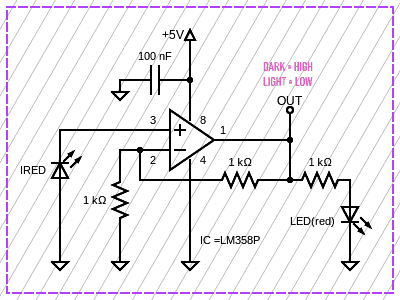
This a tad unorthodox concept was also tested with a 5mm diffused yellow LED. It worked but with much less sensitivity than the infrared LED. You can also experiment more with this circuit by reversing the orientation of the infrared LED (and in a few other ways). Keep in mind, this is a simple and fun to do project.
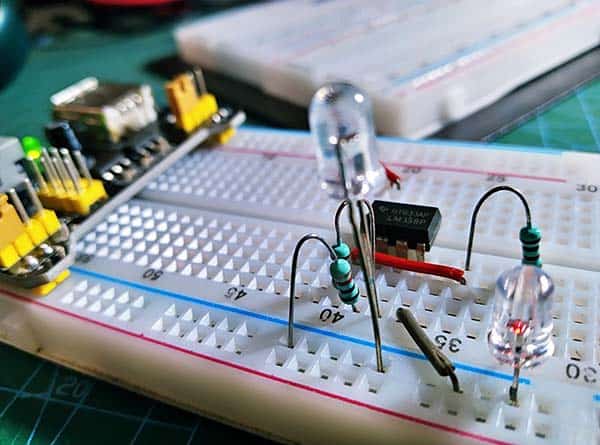
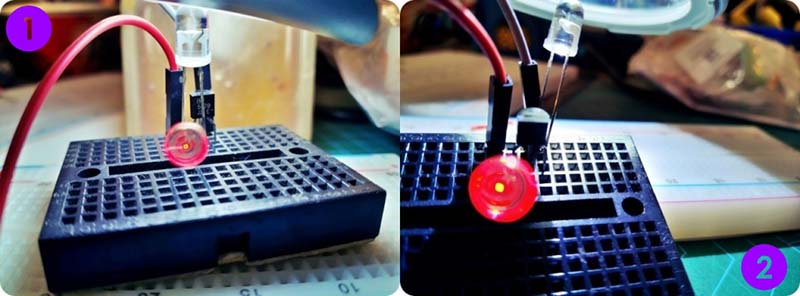
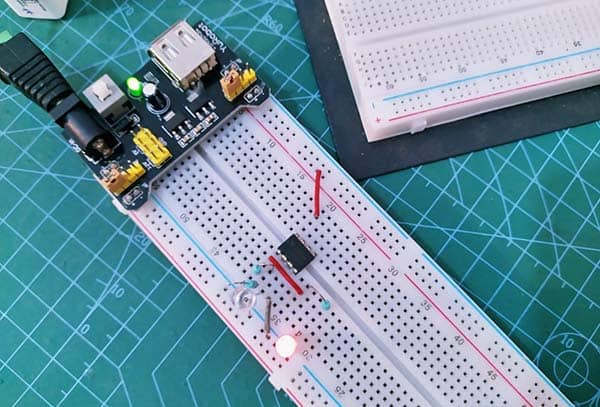
Below shown is the snap of my test setup wired on a breadboard, and powered by the 5vDC breadboard power supply.
Conclusions? Today’s LEDs are surprisingly good photodetectors. You can substitute a regular LED for a standard silicon photodiode in most hobby projects (just be sure to watch its polarity). At least in my experience, green, yellow, and red LEDs can be used as light detectors but infrared LEDs will respond many times better than them. Aiming a common red laser pointer at the infrared LED in the close vicinity makes about 1000mV of photovoltage. For best results, use LEDs encapsulated in clear epoxy, often described as water-clear LEDs.
Have Fun!