Still, a google search for a commonly available temperature sensor to connect to a microcontroller quickly brings up the LM35. And, copy-paste of a little bit of clichéd code uploaded to the intended microcontroller makes it possible to measure the ambient temperature right away.
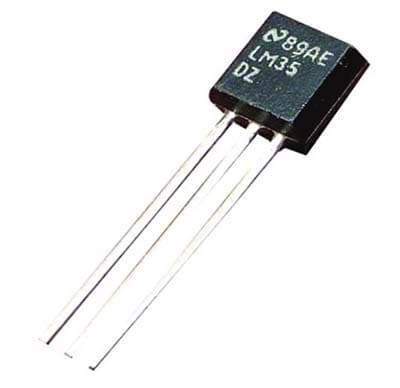
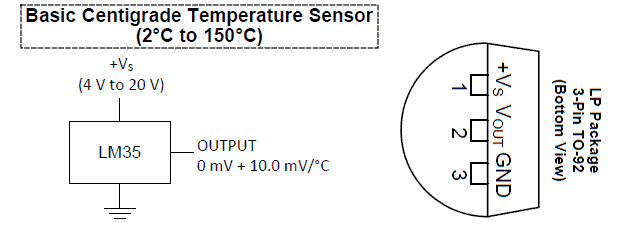
See, the LM35 is a ubiquitous temperature sensor chip that you will be able to find at a number of sources for a very reasonable price. It is in fact a precision 3-pin integrated-circuit temperature device with an output voltage linearly proportional to the Centigrade temperature. Moreover, its low-output impedance, linear output, and precise inherent calibration makes interfacing to readout or control circuitry especially easy.
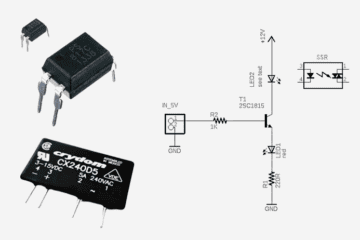
LM35 related projects that have previously appeared here are:
So, what is the purpose of the rescript at this time? We will see…
Nowadays it seems that the LM35 temperature sensor does not work well especially in some STEM Arduino projects. There are a few (often overlooked) reasons for such misdeeds. So, I will mention some of the causes here.
- Counterfeit IC
- Undependable USB power source
- Noise induced to LM35’s output signal
When buying electronic components from some online stores, Chinese counterfeit components are always a risk. I have also got fake LM35 chips even from some trusted sellers (it is possible that fake items may enter their supply chain).
When the Arduino board runs on 5VDC available from the USB port of a PC or Laptop, not every system can deliver ample power to each USB port. So, variations in the USB voltage and current level might results in an unstable Arduino setup.
Since the LM35 yields only 10mV for every 1°C, that millivolt scale output signal is likely to be affected by noisy signals from nearby sources. This often disturbs the lame output signal of the LM35.
Keep note at this point that when you are using the LM35 as a remote temperature sensor, a proven way to cease the connection cable from acting as a receiving antenna that interferes with the sensor is to add a resistor-capacitor damper between the output and ground. Also, a bypass capacitor across positive and ground rails obviates potential unwanted electromagnetic interference.
Look below for a recommended resolution as pointed in the LM35 datasheet published by TI.
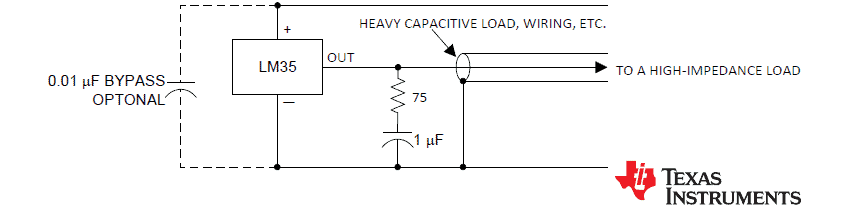
I tested this concept with an R-C damper consisting of a 75Ω resistor wired in series with a 220nF ceramic capacitor. Also, my quick test setup employed a 100nF ceramic capacitor as the optional bypass capacitor. It worked great for me!
Now to a trick to get much better precision when setting up an Arduino Uno Room Thermometer with the LM35 temperature sensor.
Nothing exceptional here but just make a call to the analogReference method in your Arduino Sketch. Also tweak your code accordingly.
Recall, setting the reference voltage to INTERNAL will change it to 1.1V from the default 5V, and this significantly improves the precision because LM35 delivers an output voltage from 0V to 1V only (Functional range: 0°C to 100°C).
In conclusion, I would like to share an elementary Arduino Uno + LM35 Temperature Sensor project code tailored especially for STEM kids!
int raw = 0;
float temp = 0;

void setup() {

  /* you do not need to set analog pin as input */
}

void loop() {
  raw = analogRead(A0); //Read A0
  temp = ( raw / 1023.0 ) * 5.0 * 1000 / 10; //Calc
  if (temp > 28) //Threshold 28°C
    digitalWrite(12, HIGH); //LED-SW = ON
  else
    digitalWrite(12, LOW); //LED-SW = OFF
  delay(1000);
}

Here, when the ambient temperature exceeds a specified threshold (28°C as coded), an LED wired between D12 and GND pins (With a 1KΩ series resistor) of the Arduino Uno lights up to raise a visual alert. Needless to say, you can use the logic-level signals appeared at D12 pin to drive a relay module or something alike to control an external electric load (an exhaust hood, for instance).