Get ready to make a smart badge or a simple wearable device such as a wristband, lanyard or watch-style device for your smart kids. And, introduce your kids to electronics and microcontrollers without them even knowing about it. Yes, this is an entry-level micro:bit project!
micro:bit – quick introduction
The micro:bit is an open source hardware ARM-based embedded system designed by the BBC for use in computer education in the United Kingdom. There’re two versions of the micro:bit – v1 and V2. The latest version V2 has an onboard speaker and microphone and the previous V1 revision does not (https://en.wikipedia.org/wiki/Micro_Bit).
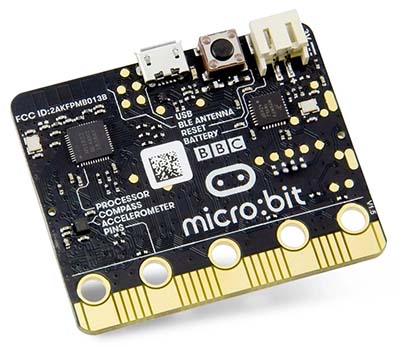
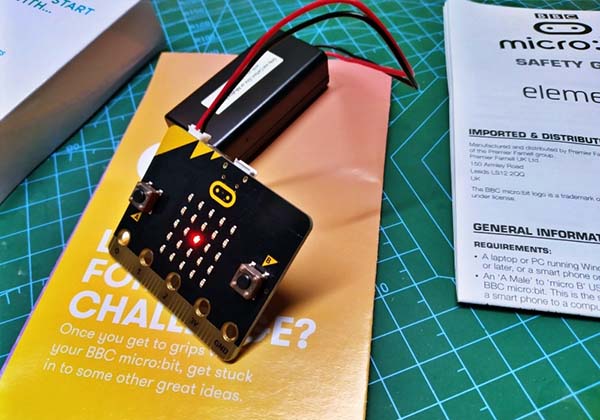
Although the V1 version was used for preparing this post, both micro:bit versions will work equally well here. What I actually have is a micro:bit Go Kit V1.5 that I bought a while back!
micro:bit – smart badge for kids
Now to the build idea of the micro:bit smart badge tailored for kids and grown kids alike. First off, note that the final build of this concept may not be a toy suitable for children 3 years old or younger, as it contains small electronic parts and a battery. If ingested, seek medical attention immediately!
At this point, the only hardware needed to complete the project is a micro:bit module because the intention is just to make a little construction toy to entertain our kids. Anyway, remember that this is a funny means to introduce kids to electronics experimentation and invention in a hands-on and creative way.
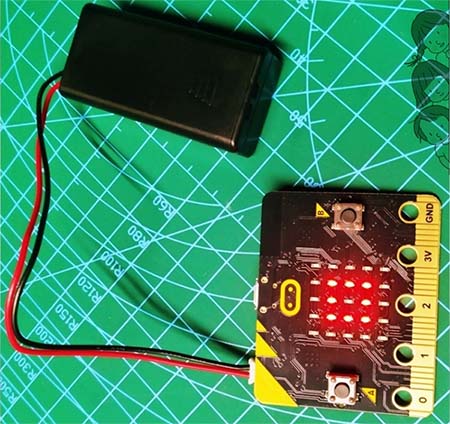
The most obvious common and convenient way of powering the micro:bit would be the on-board JST connector. A simple 2 x Carbon Zinc/Alkaline AAA battery box (3V) with JST connector can be used to do this at ease.
However, you can power your micro:bit up from a computer or mobile device using a USB cable as well (https://support.microbit.org/support/solutions/articles/19000013982-connecting-a-power-supply-to-the-micro-bit). The smart badge example presented here is of a name tag. Let’s get to it quickly.
At first, plug your micro:bit into the computer’s USB socket, and make sure that it appears on the computer like a USB memory stick called MICROBIT.
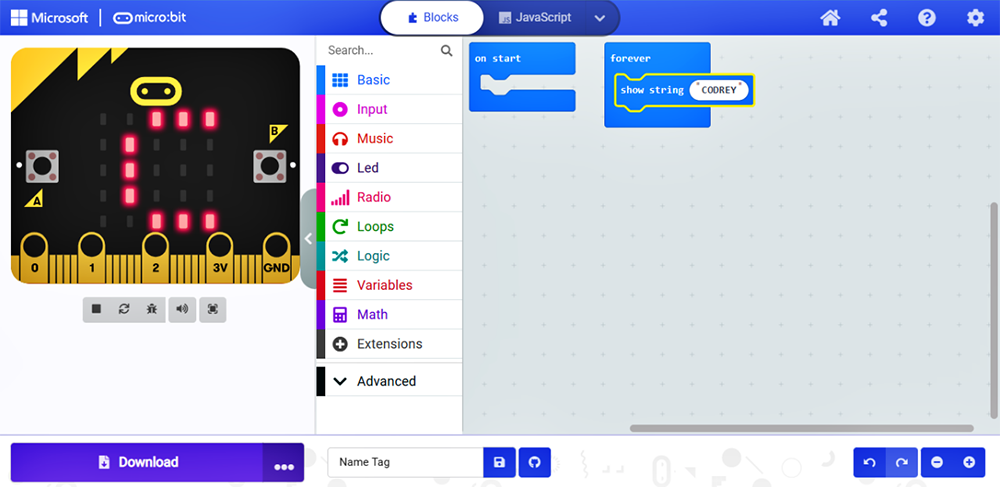
Next, open https://makecode.microbit.org/ In a new browser window. Then go to Tutorials, and open the Name Tag tutorial.

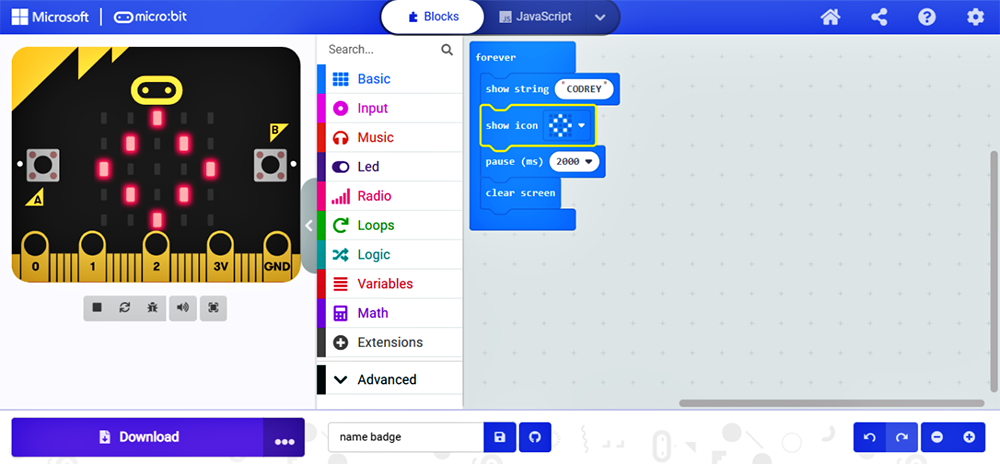
And, start the Blocks tutorial to scroll a name on the LED screen.

Finally, you can download your program as a .hex file from the code editor (https://makecode.microbit.org/#editor) to your computer. Then it’s easy to drag and drop the .hex file on to the MICROBIT drive (there are other clever methods too).
This official link will help you learn how to get your micro:bit working, program its features and create your first projects https://microbit.org/get-started/first-steps/introduction/
micro:bit – more fun
What is more, if you want to modify your name tag as a fancy flashing badge, you can download and transfer a simple hex code tailored for that through this link https://www.codrey.com/wp-content/uploads/2022/11/microbit-Flashing-Badge-codrey.zip
To import the .hex file, open https://makecode.microbit.org/#editor in a new browser window. Then you can import the file (microbit-Flashing-Badge_codrey.hex) by dragging and dropping it anywhere in the editor (provided micro:bit is connected to your computer).
Ultimately there are countless ways to make use of the micro:bit platform. Are your kids curious about how things run? Or do you wish to provide them with an outlet to unleash their creativity? The micro:bit may be just the thing you need.
I just wanted to give you a quick heads up but a new creative project may be underway, and more fun is in store!