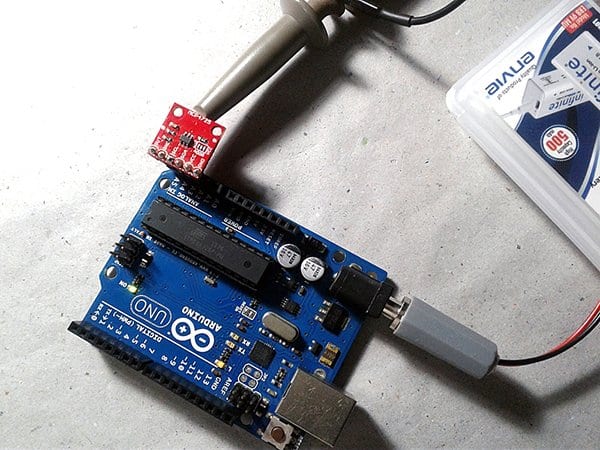
Not long ago, I played around with making an overheat sensor siren on the Arduino Uno, which I later modified a bit and incorporated into another hobby electronics project. Needless to say, it worked fine. So, this post shares the details of that simple Arduino experiment. Enjoy!
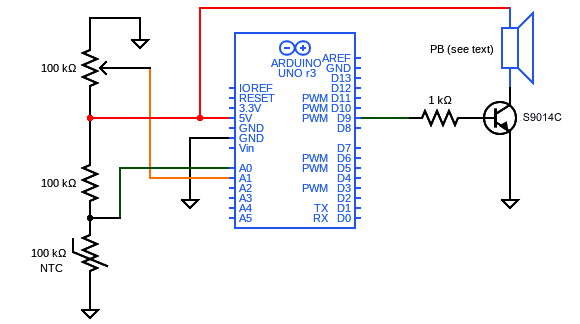
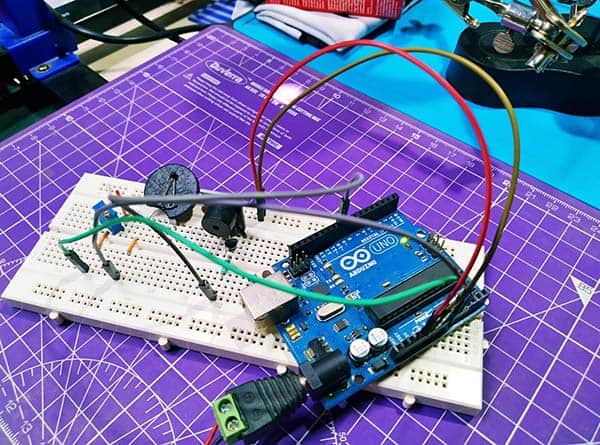
The hardware setup is very simple and straightforward as shown above as it only requires a few components apart from the Arduino Uno board. The essential elements are:
- 100KΩ NTC Thermistor x1
- 100KΩ ¼ W Resistor x1
- 1KΩ ¼ W Resistor x1
- 100KΩ Multiturn Trimpot x1
- S9014C NPN Transistor x1
5V Passive Buzzer Module x1 (see below)
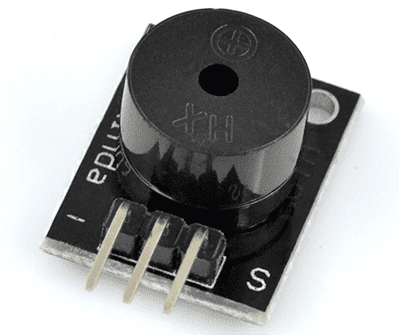
This 5V passive buzzer module has a 3-pin header but the centre pin is not connected to anything. The position of “S” pin and “-” pin may be reversed in some modules, but it should not matter. As observed in the module I used for this project, the buzzer part is actually a passive electromagnetic buzzer with an impedance close to 40Ω. For added circuit safety (and to ensure a rich volume output), a BJT is included to drive the sounder element.
An NTC Thermistor is a resistor in which the resistance drops as the temperature increases, and the most straightforward way we can measure the temperature is with a voltage divider. When we use the thermistor as the bottom leg of the voltage divider (as employed here), the voltage will decrease as the temperature increases. Note that it’s advised to optimise the value of the resistor at the top leg of the voltage divider to minimize the current through the voltage divider in order to prevent self-heating of the thermistor. Despite what I’ve just said, the onboard potentiometer lets you set the overheat detection threshold at the time of construction, or the end-user can. This is a much more elegant solution than an alarm system with a static setpoint.

This is the Arduino Sketch:
const int temperaturePin  = 0; // TH-NTC Input A0
const int thresholdPin = 1; // POT Input A1
const int sirenPin  = 9; // Siren Output D9
const int indicatorPin = 13; // Onboard Blink LED D13

void setup()
{
  pinMode(sirenPin, OUTPUT);
  pinMode(indicatorPin, OUTPUT);
}

void loop()
{
  int sensorVal = analogRead(temperaturePin);
  int controlVal = analogRead(thresholdPin);

  if (sensorVal < controlVal)
  {
    playBuzzer(sirenPin);
  }

  delay(100);
}

void playBuzzer(const int sirenPin)
{
  for (int i = 0; i < 3; ++i)
  {
    digitalWrite(indicatorPin, HIGH);
    tone(sirenPin, 400);
    delay(500);
    digitalWrite(indicatorPin, LOW);
    tone(sirenPin, 800);
    delay(500);
  }

  noTone(sirenPin);
}
Finally note that this is only an entry-level hobby-grade project, and it’s okay for an application that doesn’t demand better than a few degrees Celsius of accuracy for basic thermal protection. For this implementation I used a crude voltage divider (not optimized for any particular temperature scale) with the upper resistor matching the resistance of the thermistor at 25°C. Therefore, half of the Vcc should be expected as the output at 25°C. Also, it’s worth noting that the trimpot can provide only a limited help in setting detection thresholds unless you can tweak the hardware and/or software to optimize the canonical implementation (my way was pretty clunky).
Below figure depicts the response curve of an NTC thermistor. From the curve (representing the relationship between resistance and temperature) you can see that a small drift in temperature causes a large change in resistance but the response of the thermistor is not linear. That is, the change in resistance for a given change in temperature is not constant over the thermistor’s temperature range.

However, you can linearize the thermistor response (on the hardware side) by adding a fixed value resistor in parallel with it. The value of the resistor should be equal to the thermistor’s resistance at the midpoint of the temperature range of interest (more on this later).
Well, that’s all for now. Try it out and have fun!