This guide details how to build a simple sawtooth wave generator using the venerable 555 timer chip that can be used to test some of your homemade circuits and projects. Got any questions? I’m happy to help!
Sawtooth Wave
As you can read in Wikipedia, sawtooth wave is a kind of non-sinusoidal waveform. It is so named based on its resemblance to the teeth of a plain-toothed saw with a zero rake angle. The convention is that a sawtooth wave ramps upward and then sharply drops. In a reverse/inverse sawtooth wave, the wave ramps downward and then rise sharply. It can also be considered the extreme case of an asymmetric triangle wave (https://en.wikipedia.org/wiki/Sawtooth_wave).
Sawtooth Wave Generator – Design Description
Okay, in this project we will design and build a simplistic Sawtooth Wave Generator which gives a sensible output signal. Although this is a fixed oscillator design, a little circuit trickery will give access to variable waveforms. The figure below shows the schematic of the sawtooth wave generator.
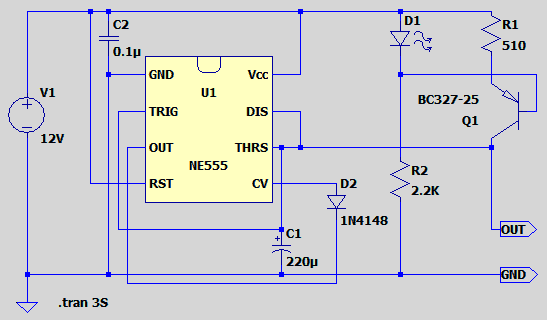
In this design, a constant current source wired around T1 is what I use to charge the timing capacitor C1 in a linear fashion. The idea behind it is very simple to understand – if you charge a capacitor from a voltage source in series with a simple resistor (RC network charging), then-current through the resistor will decrease as the capacitor charges up, because the voltage across the resistor will decrease. It’s this decreasing current which gives the capacitor charging its characteristic curve.
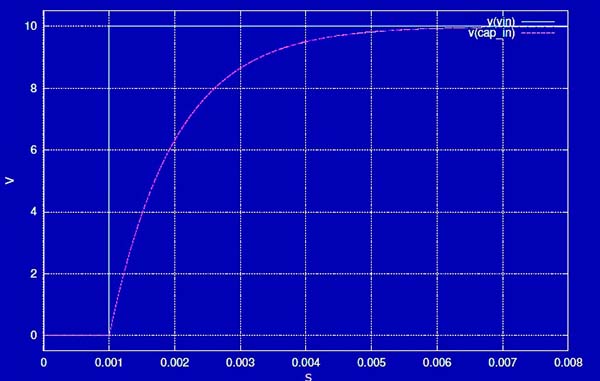
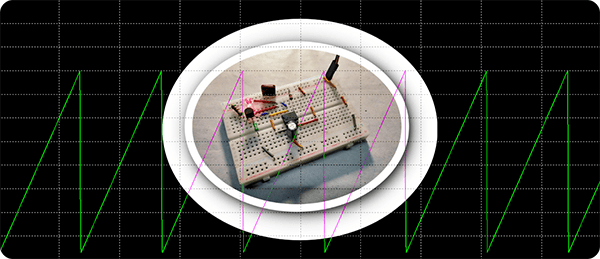
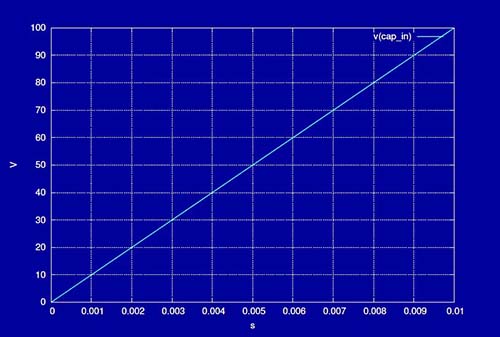
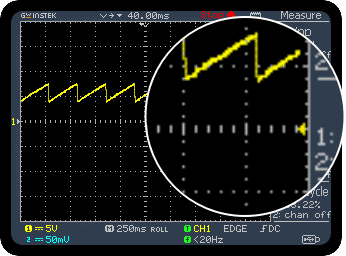
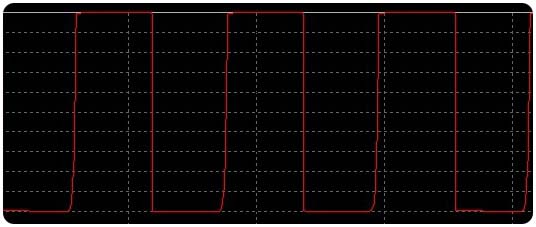
However, if a constant current is applied to the capacitor (constant current charging), the change in voltage across its terminals with respect to time is constant, i.e., a straight line. A Spice simulation depicts this well.
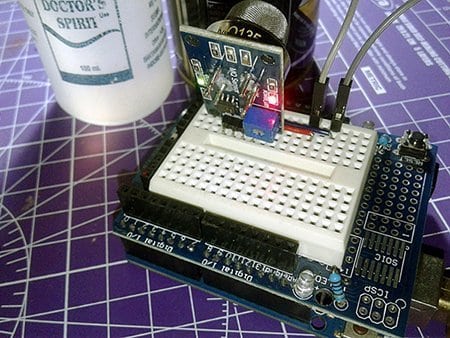
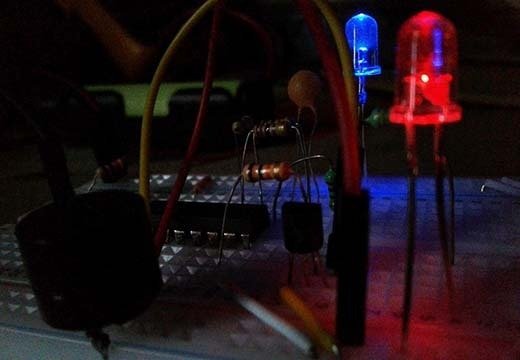
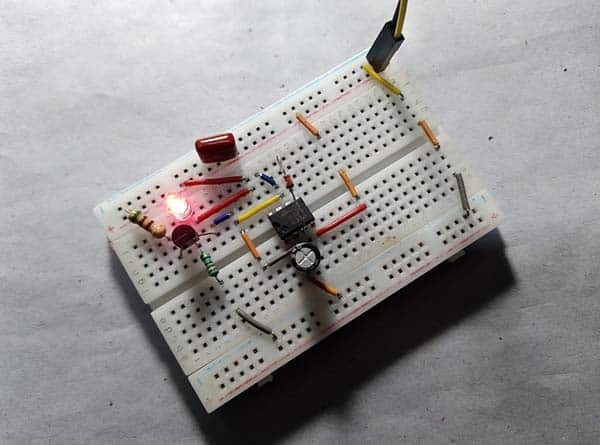
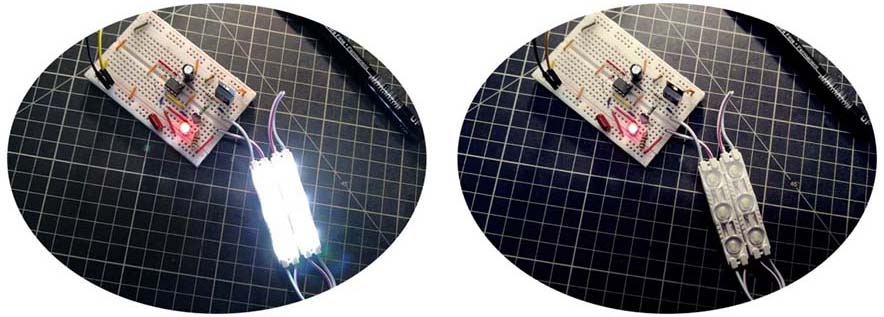
So, I built a low-frequency saw tooth wave generator using the NE555 timer (U1). I did it with the following breadboard setup
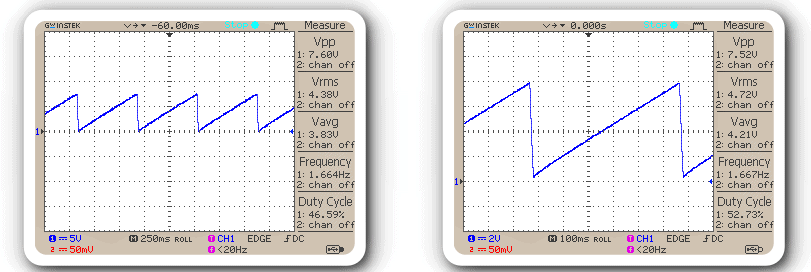
And, this is what the output (OUT) waveform looks like on my oscilloscope when the breadboard assembly is powered by a regulated 12VDC power source.
Sawtooth Wave Generator – Parts List
Note that in my breadboarded version, I only used components taken from my junk box, and you can too. Anyway, below is a list of elements needed for this small project.
- U1: NE555
- T1: BC327 or S8550
- D1: Red LED (VF ~2V)
- D2: 1N4148
- C1: 220uF
- C2: 100nF
- R1: 510Ω ¼ w
- R2 2.2KΩ ¼ w
There’s one thing to note here. You can see a ½ w 510Ω resistor (R1) in my prototype. But that’s not necessary – a ¼ w resistor will do that job right for you. Further, the main function of the 1N4148 diode (D2) is to limit the dc offset of the final saw tooth wave. Maybe I’m mistaken then, by “DC offset” I mean that the waveform appears to be shifted a bit above the zero line. Keep an eye on things with your oscilloscope, and correct me if it isn’t the right term or if I’m wrong!
Idea Detours…
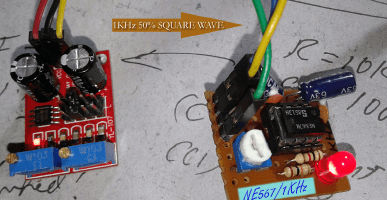
My real intention behind this concept is to use it as a signal source in an upcoming audio-related project. But I need to gather a few more crucial parts to move forward with that weird project. However, I will get to that later. In the meantime, you can try to make something fun to enjoy in your spare time.
Okay, now we’re going to look at a relatively low cost way to convert the output of the sawtooth wave generator into something more interesting, it’s a despicable idea though. This is an add-on circuitry for driving a 12VDC LED lamp stick/strip to make a mesmeric solid-state LED flasher/strobe device.
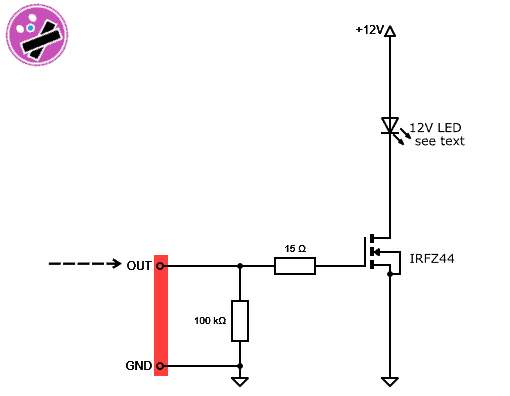
My breadboard setup. As you can see, it employs a pair of 12VDC (100mA x2 in parallel) power white LED modules as the light source (https://docs.rs-online.com/b738/0900766b8150e1dd.pdf).
The ideal LED current waveform should be just like the one shown below.
Naturally, there is enough room for Improvements, and of course, one’s own subjective enhancements may always be made. That’s all for now. Thank You!