Peephole proximity sensor presented here is an inexpensive nearness detector for hobby electronics projects and home automation applications, where we need to sense the presence of a person (or object) in front of an entry door.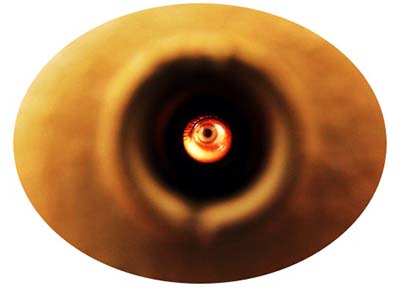
E18-D80NK – Introduction
My personal favorite Key component for this design is an easy-to-use active infrared proximity sensor switch E18-D80NK which is available in many Chinese & Indian online webstores as well as Amazon and Flipkart. Its price varies, but you can get it for approximately ₹200 in most Indian stores.
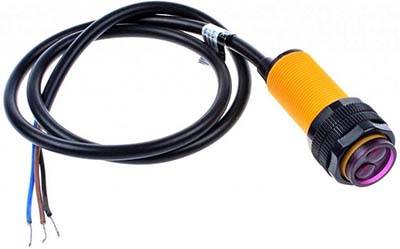
The E18-D80NK adjustable infrared (IR) proximity sensor switch can measure distance between 3 to 80 cm. It features an easy to mount chassis, making prototyping much simpler. The E18-D80NK is in fact a well-engineered reflective-type photoelectric proximity sensor that integrates modulated Infrared light, so there’s less false triggering even when exposed to strong ambient light. The sensor is designed to be powered from a 5VDC source and it has a 100mA NPN transistor NO (normally open) solid-state switch output.
E18-D80NK – Quick Specs
- Light source: Modulated Infrared (diffused reflective type)
- Sensing range: 3cm to 80cm (depends on obstacle surface)
- Input voltage: 5VDC (< 25mA)
- Type: DC 3 Wire NPN-NO (Normal Open)
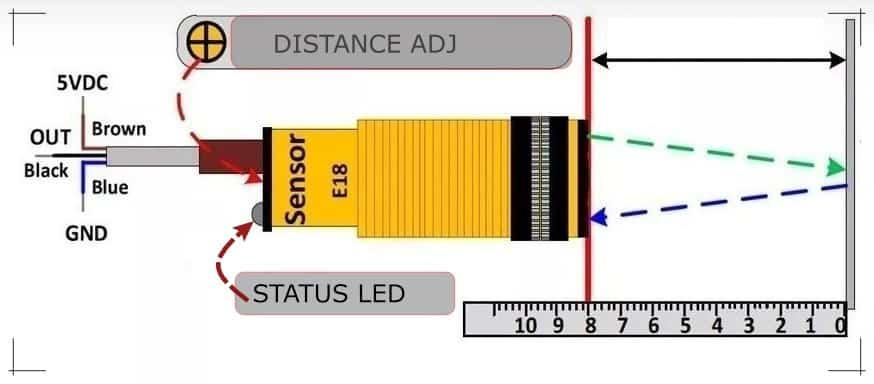
- User Interface: Sensing distance adjustment POT and output status LED indicator
- Control signal level: High = 2.3V≤Vin≤5V & Low = 0.3V≤Vin≤1.5V
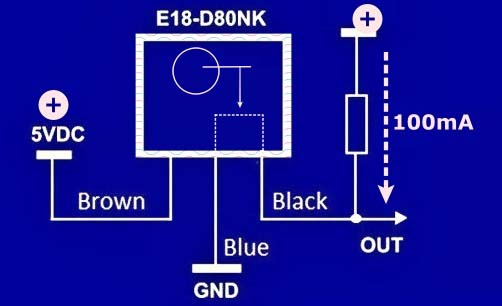
E18-D80NK – Output Circuit
The signal output is normally held HIGH due to a claimed to be built-in 10KΩ pull-up resistor. When an object is detected, the output drops to LOW and remains in LOW state as long as the object is there. A red LED on the back of the module also lights up when the object is detected. The output wire is in fact the collector lead of the internal NPN transistor that can sink a maximum current of 100mA.
E18-D80NK – Inside Look
This is the generic system block diagram of the E18-D80NK infrared proximity sensor switch, published by a Chinese site www.61mcu.com. Since there’re upgraded versions with altered internal circuitry and external wiring schemes, simply consider this as quick reference material rather than official documentation.
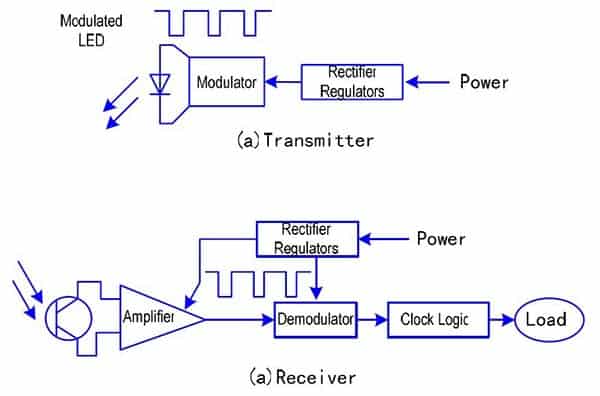
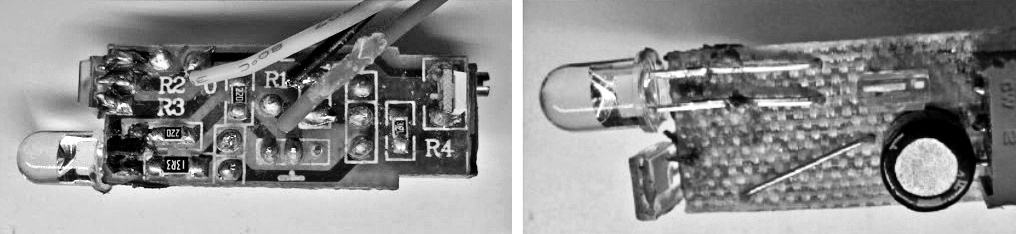
And, this is the photograph of its internal circuit board, borrowed from an electronics community forum.
How does this bizarre circuit work? have no answers yet, but I’m in a plan to do an in-depth teardown to figure out the secrets of this mysterious Chinese electronics. Meanwhile, if you have any surmisals or dependable information, drop them in the comments box provided below.
E18-D80NK – Peephole Proximity Sensor Project
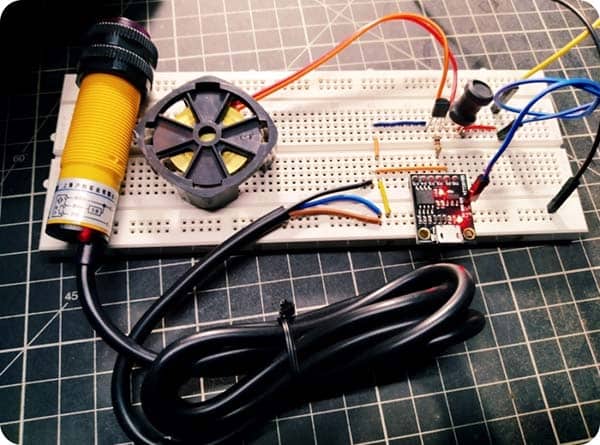
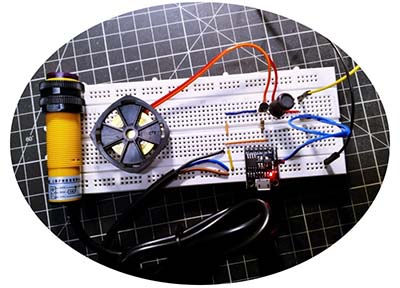
Similar to installing a peephole camera, I wanted to make a peephole alert device (to warn myself when someone comes in front of my door) by attaching the E18-D80NK infrared sensor eye to the front door peephole. My little design is ready to receive power from any rechargeable (or non-rechargeable) 9V Battery. Also, the whole design is based on cheap and ubiquitous electronics components. The following circuit, centered on Digispark Attiny85, was selected to do that job.
Digispark – Hardware Setup
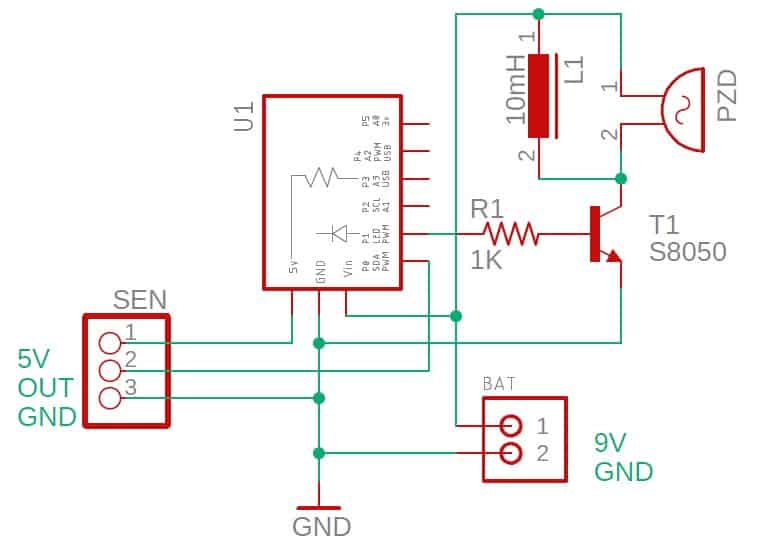
- U1: Digispark Attiny85 Development Board
- T1: S8050 NPN Transistor
- R1: 1KΩ ¼ w Resistor
- L1: 10mH Drum-Core Inductor ( or a 1KΩ Resistor)
- PZD: Piezo Passive Buzzer (Example: Murata PKM22EPTH2001-B0)
- SEN: 3-Pin Connector for E18-D80NK Sensor
- BAT: 2-Pin Connector for 9V Battery
Digispark – Code/Arduino Sketch
/*
 * Peephole Proximity Sensor v1.0
 * Sensor: E18-D80NK
 * uC: Digispark Attiny85
 * T.K.Hareendran / 02-2021
 */

#define sirenPin 1 // P1
#define switchPin 0 // P0
#define lowFreq 600 // Hz
#define highFreq 1200 // Hz

void setup() {
  pinMode(sirenPin,OUTPUT);
  pinMode(switchPin,INPUT_PULLUP); // Pull-up Enabled (optional)
}

void loop() {
 if (digitalRead(switchPin) == LOW){ // Object Detection

  for (int i = lowFreq; i <= highFreq; i++) { // Siren ON
    tone(sirenPin, i);
    delay(1);
  }


  for (int i = highFreq; i >= lowFreq; i--) {
    tone(sirenPin, i);
    delay(1);
  }


  delay(10);
}
else {
     noTone(sirenPin); // Siren OFF
     }
}
There’re a few important things to note here:
- Most E18-D80NK sensors are wired with a 10K pull-up resistor. However, you can enable Digispark I / O’s ‘weak’ internal pull-up resistor as an additional measure to counteract the noise produced by longer sensor cables
- Since the sounder is a passive piezo buzzer, one 10mH inductor or one 1K resistor needs to be wired in parallel with it. The latter, however, will produce a comparatively low sound output
- To create better output, you need to adjust the alarm frequency to match the passive piezo buzzer used in your prototype
Enclosure & Installation Hints
A small soapbox is enough to cover the entire electronics assembly. However, the sensor should be mounted on the peephole of the door so that the eye of the sensor is facing the front. Mounting brackets specially made for this sensor are also available in many webstores (see below).

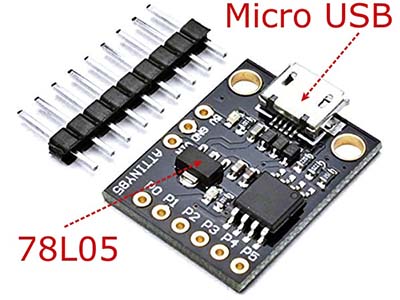
Note, this time I am using the CJMCU Digispark board, which is almost identical to the standard Digispark board, but with some minor changes. First, this board comes with a micro USB female connector. Second, the onboard 5V regulator is 78L05, not 78M05. No change found in the rest of the electronics yet!
Finally, I decided to share with you a pair of random snaps of my quick prototype. Take a look!