A few weeks ago, while working on another project, someone asked me to build a simple sweeping system for a tiny webcam. I set it aside for the next day and built a webcam servo sweep base using a few parts I had in hand. As a sequel, here’s a quick post on how to build a crude sweeping system for your webcam!
You will need these key elements:
- Arduino Uno/Nano x1
- TowerPro MG995 Servo Motor x1
- 25T Round Servo Horn (MG995) x1
- 3mm/5mm LEDs x2
- 220Ω ¼ W resistor x2
And, of course, a webcam! My choice is Zebronics ZEB-Crystal Clear because it’s a lightweight webcam that’s easy to attach to a regular servo horn/arm. Now let’s go with the software. So, upload the code below to your Arduino Uno/Nano.
#include <Servo.h>

Servo myservo;

int pos = 0;

void setup() {
  myservo.attach(9); //Servo Pin D9
  pinMode(8, OUTPUT); //LED-A Pin D8
  pinMode(10, OUTPUT); //LED-B Pin D10
  myservo.write(90); //Initial Servo Horn Position 90°
  delay(4000); //Initial Delay 4000mS (optional)

}

void loop() {
  for (pos = 0; pos <= 180; pos += 1) {
    myservo.write(pos);
    delay(20);
  }
  digitalWrite(8, HIGH);
  delay(20);
  digitalWrite(10, LOW);


  for (pos = 180; pos >= 0; pos -= 1) {
    myservo.write(pos);
    delay(20);
  }
  digitalWrite(10, HIGH);
  delay(20);
  digitalWrite(8, LOW);

}
I will not explain anything about this basic code, so try it yourself and update it if necessary.
Want to see the magic go on? https://wokwi.com/projects/327069862412157522
Next, follow this hardware setup diagram:
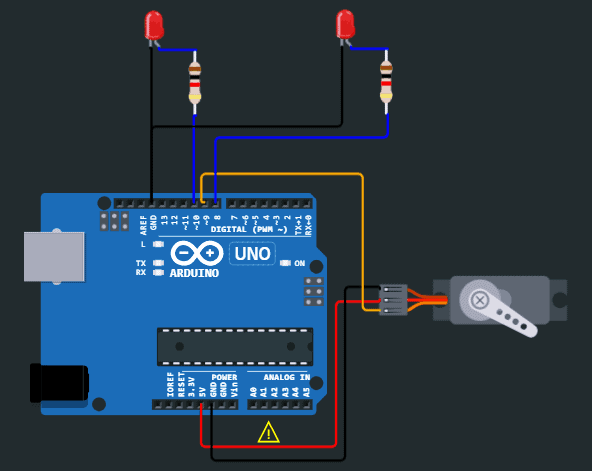
As a precautionary note, never power the servo from the 5V logic power supply of your Arduino, except for some spry tests. So far as I’m aware, the no-load running current of MG995 Servo is around 350mA at 4.8V, and its stall current is close to 1500mA. Therefore, always use an external 5VDC power supply for the servo to protect your Arduino!
- MG995 Servo Datasheet https://www.electronicoscaldas.com/datasheet/MG995_Tower-Pro.pdf
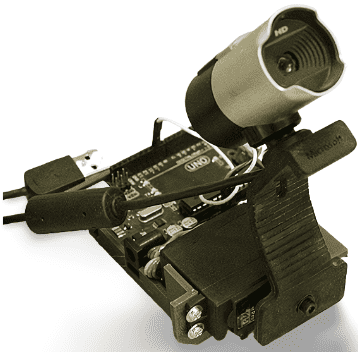
As an aside, I bought a clone of the original TowerPro MG995 Servo last year from a trusted online supplier. Although it’s a cheap clone, it seems to be compatible with all the applications that use the genuine TowerPro MG995. I’ll do more tests later to confirm this claim! Note on mechanical assembly – There’re no special rules to follow when building the webcam servo sweeping base, as it depends entirely on your webcam. You must first build a support to hold all the elements, and finally screw/clip the webcam to the sweeping base. Below you will find such a build idea (seen on the web) that inspired me a lot (Thanks Eduardo Chamorro Martin).
However, there’re some significant “mechanical” things you need to know when using servos in your electronics projects:
Servo Mounts: Hobby servos usually have tabs/ears that can be used to fasten the servo to your build, however, sometimes those are not positioned in a way that makes them useful for your application. Luckily, servo mounts come in many forms and fasten to the stock servo tabs, leaving you with holes that make fastening the servo to your build much easier.
Servo Horns/Arms: Servo horns/arms are servo attachments that’re commonly used to transfer motion from the servo to a linkage. Standard servo arm and horn kits are now available everywhere (see below).

Servo Splines: Servos have an output shaft that typically uses a splined profile in order to transfer the torque from the output shaft into the servo attachment that is fastened to it. This splined profile is typically classified by the number of teeth, for example 25T.
- Learn more from here https://www.servocity.com/glossary/
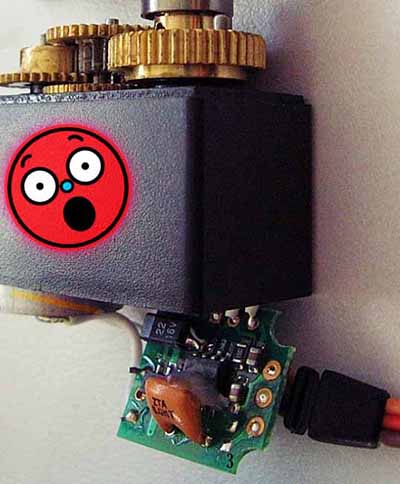
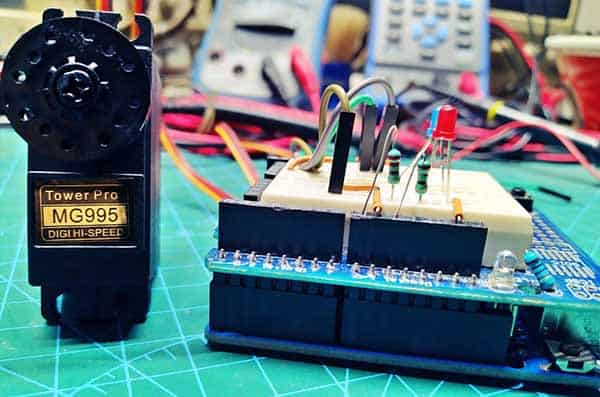
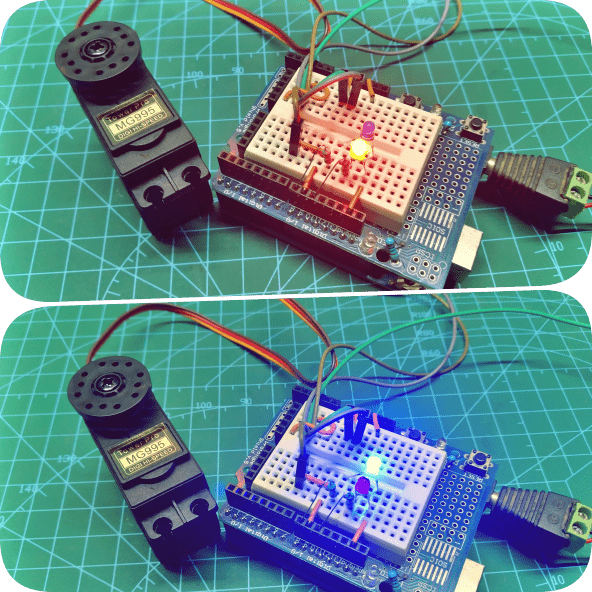
Here’s a casual snap of my completed electronics assembly (done first, just for drill). At this point, note that I used a 9V battery for my Arduino setup and a separate 5VDC power supply for the servo, while the GND rail was common to both!
In conclusion, like many of my posts, there’s a lot to take in, but I hope this post inspires you to build your own webcam servo sweep systems.
Servos are not simple, despite appearances, but one thing is certain – the more you play around with the servo electronics, the more you will learn about the complex interactions between the electronic and mechanical elements. And, such hands-on experiences will greatly enhance your basic knowledge of electro-mechanical systems and components. Sounds like a good idea? Go for it!