Aroma burners/diffusers let the air around you deliver revitalizing and refreshing fragrance to your home/office interiors. This article guides you through the simple process of making your own electric aroma burner/diffuser.
Gathering requisite components
First of all look for and gather a small ceramic ware looks attractive and can be kept in any place in the room. The quick way is to buy a “tea light candle aroma diffuser” from a street merchant or from the online market place. In such a non-electric aroma burner, placing a tea light candle inside the container will heat the water (mixed with a few drops of aroma oil) in the bowl on the top of it so that a sweet fragrance disperses smoothly and surrounds the room within a few moments.
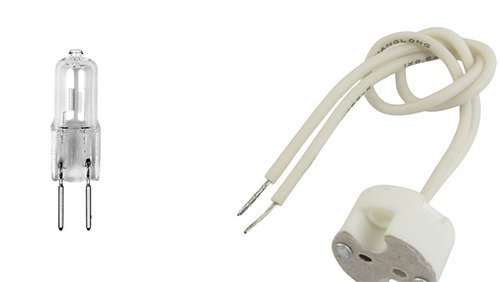
Here you’re going to build an electric aroma burner. So you’ll need a suitable tungsten halogen bulb (to replace the tea light candle) – one AC230V/50W tungsten halogen bulb will fit in. You should also pick an appropriate holder base for that halogen capsule bulb.
Electrifying the aroma burner/diffuser
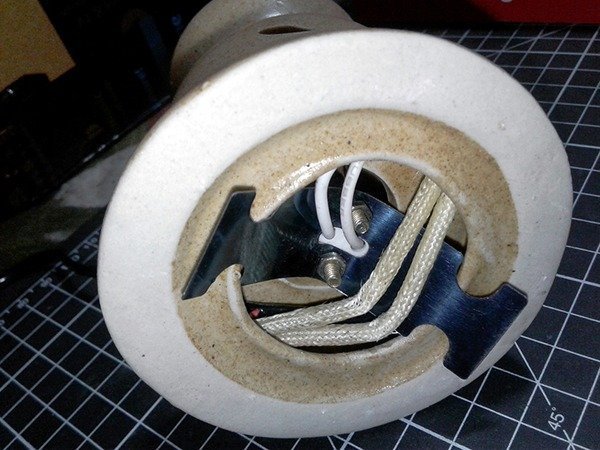
Now is the time to pick out a suitable piece of flexible metal strip for mounting the halogen bulb.
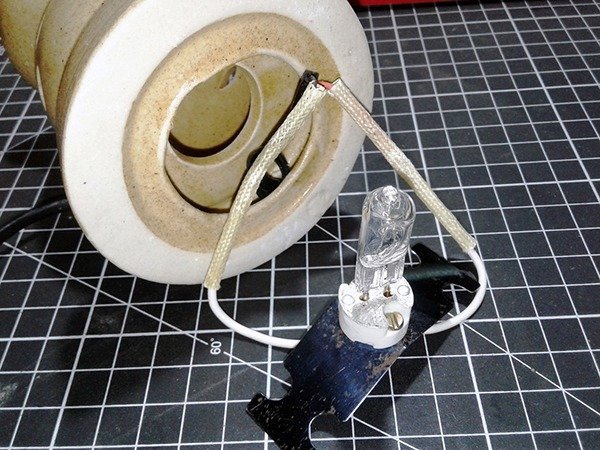
Upon completion, just solder a power cable to the halogen holder base, insulate, and route that cable comfortably through any available hole/slot located at the bottom of the container (hoping that you’re a meticulous craftsman).
Well, now fill the top bowl with water, pour 3-4 drops of aromatic essential oil in that water, and power up your electric aroma burner/diffuser. Yes, it’s done!
Delighting touch of electronics
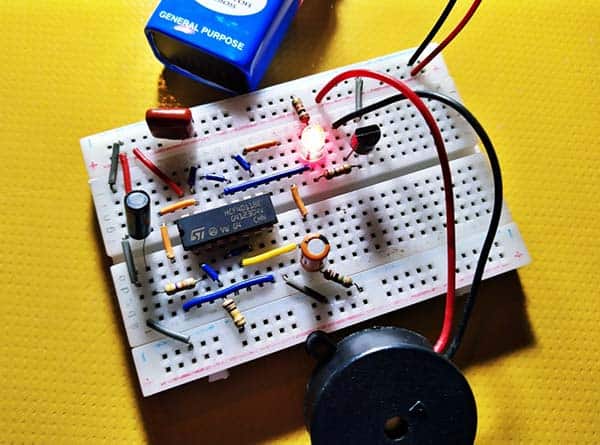
Just after the successful build of my model, I got inspired by an idea that’s nothing but the design of an isolated controller interface/ adapter to drive the electric aroma burner/dispenser by a microcontroller-based circuit or the like. Following is the tried and tested design (v1) of that electronics assistant realized with the help of a handful of cheap electronics components. Needless to say, it’s tailored particularly for the proposed application only.
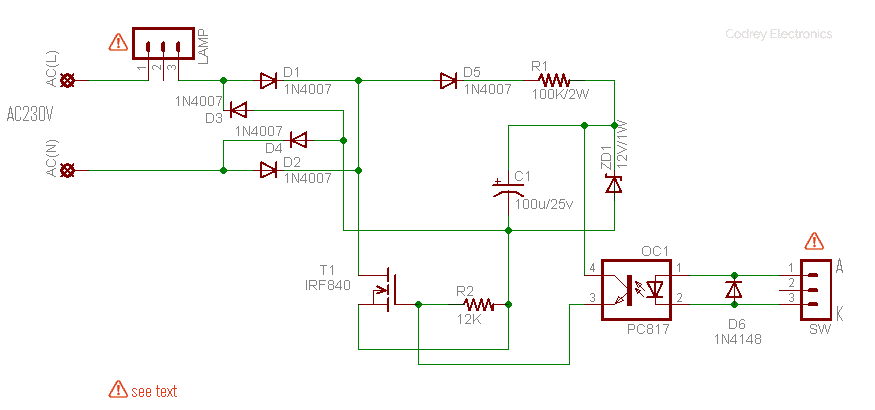
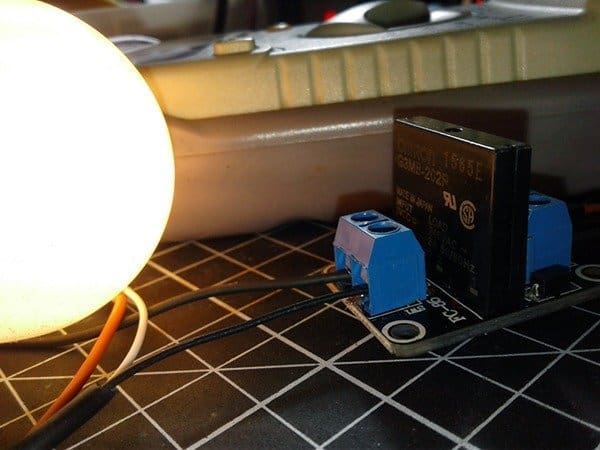
As can seen in the schematic, the circuit runs on AC230V with an output socket (LAMP) for the lamp and an input socket (SW) for external drive. One thing to be mindful of is the correct level of the drive input (steady or pulsed). Terminal “A” of the input socket represents the Anode of the internal opto-coupler while “K” is for its Cathode. The 1N4148 (D6) is an optional component wired antiparallel to the internal infrared light-sender part of PC817 opto-coupler (OC1). Maximum forward voltage (VF) of PC817 is 1.4V (IF = 20mA), and this must be noted while selecting the value of your ballast resistor. As usual please be very aware that this circuit is particularly dangerous because it involves fatal high-voltage AC, so if you’re not comfortable and experienced in handling it, please don’t attempt.
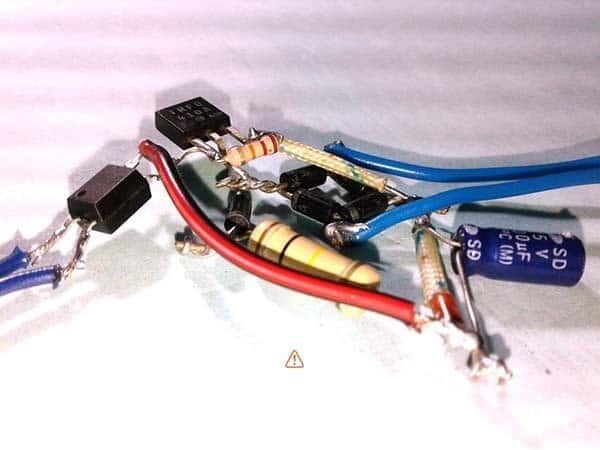
Next is the static image of my point-to-point wired isolated controller/driver circuit. See, it’s tested with the IRFU410A power mosfet (for a while) as it’s only available in my drawer at that time. But you should strictly follow the given schematic, build it on a piece of veroboard, and finally put the entire circuit board inside an insulated plastic enclosure!
Useful web links
- IRF840 – https://intranet.ctism.ufsm.br/gsec/Datasheets/IRF840.pdf
- PC817 – https://www.farnell.com/datasheets/73758.pdf
- IRFU410A – http://pdf.datasheetcatalog.com/datasheets/208/426263_DS.pdf
- Halogen Bulb – https://www.amazon.in/VRCT-Replacement-Halogen-Diffusers-Mirchi/dp/B078VSZZLT
- Halogen Bulb Holder – https://www.amazon.in/Socket-Halogen-Light-Holder-Connector/dp/B078F15W3L
- Ceramic Aroma Burner – https://www.amazon.in/Pure-Source-India-Ceramic-Regular/dp/B078HKD1FP