Recently, I got another packet from Banggood as usual from China warehouse. Inside the packet, there’s a WeMos® D1 mini module – this time its version 2.2.0. I’m happy to note that it’s still alive because WeMos D1 mini is an inexpensive, Arduino compatible, minuscule Wi-Fi module backed by the power of the quite popular ESP8266 controller. And it’s a likely a best module for a maker (especially a novice) wanted to develop little IoT projects without burning a deep hole in his pocket.
WeMos D1 mini (v2.2.0) Hardware
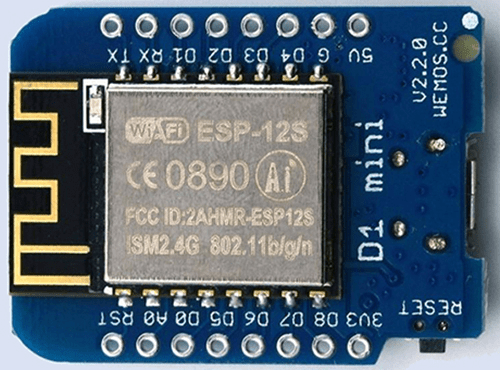
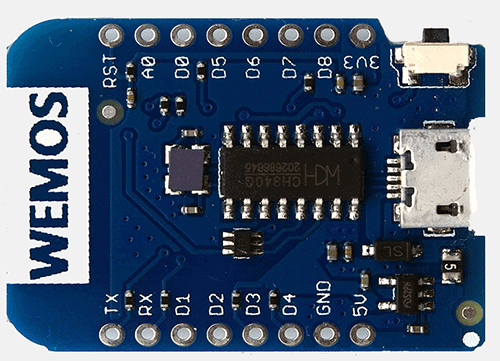
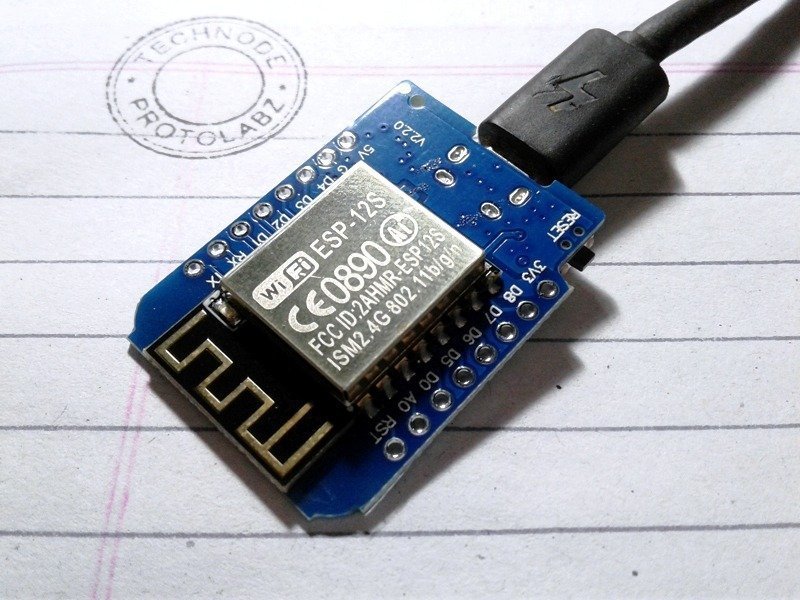
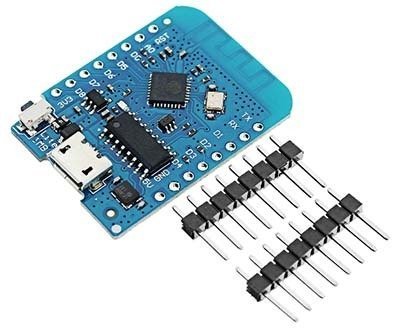
As you can see here, core component of the WeMos D1 mini (v2.2.0) is the ESP-12S Wi-Fi enabled controller mounted at the top of the module. There’re a number of other components at the bottom of the module (see next figure) including one CH-340G chip and a 3.3V linear voltage regulator. Also see two rows of connection/header points, one reset key, and a micro USB female connector.
Official schematic diagram of the WeMos D1 mini (v2.2.0) is shown below:
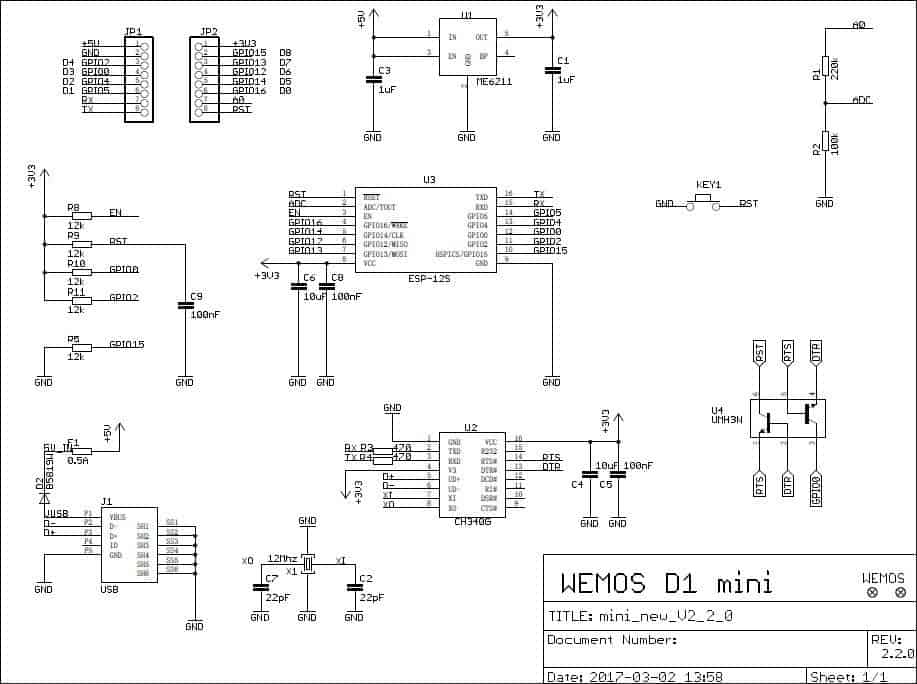
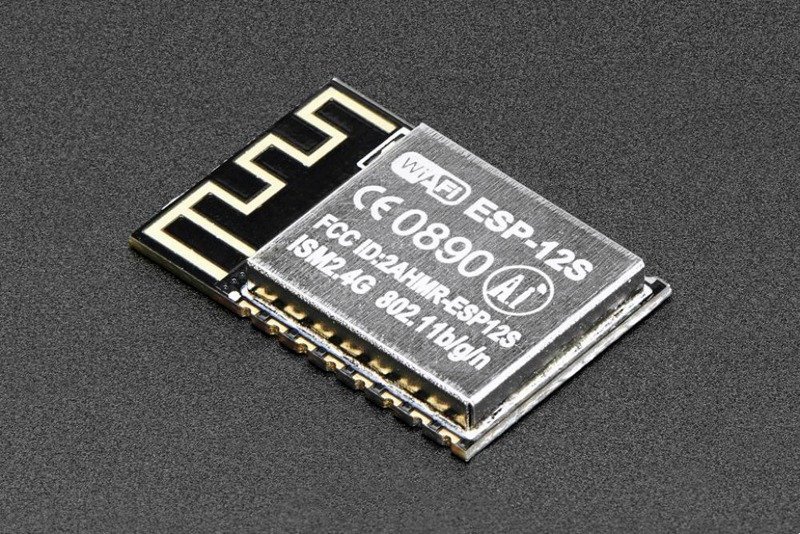
ESP-12S Wi-Fi module (https://www.elecrow.com/download/ESP-12S_User_Manual.pdf) allows you to easily access many features of the ESP8266 i.e. 11 GPIO pins, one analog-to-digital converter (ADC) with a 10-bit resolution, etc. As for the modules previously released, the antenna is an onboard (PCB track) type which yields better Wi-Fi sensitivity.
The CH340G (https://www.datasheet5.com/pdf-local-2195953) is a USB bus adapter chip that provides a serial interface over the USB bus. CH340G renders common MODEM signals to allow adding UART to a PC, or converting existing UART devices to USB interface. For CH340G Windows driver download (and to get useful instructions), go to https://www.drivereasy.com/knowledge/ch340g-driver-download-and-update-in-windows/. For further technical details on WeMos D1 mini (v2.2.0), take a look at https://wiki.wemos.cc/products:retired:d1_mini_v2.2.0.
WeMos D1 mini (v2.2.0) Quick Setup
I am very happy to guide you through the quick test setup steps and the procedure to upload programs to WeMos D1 mini (v2.2.0).
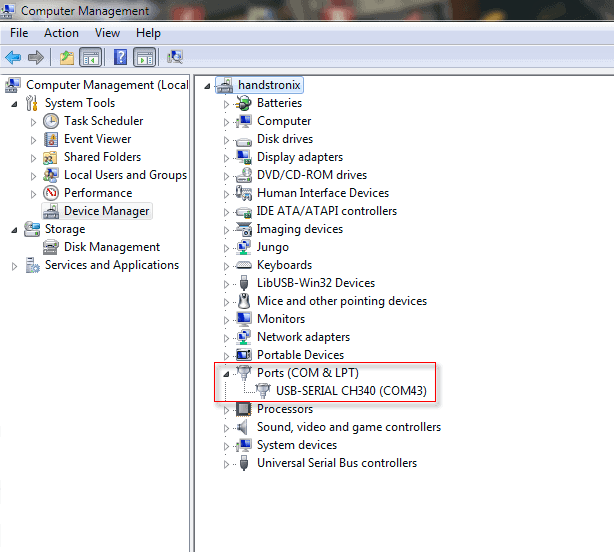
First of all, install the latest CH340G driver in your Windows computer. After successful installation, connect WeMos D1 mini module to the computer USB through a micro USB cable (the so called android cable) and ensure that it’s appeared there in the Device Manager.
Here, I’m going to assume that you already have at least version 1.6.9 of the Arduino IDE installation in your Windows computer.
Open your Arduino IDE, Go to “File>Preferences”, copy-paste the following URL in the additional board manager’s URL text box, and click OK to download the packages. http://arduino.esp8266.com/stable/package_esp8266com_index.json
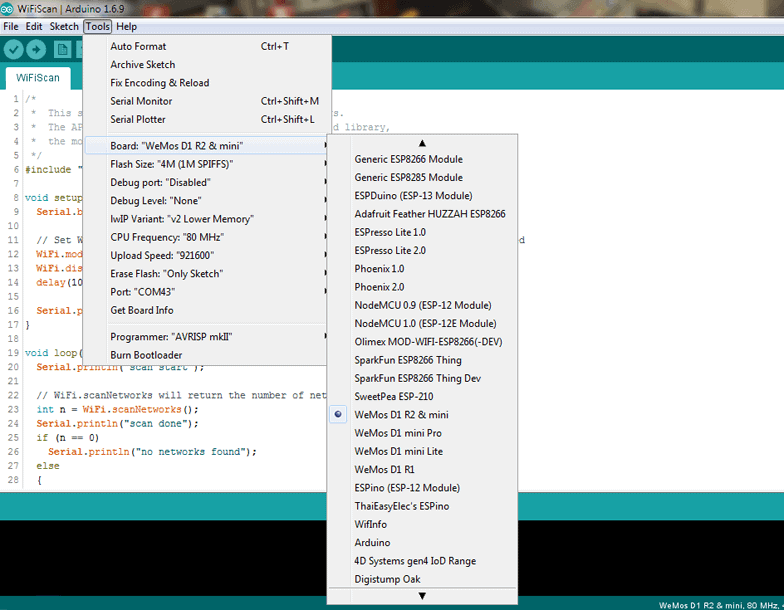
Next, go to “Tools>Board>Board Manager” in your Arduino IDE, select “esp8266 by ESP8266 community” from the dropdown list of available boards, and continue the installation process.

Once complete, just select the type of WeMos D1 board from the “Tools>Board” menu of your Arduino IDE to upload your first program. You can select “WeMos D1 R2 & mini” as the board. Remember to select the right port to which the board is connected in the “Tools>Port” branch.
There you are!
WeMos D1 mini (v2.2.0) Example/Test Sketch
Well, now you might like to get and test some example sketch/code to begin the play. Here’s how you can do that:
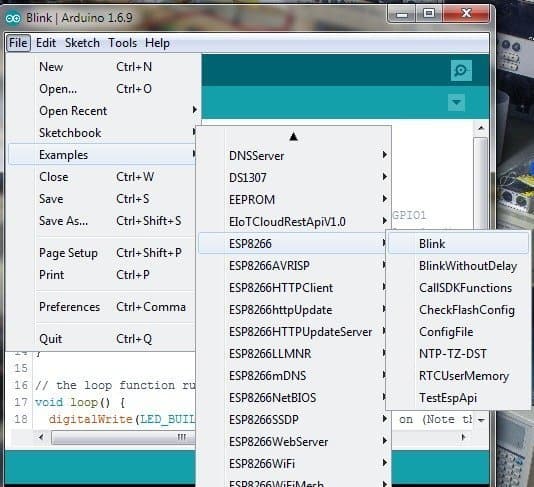
Open “File>Examples”. In examples of ESP8266 (or in D1_mini_Examples), just select the “Blink” program. Uploading that example sketch to WeMos D1 mini board blinks its onboard blue LED (see test video).
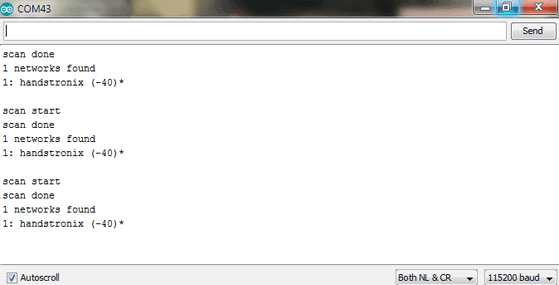
Now to a “WiFi Scanner” sketch for scanning available Wi-Fi networks. Here’s how to get that simple one:
For the experiment, simply copy-paste-compile-upload the example sketch given below (as usual). Note that the example sketch uses a powerful “ESP8266 WiFi” library which is automatically installed while using the Boards Manager. While you proceed with the board package for the ESP8266, as done previously, the “ESP8266 WiFi” library is automatically installed for you. Actually, the “ESP8266 WiFi” library is prepared after the standard Arduino WiFi library but it has even more great functionality than the standard Arduino WiFi library.
#include "ESP8266WiFi.h"

void setup() {
  Serial.begin(115200);

  // Set WiFi to station mode and disconnect from an AP if it was previously connected
  WiFi.mode(WIFI_STA);
  WiFi.disconnect();
  delay(100);

  Serial.println("Setup done");
}

void loop() {
  Serial.println("scan start");

  // WiFi.scanNetworks will return the number of networks found
  int n = WiFi.scanNetworks();
  Serial.println("scan done");
  if (n == 0)
    Serial.println("no networks found");
  else
  {
    Serial.print(n);
    Serial.println(" networks found");
    for (int i = 0; i < n; ++i)
    {
      // Print SSID and RSSI for each network found
      Serial.print(i + 1);
      Serial.print(": ");
      Serial.print(WiFi.SSID(i));
      Serial.print(" (");
      Serial.print(WiFi.RSSI(i));
      Serial.print(")");
      Serial.println((WiFi.encryptionType(i) == ENC_TYPE_NONE)?" ":"*");
      delay(10);
    }
  }
  Serial.println("");

  // Wait a bit before scanning again
  delay(5000);
}
I hope you are now somewhat familiar with the WeMos D1 mini (v2.2.0). Keep following us for new Wi-Fi / IoT do it yourself projects.
Finally, it’s very worthy to note down that the WeMos D1 series generally consists of the regular 4MB D1 mini, the 16MB D1 mini Pro plus, and the 1MB D1 mini Lite. However, the WeMos D1 mini Lite (tailored especially for wearable computing) sports an ESP8285 (not ESP8266). Contrary to its forerunner, it’s got an internal 1MB flash memory!
Hello,
do you have the official schematic diagram of the WeMos D1 mini (v2.2.0) in high res or as pdf?
Steve:
Thanks!
You can download a PDF copy of the official schematic through this link (I have not checked it thoroughly) https://www.wemos.cc/en/latest/_static/files/sch_d1_mini_v3.0.0.pdf
Thank you, but i know the V3 schematic diagram. V3 is using the ESP8266EX as base and not the ESP-12F.