Here is a fascinating USB-powered LED Candle armed by the Digispark USB Development Board based on Attiny85 microcontroller. Thanks to Digispark – despite the lilliputian size, it’s packed with capabilities, and apart from having fewer I/O pins it can do most of what the microcontroller in the Arduino can do. Further, you can program it from the same Arduino IDE used with your Arduino!
What you will need:
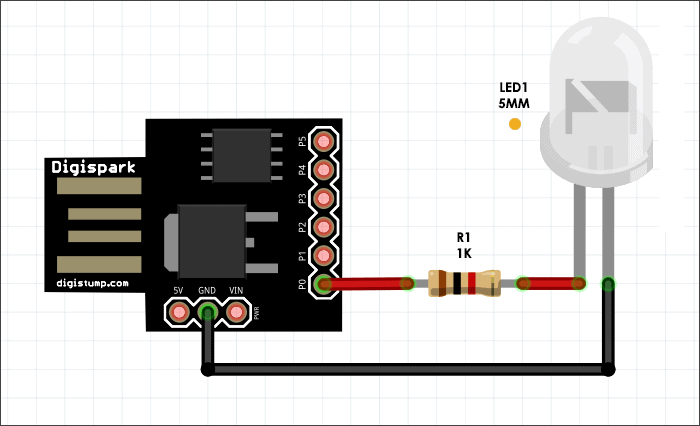
- Digispark USB Development Board x1
- Water-Clear 5mm LED (golden yellow/amber) x1
- 1K ¼ w carbon resistor x1
Note that the golden yellow/amber LED is absolutely vital for this design. Other colors make a huge deviance, may be nice, but not commended!
Wire the LED and the resistor up like in this schematic
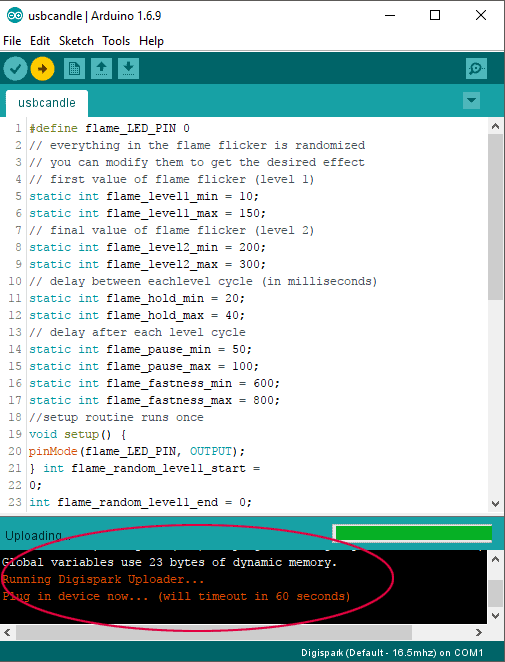
Upload the “escomcandle.ino” code to the DigiSpark board
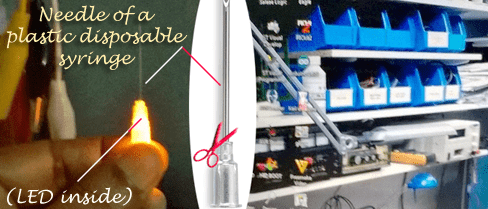
Take the needle of a plastic disposable syringe (matches with the diameter of the LED). Insert the LED in the hole of the needle holder, stick the LED inside, and cut the needle out (needle-cap of an insulin syringe can also be used for this purpose).
The light is now nicely diffused, however, to get best results, mount this assembly at the top of a short-length thermal glue-stick. The LED candle light is mostly done!
Digispark Primer
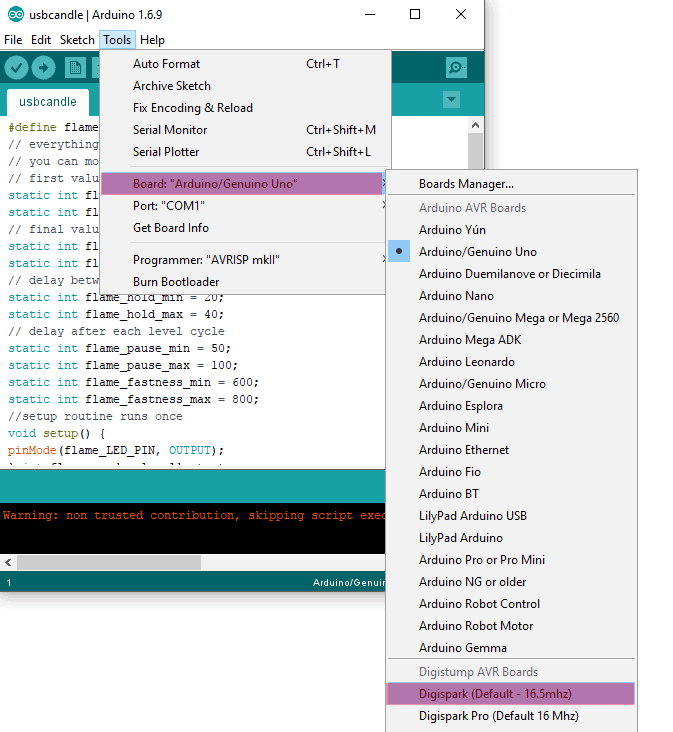
At first, note that bootloader code that is pre-programmed on Digispark allows it to act as a USB device so that it can be programmed by the Arduino IDE. The Digispark uses the Arduino IDE 1.6.5+ (1.6.9 strongly recommended by author).
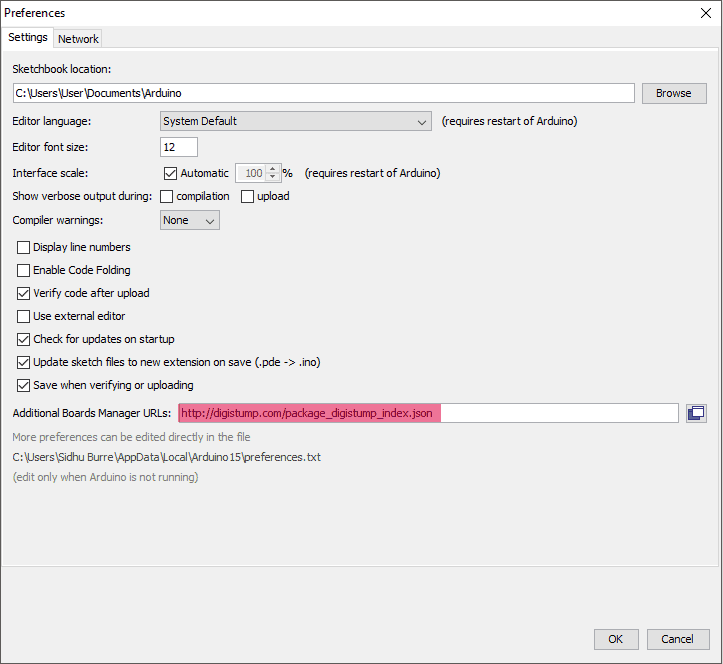
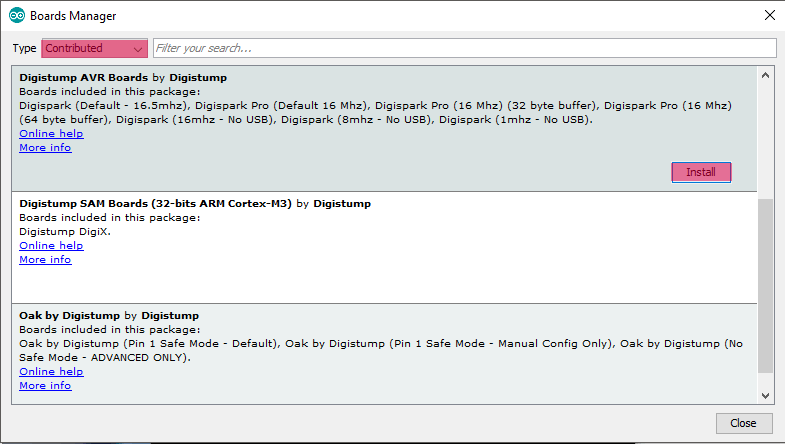
Now follow the installation instructions as mentioned on Digistump website: https://digistump.com/wiki/digispark/tutorials/connecting
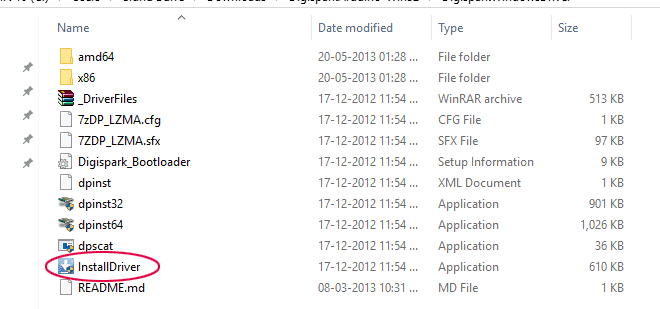
Oh, I lost a part of what they said. Sorry, before plugging the Digispark board (or running the Arduino IDE) you need to download the requisite driver, and create a folder named “Digidriver” (c:\Digidriver) or any directory. To install the Digispark Attiny board driver, go to this folder and run the InstallDriver exe file. After this, you can start working on your first Digispark with Arduino IDE!
Windows 10 screenshots (taken by the author) is shown below for your quick reference: (Driver download link: http://sourceforge.net/projects/digistump/files/DigisparkArduino-Win32-1.0.4-May19.zip/download)
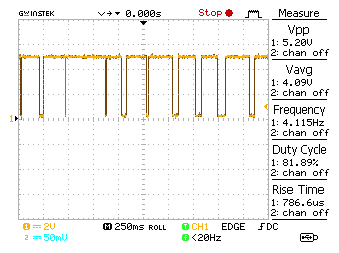
Shown below is a random oscillogram from author’s prototype (probed into P0):
escomcandle code (adaptation of an open-source work by ledhacker):
#define flame_LED_PIN 0
// everything in the flame flicker is randomized
// you can modify them to get the desired effect
// first value of flame flicker (level 1)
static int flame_level1_min = 10;
static int flame_level1_max = 150;
// final value of flame flicker (level 2)
static int flame_level2_min = 200;
static int flame_level2_max = 300;
// delay between eachlevel cycle (in milliseconds)
static int flame_hold_min = 20;
static int flame_hold_max = 40;
// delay after each level cycle
static int flame_pause_min = 50;
static int flame_pause_max = 100;
static int flame_fastness_min = 600;
static int flame_fastness_max = 800;
//setup routine runs once
void setup() {
pinMode(flame_LED_PIN, OUTPUT);
} int flame_random_level1_start = 0;
int flame_random_level1_end = 0;
int flame_random_level2 = 0;
int flame_random_fastness_start = 0;
int flame_random_fastness_end = 0;
//loop routine runs forever
void loop() {
// random time for level 1
flame_random_level1_start = random(flame_level1_min,
flame_level1_max);
flame_random_level1_end = random(flame_level1_min,
flame_level1_max);
// random time for level 2
flame_random_level2 = random(flame_level2_min,
flame_level2_max);
// random time for fastness
flame_random_fastness_start = random(flame_fastness_min,
flame_fastness_max);
flame_random_fastness_end = random(flame_fastness_min,
flame_fastness_max);
//level 1 -> level 2
for (int i = flame_random_level1_start;
i<flame_random_level2; i++) {
analogWrite(flame_LED_PIN, i);
delayMicroseconds(flame_random_fastness_start);
} // hold
delay(random(flame_hold_min, flame_hold_max));
delay(random(flame_pause_min, flame_pause_max));
}

Warning! The Digispark does not have short circuit or reverse polarity protection. Connecting power to the Digispark power pins backwards will almost certainly destroy it. When testing your finished project circuit I recommend that you should test it with an external power source first. Connecting a shorted circuit to the Digispark board and connecting it to your computer may damage your computer and/or its USB ports.
Download Arduino Sketch – escomcandle