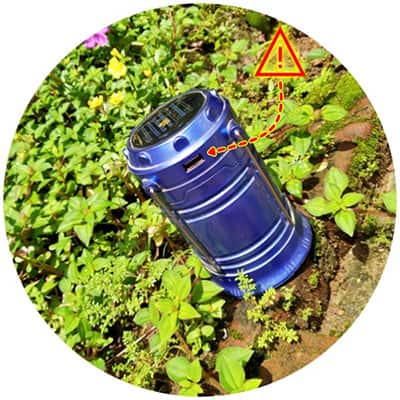
Have you ever wondered what’s inside this cheap Chinese Solar LED Lantern Torch? Although it appears like a safe and beautiful emergency lamp, be aware that it has the potential to kill you through its USB receptacle!
In this post, I teardown my solar lantern torch not only to reveal its internal electronics but also to warn you of a design flaw that is far more dangerous than you might expect. So, read on!
Overview
Okay, I’ll start with a quick overview of the lamp, and then describe the pitfalls examined by me in detail.
This portable emergency lamp is actually a combination of an LED torch and an LED lantern, powered by a rechargeable battery pack located inside. The torch can be operated with an external push-lock button switch, while the retractable lantern is operated by a microswitch hidden inside the enclosure.
The internal battery pack is recharged through the small solar panel mounted atop, but it can also be charged via AC 230V grid power. It also has a small red LED as the charging indicator.
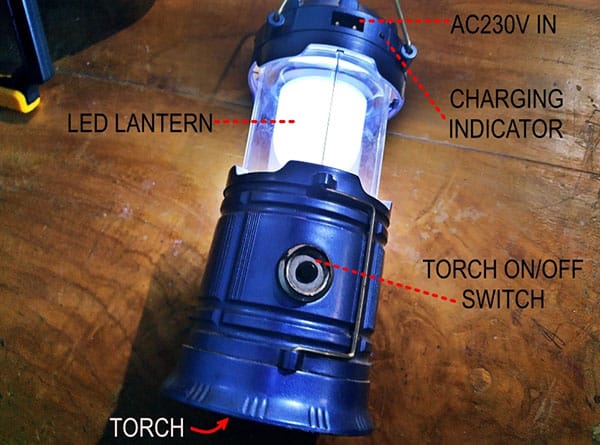
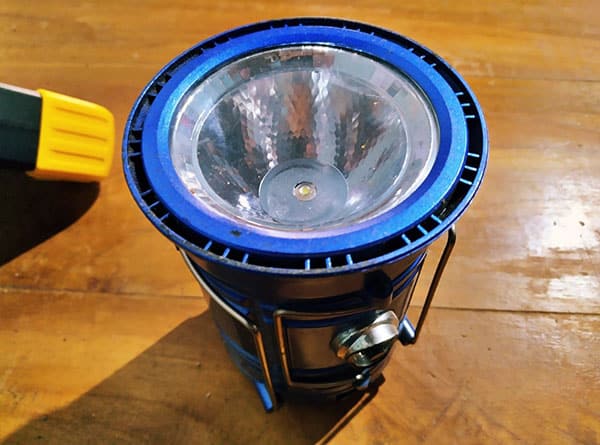
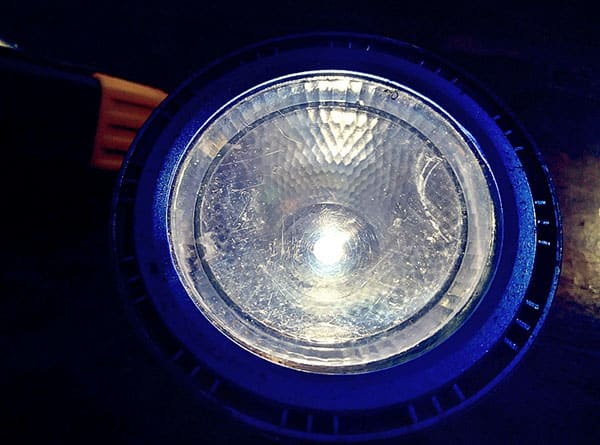
This is the face of the LED torch. As you can see, this is a simple assembly with a white high-power SMD LED bead mounted on a large reflector covered with a transparent circular lid.
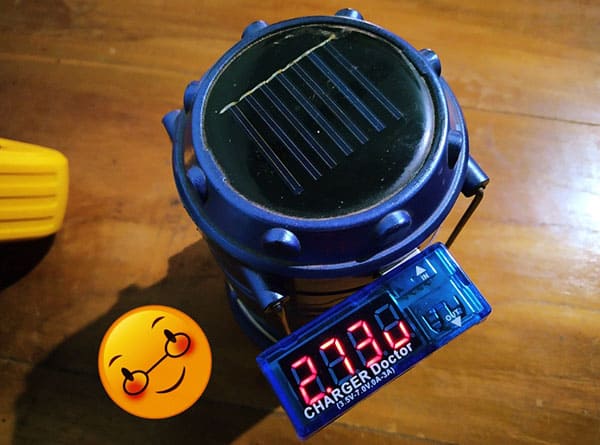
The USB receptacle (USB-A Female Connector) provided on one side of the enclosure not only deceives you but also kills you if given a chance. I will get into that topic soon. But now note that only the voltage from the internal battery is available through this socket. So, the actual voltage available is only around 3.6 to 4.2V. See the “USB” output when the battery is weak!
Teardown
Now we can look at the inside of the lamp!
The key parts (rechargeable battery pack and circuit board) are placed just underneath the mini solar panel. The battery pack is a 3.6V Ni-MH type (1.2V x3) type with a capacity of 1200mAh (in my case).
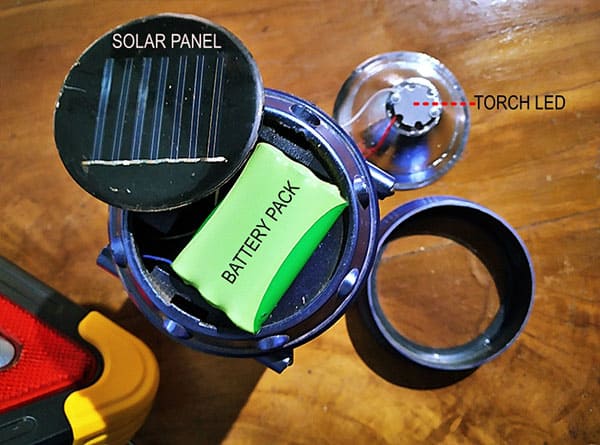
The wires were detached from the base when I inadvertently detached the solar panel, so I have no easy way to find out/measure its output (sorry about that). However, the torch LED is a 1W white type with an aluminum star base plate, I’m sure.
The lamp has a small PCB holding very few components, all of which are SMDs. Some parts are wired externally so it doesn’t take up much room in the circuit board.
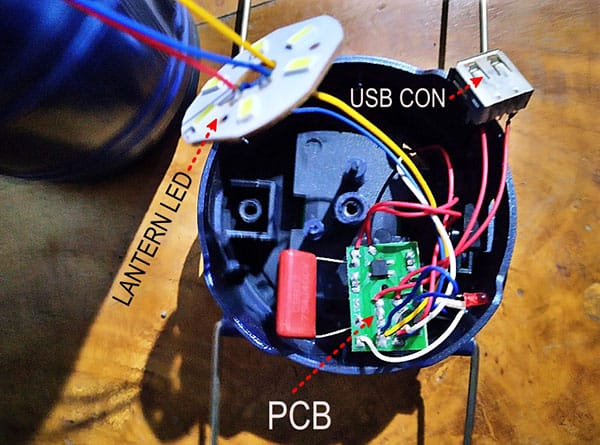
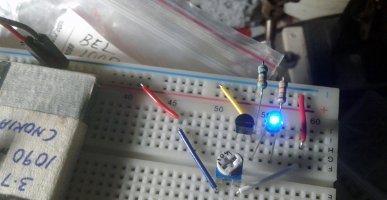
The lantern LED is a 4V white LED plate consisting of 6 SMD LEDs wired in parallel.

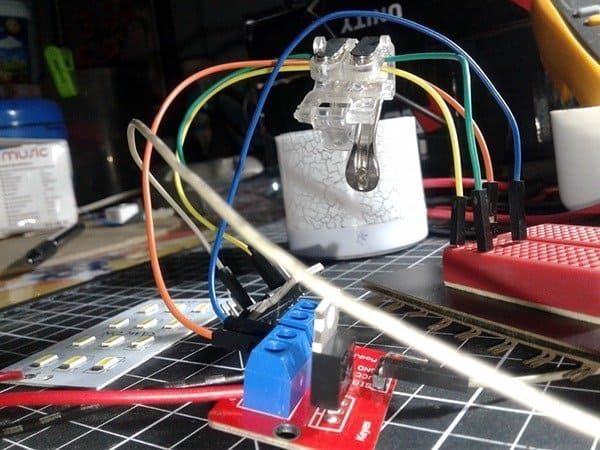
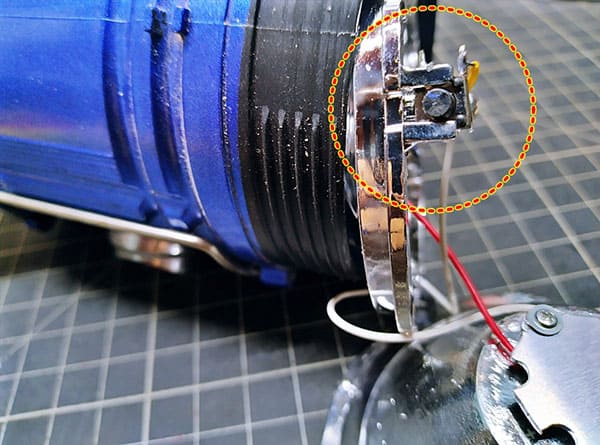
This is a close-up of the lantern on/off switch combined with the lamp’s retractable mechanism. This momentary switch will illuminate the LED cluster when the lantern part is pulled up.
The power supply I examined like most Chinese power supplies use a (dangerous) design known as “capacitive power supply”. I have already posted several articles and projects on this topic, so I will not go into it now. If you missed them, this is a good guide to learn more about capacitive power supplies http://ww1.microchip.com/downloads/en/AppNotes/00954A.pdf
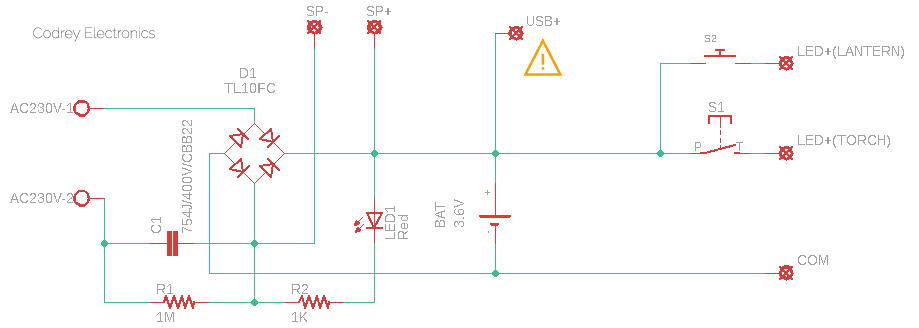
Below is the basic schematic of the lamp (I drew it), which will show you how the circuit is tailored. This is a crude circuit that is in direct contact with dangerously high AC voltages, so the risk of fatal electric shock is high. Be careful!
The Killer USB
Since you have studied the above schematic, no further explanation is needed for the dangerous situation ahead. Suppose the lamp is connected to the AC230V grid power for charging, and someone accidentally touches the metallic USB connector. What happens? The unisolated power supply circuitry can cause fatal electrocution to that person!
For the safety of the end-user, the high-voltage components and the low-voltage components must be separated in an electrical device. Mechanical and electrical isolation is a key factor in safe power supply design as direct electrical connection between the high-voltage input and the low voltage output would create a high danger of electric shock. Even if it is considered a cheap gadget, it can never be justified. That useless and dangerous USB receptacle should have been omitted!
Any betterment ideas?
Of course, there is! Fortunately, this is a real portable emergency lamp with a sturdy body. In my opinion, you can make it better by making a few changes.
First of all, you need to remove its circuit board completely (no more mains charging), but keep all other parts intact. Don’t worry, you can add a USB/DC charging setup instead.
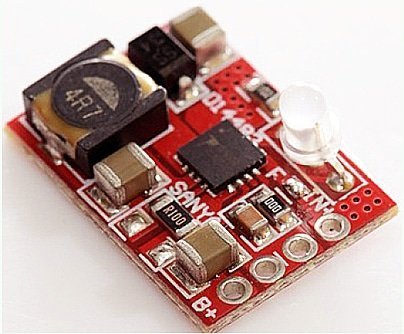
Now it is easy to buy charger modules at affordable prices from online stores. So, get ready to buy the module shown below (NIMHCRTB_3S/Canton-Electronics) or go for a similar one.

The NIMHCRTB_3S module shown above is built around the ubiquitous NiMH battery charger chip CN3085. See its datasheet http://www.consonance-elec.com/pdf/datasheet/DSE-CN3085.pdf
Then all that remains is the new wiring scheme. I’m sure you know how to do that well. Happy Soldering!