Nowadays most electronics hobbyists require a precision 3.3V power supply module for their microcontroller (uC) and/or internet of things (IoT) projects. The traditional linear power supply is not a good choice in many situations because of a number of technical reasons. Well, here is the simplest circuit of a do-it-yourself 3.3V switched buck converter power supply module capable of delivering currents upto 3A.
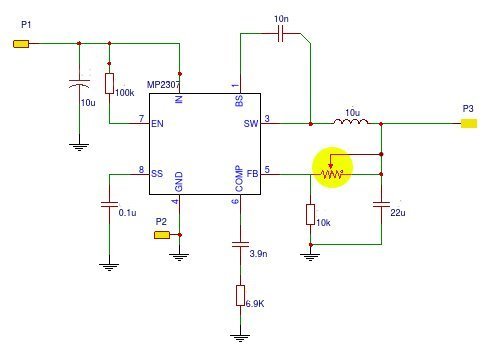
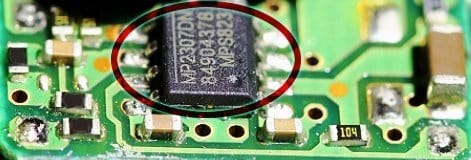
At the heart of the circuit is an 8-pin SMD chip – the MP2307, from Monolithic Power Systems,Inc. The MP2307DN, available in SOIC8N package, is a monolithic synchronous buck-converter that integrates 100mΩ MOSFETs to provide 3Ampere of continuous output/load current over a wide input voltage in the range of 4.75V to 23V DC. The schematic given here strictly follows the application guide published by the chip maker (MPS) but it’s infact a refined design tailored for the purposed practical application.
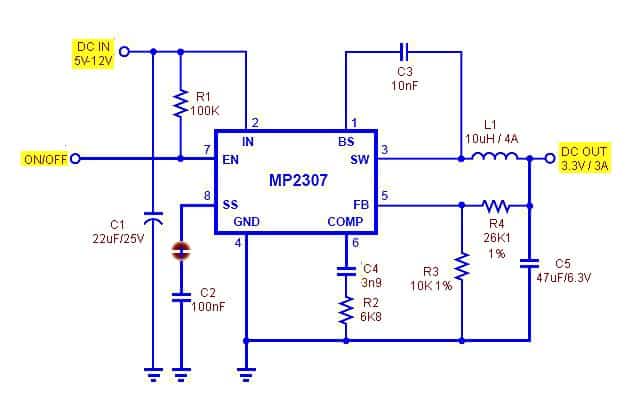
Here, the output voltage is configured using a resistive voltage divider (R3&R4) connected from the output voltage to the FB (pin 5). The output voltage VOUT = 0.925xR3+R4/R3 = 0.925×10+26.1/10 = 3.33V.
For C1 and C5, ceramic capacitors are preferred, but tantalum or low-ESR electrolytic capacitors can also be used. However, when using an electrolytic or tantalum capacitor as C1, a 100nF ceramic capacitor should be placed very close to the MP2307 as possible. Pin 7 of MP2307 is a digital input that turns the buck converter on or off. Drive EN high to turn on the buck converter, and EN low to turn it off. Here the 100K pull-up resistor is added for automatic startup, and the connection is extended to the ON/OFF terminal for external/remote control. Similarly, pin 8 of MP2307 is the ‘soft-start control input’, and removing the 100nF capacitor connected to it will disable the 15ms soft-start period. Also, note that an optional Schottky diode (1A/30V) may be paralleled between the SW (pin 3) of MP2307 and GND (pin 4) to improve overall efficiency.
Finally, using a 1N4148 diode as external bootstrap diode will enhance the efficiency of the buck converter. Just connect its anode to the positive end of C5 (DC OUT), and its cathode to pin 1(BS) of MP2307. That’s all!
If you’re looking for an adjustable output (0.925 to 12V) version of this power supply module, just replace the fixed resistor R4 in the above schematic with a 250K preset pot exactly as indicated in the reference diagram shown below.