In this primer, we’ll learn how to play an audio file thru Arduino without using any external modules. Here we’re going to use the pulse code modulation (PCM) audio technique with the help of a popular PCM library which helps to playback low bitrate audio samples from Arduino board thru a standard loudspeaker. Okay, let’s do this!
PCM & PCM Audio
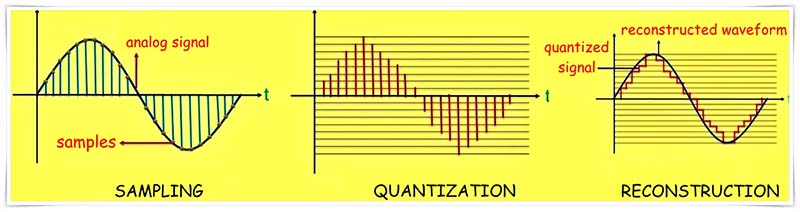
Before going further, just note that pulse code modulation (PCM) was originally developed for telecommunication systems by British engineer Alec Reeves in 1937. PCM is the typical method used for converting analog audio into its digital counterpart. Simply, PCM audio is an analog signal that’s sampled at uniform intervals and converted to a digital binary number. In other words, it’s a representation of usual continuous analog signals as discrete samples.
Further Reading:
- https://samplerateconverter.com/educational/pcm-audio#how-pcm-works
- https://samplerateconverter.com/educational/analog-vs-digital
PCM & Arduino
In order to start your Arduino PCM Audio experiments, just pick a small MP3 audio file of your choice at first, and then convert it into a 16bit PCM 8kHz monoaural MP3 audio file. The far-famed Audacity software will help you to do this conversion at ease (see a sample screen snip below).
Audacity Download https://www.audacityteam.org/download/
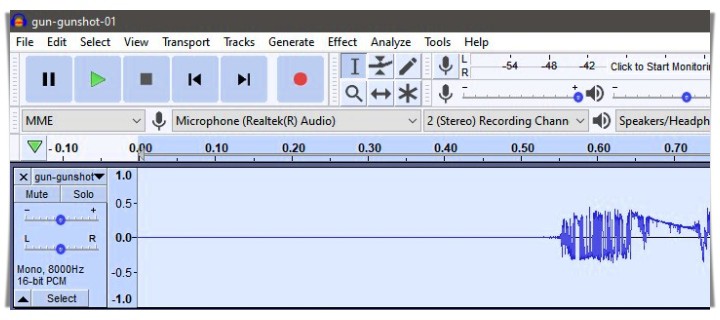
Also, remember to listen to the modified audio to get a quick idea of the audio quality you can expect when playing the audio file from your Arduino board. Note that you’re only going to be able to store approximately 4 seconds of audio on your Arduino, so you might want to trim your original MP3 file at first.
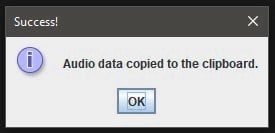
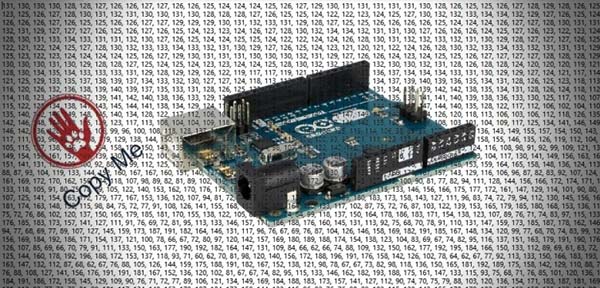
Next, use an appropriate encoder software to encode that modified audio file into a series of numbers which you can paste into your Arduino sketch. See, the “EncodeAudio” application is a simple processing program that reads an audio file and copies its audio data to the clipboard in numeric form (https://github.com/damellis/EncodeAudio).
Now is the time to open a new code window in your Arduino IDE and write the Arduino Sketch as shown below. Oh, before that you need to download and install the PCM library (https://github.com/damellis/PCM/zipball/master).
#include <PCM.h> // PCM Library
//Audio Output Pin = D11 ( & GND)

const unsigned char sample[] PROGMEM = {---
                                    ---};

void setup()
{
  startPlayback(sample, sizeof(sample));
}

void loop()
{
}
Finally, paste the new numbers copied to the clipboard by the encoder program in the sample array, and upload the completed code to your Arduino. If you get a warning that your Arduino Sketch (code) is too big for the Arduino board, try to delete some of the numbers from the end of the sample array. My test code uses 31126 bytes (96%) of program storage space. Maximum is 32256 bytes!
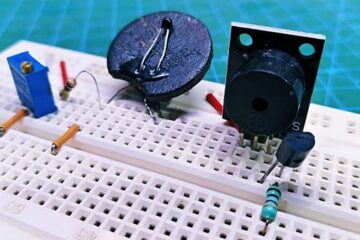
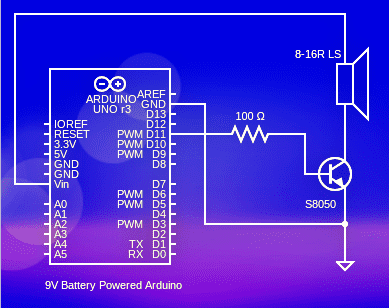
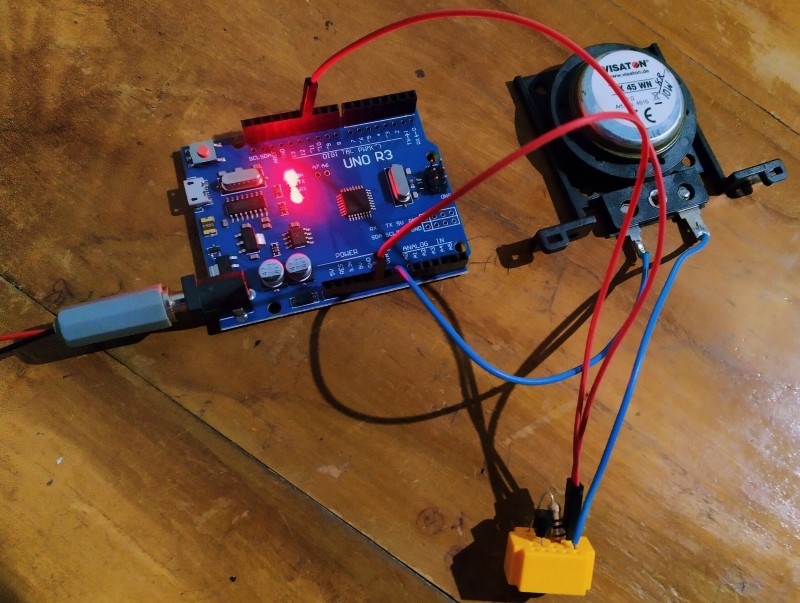
Now you should be able to hear your own audio file through the 9V battery-powered hardware setup (see below). Note at this time that, Vin is the input voltage pin of the Arduino board when it’s using an external power source, as opposed to 5V from the USB connection or other regulated 5V power source. When you feed 9V battery output via Arduino’s onboard dc input power jack, you can access “nearly” the same dc voltage through this pin.
What’s more, interested readers can download a zip file containing the required library, audio encoder software, and my tested example sketch via this link https://www.codrey.com/wp-content/uploads/2022/01/Arduino-PCM_TK.zip
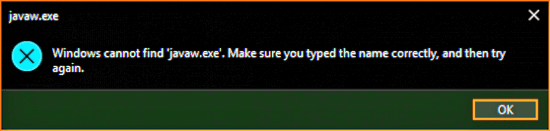
On a side note, if, when you try to open the audio encoder, an error window shows the message “cannot find javaw.exe”, it means that it cannot find a working Java installation in your Windows system. To solve this issue try installing (or reinstalling) a working Java Runtime Environment which can be found here https://www.java.com/en/
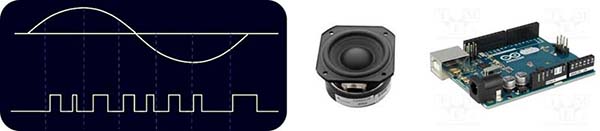
Okay, I admit it: nowadays, even a lazy Google search will give you countless design ideas for building your own audio projects using Arduino. But most of them rely on pretty expensive ($10+) external boards such as luxurious MP3 shields.
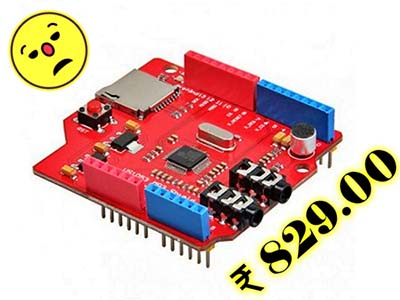
For this reason, this simplistic idea will make you happy if you want to rig up a small Arduino audio project with what you already have, or if you want to use the least possible parts for it. Yes, with it you can simply save an audio file directly to the ATmega microcontroller without using any external storage or interface modules.
This is a casual snap of the quick hardware setup I threw together to try things out. It’s hoped that this will not require further explanation. Not bad. It does what it does!
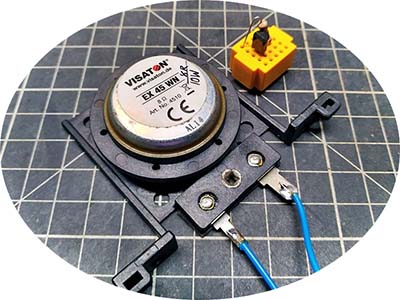
I agree, at least this works as a proof of concept but the audio output is not very loud. You might have to put a good amplifier circuitry, instead of the single transistor trick, to drive the loudspeaker mightily!
Next up…I’ll write about more of the advanced audio projects over the next few months. If you want to keep track of what I’m up to, watch this space from time to time!