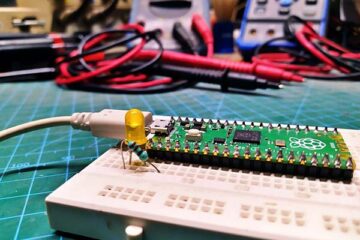
Raspberry Pi Pico is a microcontroller board from the Raspberry Pi foundation. It is an exciting new microcontroller board launched on January 21, 2021, based on the RP2040 micro-controller by the Raspberry Pi Foundation sporting a dual-core ARM Cortex-M0+ running at 133 MHz.The Rpi Pico provides 26 GPIOs allowing you to control various electronic components at low cost and very low power consumption.
With the Raspberry Pi Pico microcontroller being so new, getting started can be messy if this is your first time holding the board in your hands. Yes, it is a bit cumbersome for some hobbyists and makers. Anyway, don’t panic, this little post should hopefully give you some ideas on how to go!
If you want a fast start, have a look at this primer prepared by me https://www.electroschematics.com/raspberry-pi-pico-first-look-part-1/
In theory, we could just get started with the RPi Pico board alone but note that the board does not come with headers soldered so you will have to get and solder them yourself. Also, note that Rpi Pico is a microcontroller, so there is no Raspbian OS to play with. Instead, the boards come with two most popular programming languages in the maker’s world: MicroPython and C/C++.
At this point, remember that the RP2040 microcontroller, at the core of the RPi Pico, has a native MicroPython port and a USB Flashing Format (UF2) bootloader in its memory, meaning that it can directly handle Python code uploaded via an IDE.

MicroPython (https://micropython.org) is a full implementation of the Python 3 programming language that runs directly on embedded hardware like RPi Pico. You get an interactive prompt (REPL) to execute commands immediately via USB Serial, and a built-in filesystem. The RPi Pico port of MicroPython includes modules for accessing low-level chip-specific hardware.
You can program your RPi Pico by connecting it to a computer via USB, then dragging and dropping a file onto it. Okay, let’s see how to install MicroPython in an easy way.
- Download the MicroPython UF2 file (https://micropython.org/download/rp2-pico/)
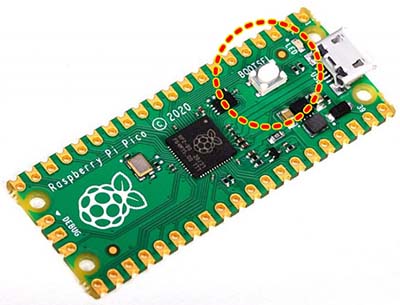
- Push and hold the BOOTSEL button and plug your RPi Pico into the USB port of your computer
- Release the BOOTSEL button after your board is connected (It will mount as a Mass Storage Device called RPI-RP2)
- Drag and drop the downloaded MicroPython UF2 file onto the RPI-RP2 volume. Your RPi Pico will reboot
You are now running MicroPython, and you can access the REPL via USB Serial 😊
If you are new to MicroPython, this official guide is a great place to start https://hackspace.raspberrypi.org/books/micropython-pico
Raspberry Pi Pico & Hello PWM LED
Now let me show a pretty painless way to start a PWM LED fade experiment on RPi Pico using a ridiculously simple piece of code. This experiment hardly requires any external components because the given example is tailored to fade the onboard LED on RPi Pico board (hard-wired to GPIO25).
import utime
from machine import Pin, PWM

PWM_width = 0

pwm = PWM(Pin(25))
pwm.freq(1000)

while True:
  while PWM_width < 65536:
      PWM_width += 10
      utime.sleep(0.001)
      pwm.duty_u16(PWM_width)

  while PWM_width > 0:
      PWM_width -= 10
      utime.sleep(0.001)
      pwm.duty_u16(PWM_width)
If you are in a rush, I have uploaded the Python File for you. This is the download link https://www.codrey.com/wp-content/uploads/2021/09/hellopwmled.py
The management of PWM in MicroPython is greatly simplified and reduced to the bare minimum. You set a pin to be designated as a PWM output and in the background, from the chosen GPIO number, the interpreter knows which slice and which output to configure. The PWM frequency and the duty cycle are then written and once again the interpreter takes control of the situation by managing and setting all the registers for us.
Further reading https://www.settorezero.com/wordpress/raspberry-pi-pico-gestione-del-pwm-in-micropython/
If you take the above example code which generates a PWM signal with a frequency of 1kHz (variable duty cycle) you will see that the onboard LED renders a breathing effect (watch the quick test video https://www.youtube.com/watch?v=e69o8l_HpsI).
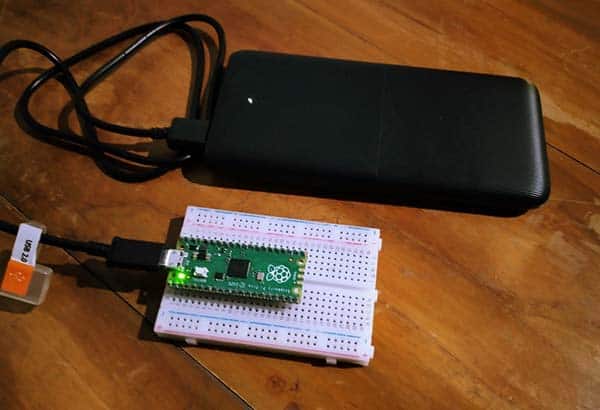
Note that, if you want to run your RPi Pico without it being attached to a computer, you need to use a USB power supply. And, to automatically run the MicroPython program, simply save it to the device with the name “main.py” (https://projects.raspberrypi.org/en/projects/getting-started-with-the-pico/9).
This should hopefully give you an idea of how to start the play with your Raspberry Pi Pico microcontroller board.
So, we continue our play with RPi Pico and MicroPython. In a future post, I’ll show how to use common electronic components/modules with your Rpi Pico. Stay tuned and feel free to ask any questions or offer suggestions in the comments!

Good article…from Where can I get this board..?
Can this board support maths library that contain trigonometric functions.?
Arun Patole: Thanks!
There’re so many official online sellers in India!
For example, you can buy it easily from:
https://robu.in/product/raspberry-pi-pico/
https://www.rhydolabz.com/raspberry-pi-raspberry-pi-boards-kits-c-201_202/raspberry-pi-pico-p-2910.html
Regarding the trigonometric functions, I don’t know much more, but you may refer page 23 of this datasheet https://datasheets.raspberrypi.org/pico/raspberry-pi-pico-c-sdk.pdf