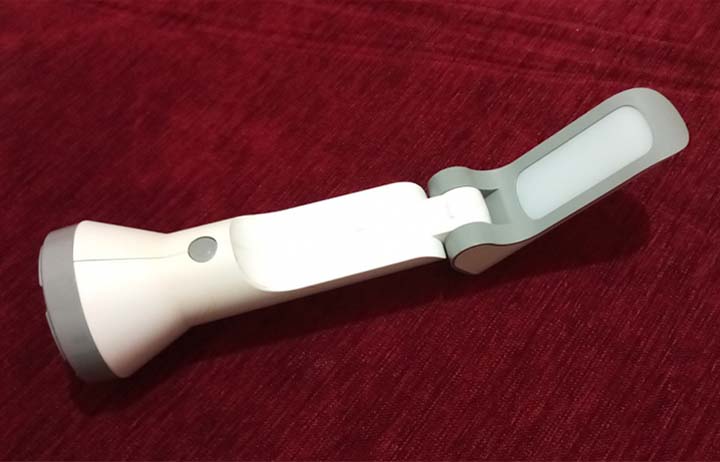
So here is an out-of-warranty Pigeon Multipurpose LED Flashlight that just suddenly stopped working so I figured why not take a crack at it.
I bought it on discount sale from an Indian online store few years back. Honestly, its beam was very bright and had good coverage at a distance of 5-10 meters. It could also be used as a nice folding desk lamp. Moreover, it is a rechargeable device with a built-in battery pack that can be charged via USB.
This torch has only one button to turn the flashlight and desk lamp on and off. Its first press will turn on the flashlight in full bright mode, second press will switch it to low bright/dim mode and third press will switch the mode to desk lamp. A fourth press switches off the device altogether.

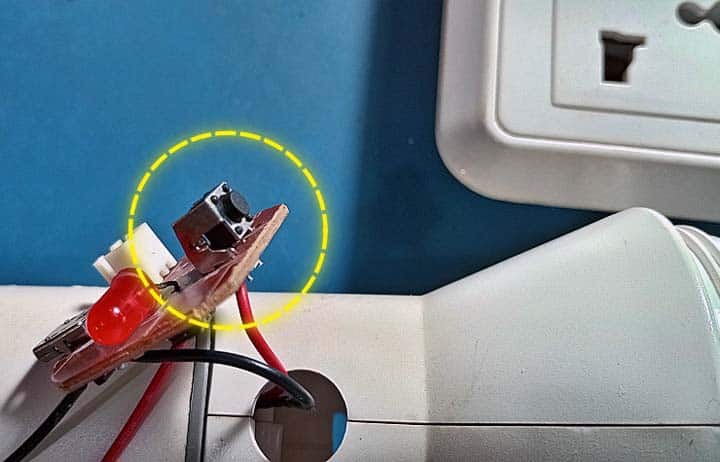
SPOILER: After opening the device and inspecting it, the momentary pushbutton switch was found to be damaged (see below). So, I replaced it and the device worked like before again!
I am sure you are also curious to know what is inside it. First, note that this is actually a relabeled Chinese gizmo sold as an Indian product.
What is inside? How does it work? Can I improve it? Is this worth buying? Read on to find out the answers to all these questions for yourself. Well, now let us see what makes it tick…
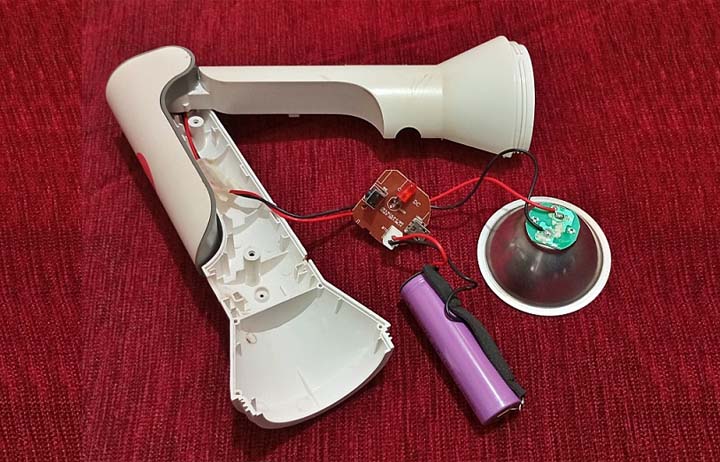
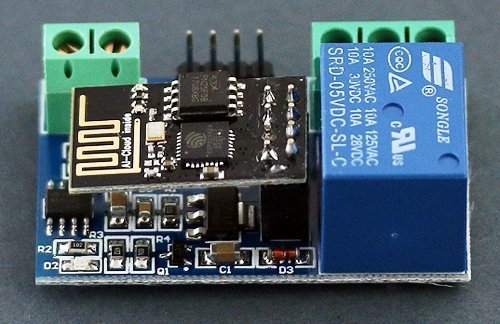
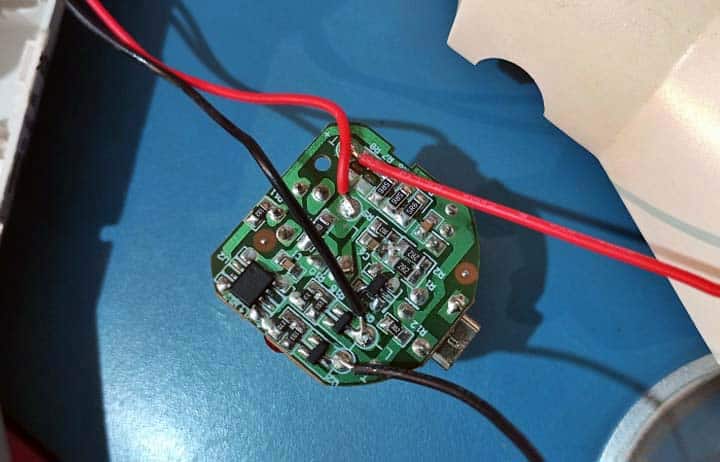
The key parts found on the small PCB of the device are listed below.
- Unknown 8-pin Microcontroller x1 (its number has been scratched off)
- AO2T Mosfet x1 (Flashlight Power LED Driver)
- Y1 Transistor x1 (Desk Lamp LED Panel Driver)
- BL4054B IC x1 (Li-Ion Linear Battery Charger)
The following parts are also found along with these.
- Right Angle Momentary Tactile Switch x1
- 5mm Red LED x1 (Charging Supply Indicator)
- USB Micro-B Socket x1 (Charging Supply Input)
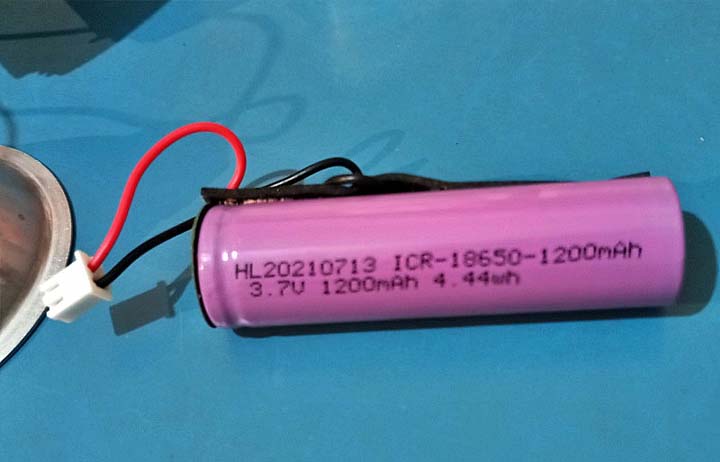
- 3.7V/1200mAH Li-Ion Battery x1
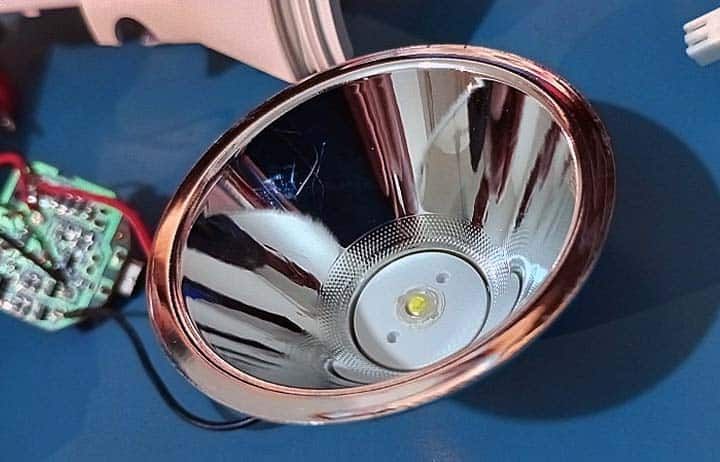
- 3W White Power LED x1 (Flashlight)
- 0.1W x14 White SMD LED Panel (Desk Lamp)
3.7V Li-Ion Battery (with wire connector):
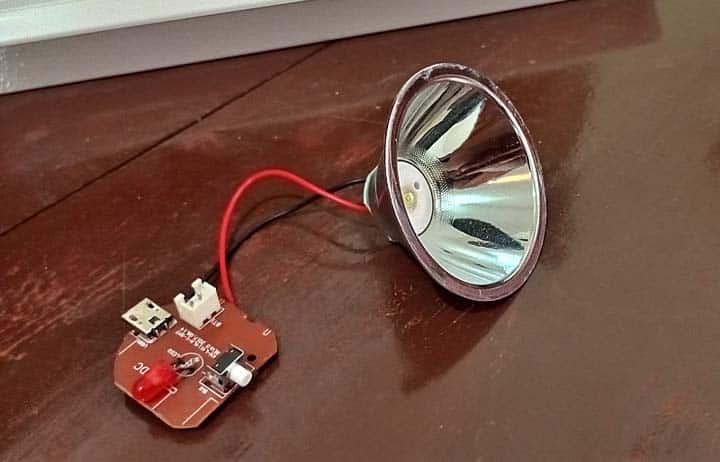
3W Power LED (with reflector and lens):
PCB Closeup (solder side):
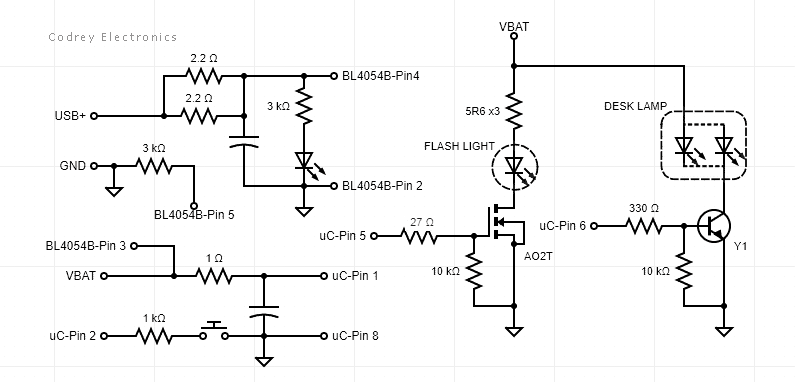
For some reason the entire schematic of the PCB is not reproduced here. But I would like to share some significant points below.
- The 8-pin microcontroller operates directly on battery voltage
- The 3W flashlight LED is controlled by microcontroller through A02T mosfet
- The 3W LED current is limited by a parallel combination of three 5.6Ω resistors
- The desk lamp LED panel is controlled by the microcontroller via Y1 transistor
- BL4054B chip performs charging of lithium-ion battery from 5VDC input available through USB connector
- A 3KΩ resistor wired to Pin 5 of the BL4054B chip sets the charging current to about 330mA
Below is a partial schematic I prepared for your reference purposes.
Overall a nice design! But I am a little disappointed with the configuration of the indicator LED – it would have been better if it was wired as a charging state indicator instead of being used as a charging supply indicator.
Note at this point that the charger chip has an option for that. According to datasheet, Pin 1 of BL4054B IC is an open-drain charge status output. When the battery is charging, the pin is pulled low by an internal N-channel MOSFET. When the charge cycle is completed, a weak pull-down of approximately 12uA is connected to the pin, indicating an “AC present” condition. And, when the BL4054B detects an under-voltage lockout condition, the pin is forced high impedance.
Well, there you have it. I was amazed by the elegant simplicity inside such an inexpensive device. The power button actually still worked after I replaced it. For the price I should not have high hopes, but it is still good enough for me. Thanks for reading!